introduction
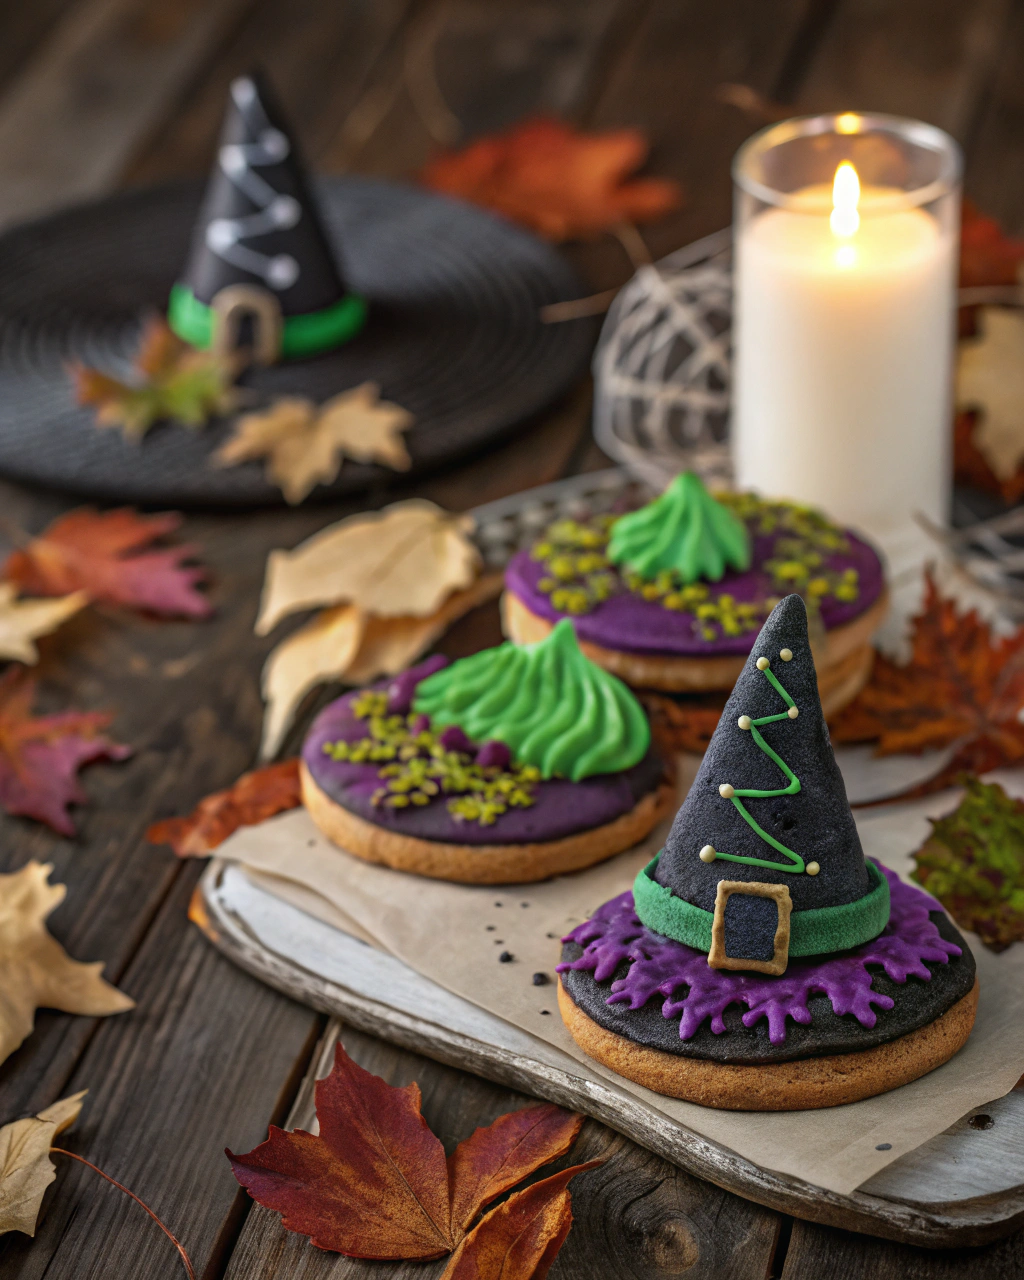
There’s something magical about baking during Halloween. The aroma of chocolate, the joy of decorating, and the laughter filling your kitchen can instantly bring you back to childhood memories of candy-filled nights. Witch hat cookies are not just a treat; they’re a playful way to spark creativity and enjoy the thrills of the spooky season with family and friends.
What Are Witch Hat Cookies?
- A festive Halloween dessert shaped like a witch’s hat.
- Made with simple ingredients like cookies, chocolate kisses, and colorful icing.
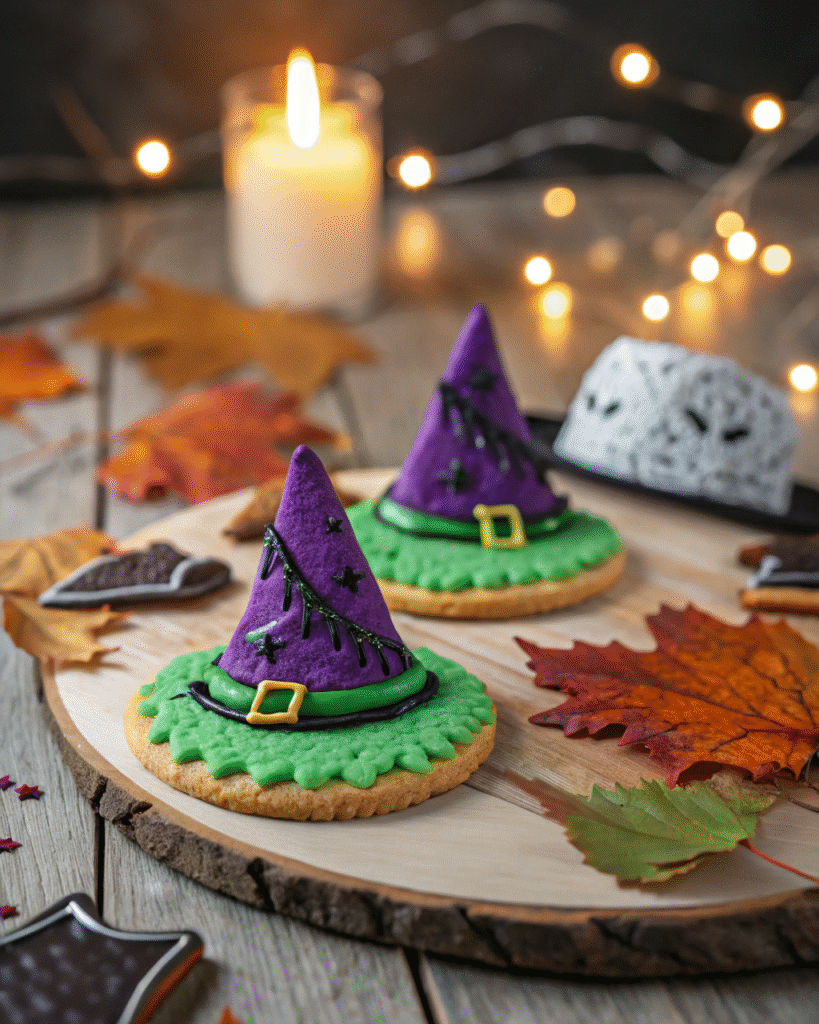
- Perfect for Halloween parties, bake sales, or fun kitchen moments with kids.
- Eye-catching design that makes them a centerpiece on any dessert table.
Why You’ll Love Witch Hat Cookies
- No-bake or minimal-bake recipe – perfect for busy weeknights.
- Kid-friendly and easy for little hands to help with decoration.
- Customizable with colors, sprinkles, or edible glitter.
- A treat that doubles as a fun Halloween craft.
Ingredients for Witch Hat Cookies
Use a structured table for clarity:
| Ingredient | Quantity | Notes |
|---|---|---|
| Chocolate cookies | 12 | Any round, flat cookie works |
| Chocolate kisses | 12 | Unwrapped |
| Colored frosting | ½ cup | Orange, purple, or green for Halloween vibes |
| Sprinkles/candies | As needed | Optional for extra fun |
Step-by-Step Instructions to Make Witch Hat Cookies
Preparing the Base
- Place cookies flat on a plate or tray.
- Make sure the smooth side is facing upward.
Adding the Hat Tip
- Use a dab of frosting to “glue” the chocolate kiss to the center of the cookie.
- Press lightly until secure.
Decorating with Icing
- Pipe a frosting band around the base of the Hershey’s kiss.
- Add sprinkles, candy pearls, or edible glitter for a festive touch.
Let Them Set
- Allow cookies to sit for 15–20 minutes.
- Store in an airtight container until ready to serve.
Creative Variations
Witch Hat Cookies with Peanut Butter
Swap frosting with peanut butter for a salty-sweet twist.
No-Bake Witch Hat Cookies
Use pre-made cookies and store-bought icing for a super-quick option.
Gluten-Free Witch Hat Cookies
Choose a gluten-free cookie base to make this recipe allergy-friendly.
Tips for the Best Witch Hat Cookies
- Refrigerate before serving to help frosting harden.
- Mix frosting colors for a more vibrant, spooky look.
- Use edible glitter to make the hats sparkle under party lights.
- Involve kids by letting them choose sprinkles and design their own hats.
How to Store Witch Hat Cookies
- Keep in an airtight container at room temp for up to 4–5 days.
- Refrigerate if using dairy-based frosting.
- Freeze in layers with parchment paper for long-term storage.
Witch Hat Cookies for Parties
- Serve on a spooky-themed dessert tray.
- Pair with pumpkin spice drinks, Halloween cupcakes, or candy corn.
- Wrap individually for party favors or trick-or-treat giveaways.
FAQs About Witch Hat Cookies
Can I make witch hat cookies ahead of time?
Yes, you can prepare them a day or two before your party, just store them in an airtight container.
What can I use instead of chocolate kisses?
Mini peanut butter cups or truffle chocolates also work well as the hat tip.
Do I need special baking tools?
No, all you need are cookies, candies, and frosting most of which you may already have at home.
Can I make witch hat cookies without baking?
Absolutely! Just use store-bought cookies and ready-made icing for a no-bake option.
Conclusion
Making witch hat cookies is more than following a recipe it’s about creating Halloween moments you will cherish. From kids’ giggles as they squeeze icing onto cookies to the excitement of setting them out at a party, these spooky yet sweet treats are all about fun, laughter, and creativity. So grab your cookies, chocolate kisses, and frosting, and let the Halloween magic begin in your kitchen.
If you loved this recipe, share your witch hat cookie creations with us! Don’t forget to pin this recipe and save it for your next Halloween bash.