
This post may contain affiliate links. Please read our disclosure policy.
If you are looking for a show-stopping appetizer that requires minimal effort but delivers maximum flavor, this Roasted Garlic Dip is exactly what you need. Whether you are planning a Memorial Day cookout, a Fourth of July BBQ, or a casual weekend gathering, this creamy, savory dip is guaranteed to disappear fast. Made with slow-roasted garlic, sour cream, mayonnaise, and a squeeze of fresh lemon juice, it is rich, mellow, and deeply flavorful in every bite.
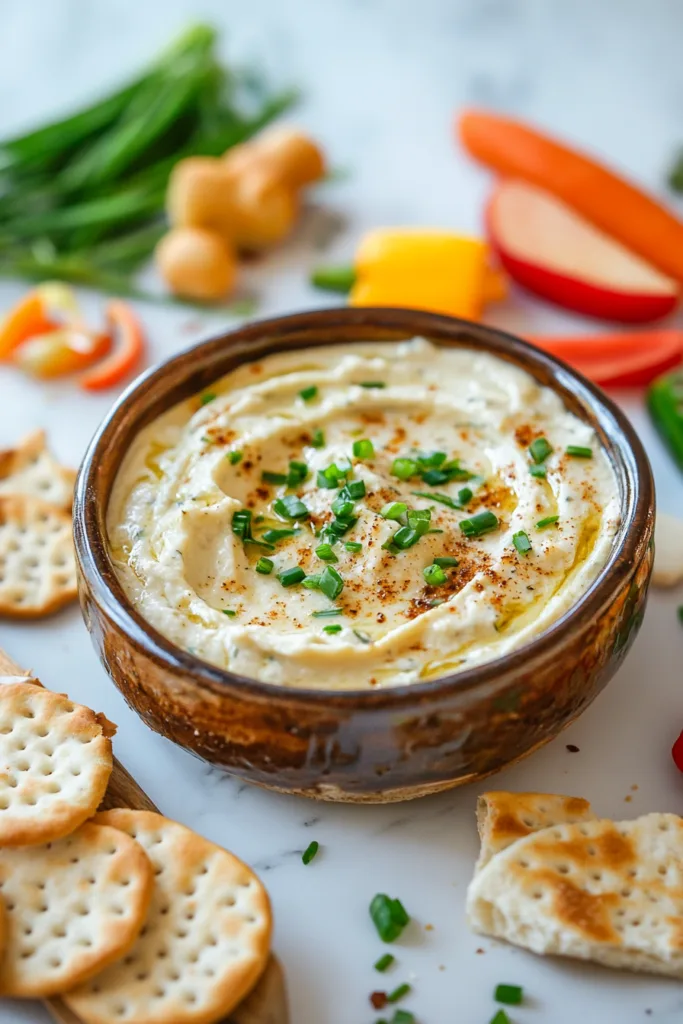
The best part? You can make it up to two days ahead of time, making it one of the most practical Memorial Day party food ideas you will ever find. Serve it with crackers, toasted baguette slices, potato chips, or a colorful spread of cut vegetables for a dip that looks beautiful and tastes even better.
Table of Contents
Why You Will Love This Roasted Garlic Dip
- Made with simple, everyday ingredients
- Only 15 minutes of active prep time
- Can be made 2 days in advance – ideal for Memorial Day meals and holiday entertaining
- Completely customizable with optional Parmesan cheese
- Pairs with almost any dipper – chips, bread, crackers, or veggies
- A guaranteed crowd-pleaser for Memorial Day food for a crowd
Ingredients You Will Need
Before you get started, gather your ingredients. Use fresh garlic heads for the best caramelized, nutty flavor. Here is everything you need to make this dip from scratch.
| Ingredient | Quantity | Notes |
|---|---|---|
| Garlic heads | 3 heads | Whole, unpeeled |
| Olive oil | 2 teaspoons | Extra virgin preferred |
| Kosher salt | 1/2 teaspoon, divided | For roasting and mixing |
| Ground black pepper | 1/2 teaspoon, divided | For roasting and mixing |
| Sour cream | 3/4 cup | Full-fat for best texture |
| Mayonnaise | 1/4 cup | Regular or light |
| Fresh lemon juice | 3 tablespoons | Freshly squeezed preferred |
| Grated Parmesan cheese | 1/4 cup | Optional but recommended |
| Fresh chives | 1 tablespoon, thinly sliced | For garnish |
| Crackers, baguette, chips, vegetables | As needed | For serving |
Kitchen Equipment
You do not need much to make this recipe, but having the right tools on hand makes the process smooth and easy. Here is what you will use:
- Oven – for roasting the garlic low and slow to sweet, caramelized perfection
- Baking sheet (rimmed) – to hold the foil-wrapped garlic securely during roasting
- Mixing bowls – for combining and mashing your dip ingredients
- Kitchen utensils – including a fork for mashing garlic cloves
- Measuring cups and spoons set – for precise ingredient portions
- Chef’s knives – for slicing the tops off garlic heads cleanly
- Cutting board – a stable surface for prepping garlic and vegetables
How to Make Roasted Garlic Dip – Step by Step
- Preheat your oven to 400 degrees F. Remove and discard the outermost papery skin from each garlic head, keeping the inner layers intact so the head holds together. Using your chef’s knife and cutting board, slice about 1/4 inch off the top of each garlic head to expose the cloves.
- Prepare the garlic for roasting. Place the garlic heads cut side up on a large piece of aluminum foil. Drizzle with olive oil and sprinkle with 1/4 teaspoon of salt and 1/4 teaspoon of pepper. Measure your oil and seasoning accurately with a measuring cups and spoons set. Loosely wrap the garlic in the foil.
- Roast the garlic. Place the foil packet on a rimmed baking sheet and transfer to your preheated oven. Roast for 50 to 70 minutes, or until the garlic feels very soft when pierced with a paring knife. The cloves should be golden, jammy, and fragrant.
- Cool and squeeze. Remove from the oven and let the garlic stand for about 10 minutes to cool slightly. Once cool enough to handle, squeeze the roasted cloves directly out of their skins into a mixing bowl.
- Mash and mix. Using a fork from your kitchen utensils set, mash the garlic cloves until smooth, or leave them slightly chunky if you prefer more texture. Add the sour cream, mayonnaise, lemon juice, remaining 1/4 teaspoon salt, remaining 1/4 teaspoon pepper, and Parmesan cheese if using. Stir until everything is well combined.
- Chill the dip. Cover the bowl and refrigerate for at least 2 hours, or up to 2 days. This resting time allows the flavors to meld and deepen beautifully.
- Serve and garnish. Transfer the dip to a serving dish and sprinkle freshly sliced chives on top. Serve with your choice of crackers, toasted baguette slices, potato chips, or fresh cut vegetables.
Pro Tips for the Best Roasted Garlic Dip
- Do not rush the roasting. Roasting garlic low and slow is what transforms its sharp, pungent bite into a sweet, caramelized depth of flavor. Give it the full time it needs.
- Make it ahead. This dip actually tastes better the next day. Make it the night before your Memorial Day cookout or Fourth of July BBQ for the best results.
- Adjust the texture. For a silky smooth dip, mash the garlic thoroughly. For a more rustic, textured dip, leave some cloves slightly chunky.
- Add Parmesan for extra depth. The optional Parmesan cheese adds a savory, umami-rich layer that takes the dip to the next level. Highly recommended.
- Use full-fat sour cream. It gives the dip a richer, creamier consistency compared to reduced-fat versions.
- Serve at a slight chill, not ice cold. Pull the dip from the refrigerator about 10 to 15 minutes before serving for the best spreadable texture.
Serving Ideas for Memorial Day and Summer Gatherings
This Roasted Garlic Dip is incredibly versatile and fits beautifully into any Memorial Day picnic food spread or Memorial Day cookout menu. Here are some of the best ways to serve it:
- Alongside a charcuterie board with cured meats and cheeses
- With toasted baguette slices and artisan crackers
- As a dipping sauce for grilled vegetables at your Fourth of July BBQ
- Paired with kettle-cooked potato chips for a casual Memorial Day dinner idea
- As a spread inside wraps, sandwiches, or burgers
- With crudites like carrots, celery, cucumber, and bell pepper strips
How to Store Roasted Garlic Dip
Store your dip in an airtight container in the refrigerator for up to 2 days. Stir well before serving if it has been chilling for a while. This dip is not recommended for freezing, as the sour cream and mayonnaise base can separate and become watery after thawing.
Frequently Asked Questions
Can I make roasted garlic dip ahead of time?
Yes. This is one of the best make-ahead Memorial Day party food recipes out there. You can prepare and refrigerate it up to 2 days before serving. The flavor actually improves overnight as the roasted garlic infuses the creamy base.
Can I use a food processor instead of mashing by hand?
Absolutely. If you prefer an ultra-smooth dip, you can use a food processor to blend the roasted garlic cloves with the sour cream, mayo, and lemon juice. This gives you a silkier, more uniform texture.
What can I substitute for sour cream?
Plain Greek yogurt is the best substitute for sour cream in this recipe. It provides the same tangy, creamy base with a slightly lighter texture and extra protein.
Is this roasted garlic dip gluten-free?
The dip itself is naturally gluten-free. Just be sure to serve it with gluten-free crackers or vegetables if you are accommodating dietary needs at your Memorial Day cookout.
Can I add other herbs to the roasted garlic dip?
Yes. Fresh thyme, rosemary, parsley, or dill all pair wonderfully with roasted garlic. Feel free to customize the herb profile to match your taste or your cookout menu.
How many people does this recipe serve?
This recipe makes approximately 1.5 to 2 cups of dip, enough to serve 8 to 10 people as an appetizer. For larger Memorial Day food for a crowd gatherings, simply double or triple the batch.
If you found this recipe helpful, feel free to check out the kitchen equipment. Click on any url to view and purchase the product through our Amazon affiliate links at no extra cost to you. Your support helps us keep Deliciousavors.com running and bringing you great recipes!
PrintRoasted Garlic Dip : Creamy, Easy & Perfect for Memorial Day Cookouts

A creamy, savory Roasted Garlic Dip made with slow-roasted garlic, sour cream, mayonnaise, and fresh lemon juice. Perfect for Memorial Day cookouts, Fourth of July BBQs, and any summer gathering. Make it up to 2 days ahead for maximum convenience.
- Prep Time: 15 minutes
- Cook Time: 1 hour
- Total Time: 1 hour 15 minutes
- Yield: 8 to 10 servings (about 2 cups)
- Category: Appetizer, Dip
- Method: Roasting
- Cuisine: American
Ingredients
3 heads garlic
2 teaspoons olive oil
1/2 teaspoon kosher salt, divided
1/2 teaspoon ground black pepper, divided
3/4 cup sour cream
1/4 cup mayonnaise
3 tablespoons fresh lemon juice
1/4 cup grated Parmesan cheese (optional)
1 tablespoon thinly sliced fresh chives
Crackers, toasted baguette slices, potato chips, and/or cut vegetables, for serving
Instructions
1. Preheat oven to 400 degrees F. Remove and discard the outermost papery layer of each garlic head, keeping the inner skin intact so the head stays together. Using a sharp chef’s knife, slice 1/4 inch off the top of each garlic head to expose the cloves.
2. Place garlic heads cut side up on a large piece of aluminum foil. Drizzle with olive oil and sprinkle with 1/4 teaspoon salt and 1/4 teaspoon pepper. Loosely wrap the garlic in the foil. Place on a rimmed baking sheet and transfer to the oven.
3. Roast for 50 to 70 minutes, or until the garlic feels very soft when pierced with a paring knife and the cloves are golden and caramelized.
4. Remove from oven and let stand for 10 minutes to cool slightly. Squeeze the roasted garlic cloves out of their skins into a medium mixing bowl.
5. Mash the garlic with a fork until smooth, or leave slightly chunky for more texture. Add sour cream, mayonnaise, lemon juice, remaining 1/4 teaspoon salt, remaining 1/4 teaspoon pepper, and Parmesan cheese if using. Stir until well combined.
6. Cover the bowl and refrigerate for at least 2 hours, or up to 2 days, to allow flavors to develop.
7. To serve, transfer dip to a serving dish and sprinkle with fresh chives. Serve with crackers, toasted baguette slices, potato chips, and/or cut vegetables.
Notes
For a silky smooth texture, blend garlic with other ingredients in a food processor instead of mashing by hand.
This dip tastes even better the next day as the roasted garlic flavor deepens overnight.
Substitute plain Greek yogurt for sour cream for a lighter version.
The dip can be stored in an airtight container in the refrigerator for up to 2 days. Not recommended for freezing.
For a larger crowd, double or triple the batch easily.