Table of Contents
Table of Contents
Introduction
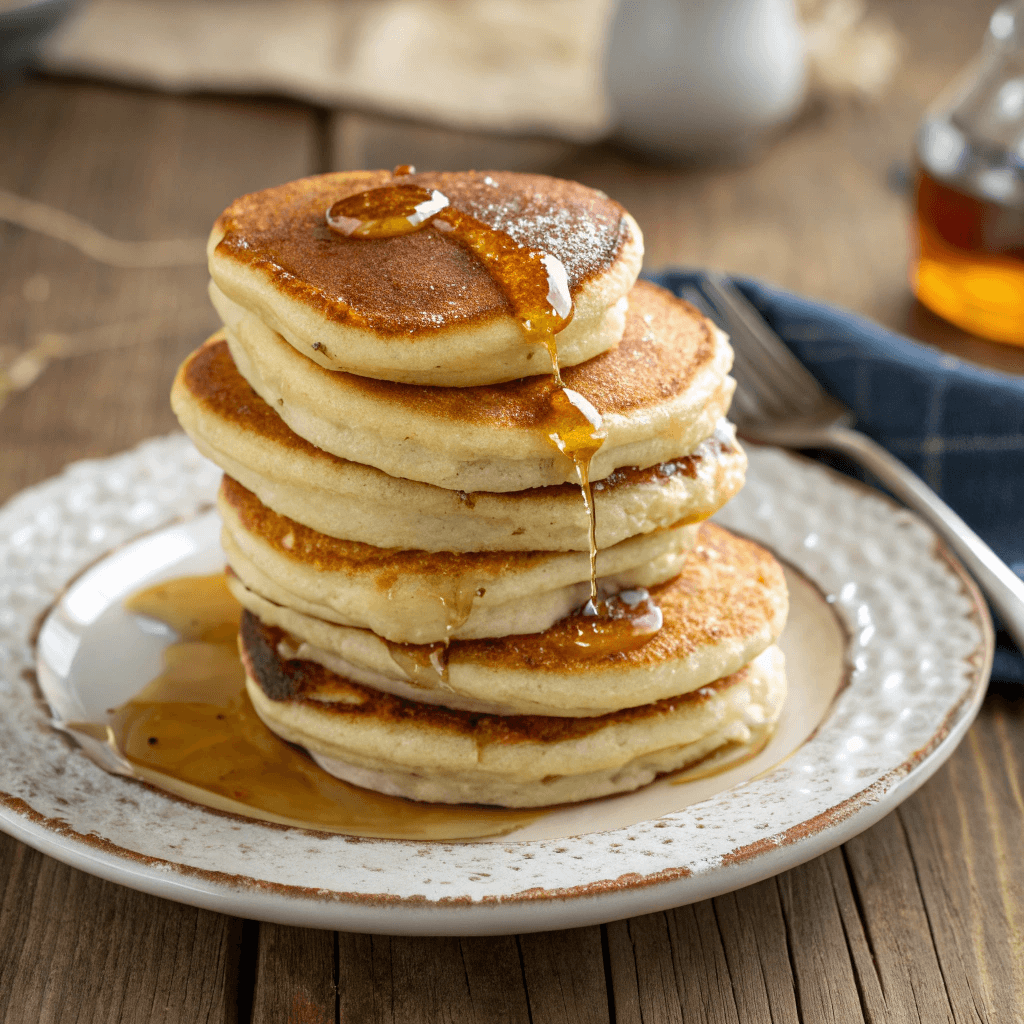
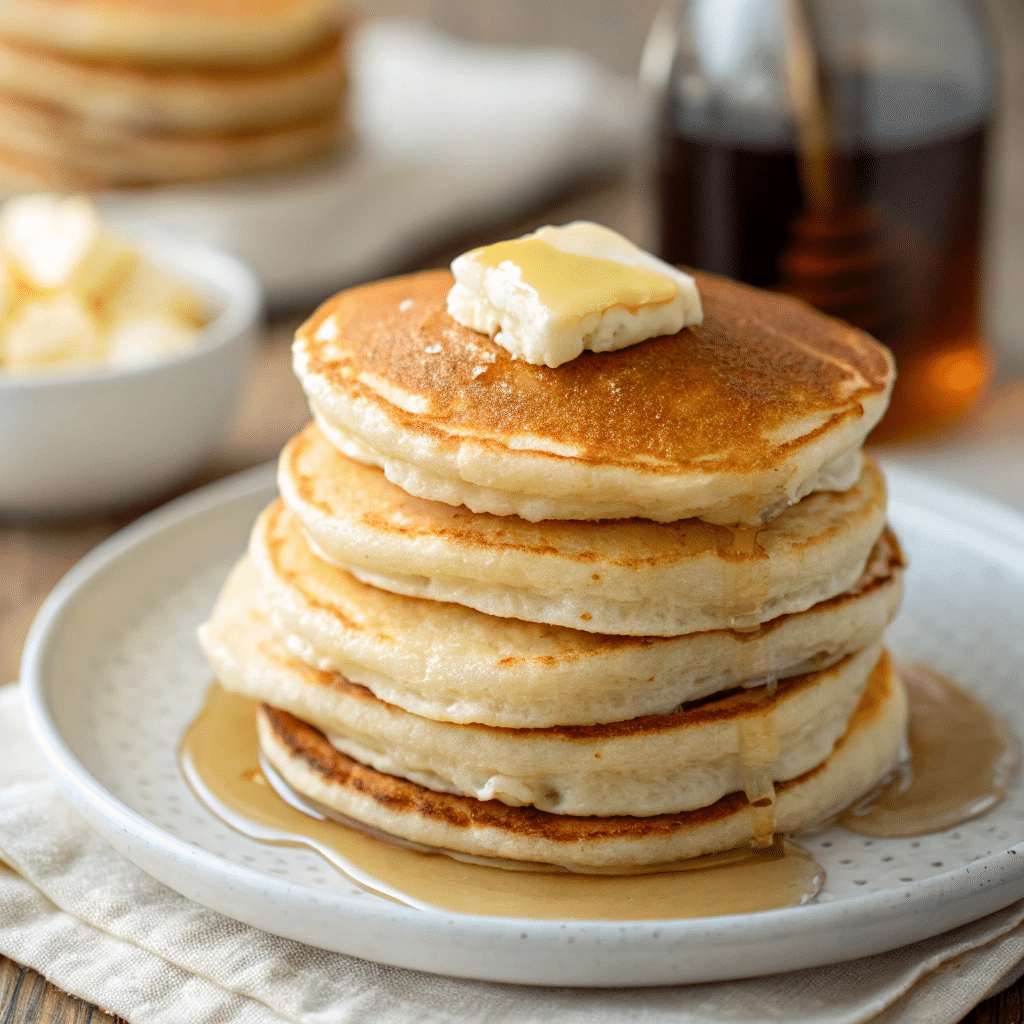
There’s something magical about mini pancakes that brings out the child in all of us. Last Sunday morning in my Madison, Georgia kitchen, I watched my family’s faces light up when I placed a stack of golden mini pancakes on the breakfast table. These tiny treasures, also known as silver dollar pancakes, transform an ordinary breakfast into something extraordinary. The beauty of mini pancakes lies in their perfect bite-sized portions and faster cooking time, making them ideal for busy mornings when you want something special. Whether you’re planning a family brunch or looking for a fun breakfast activity with kids, these delightful mini pancakes will become your new favorite morning tradition.
PrintMini Pancakes: 7 Incredible Breakfast Secrets You’ll Love

Quick and fluffy mini pancakes perfect for breakfast or brunch. Easy to make, fun to eat, and great for kids and adults alike.
- Prep Time: PT0H10M
- Cook Time: PT0H10M
- Total Time: PT0H20M
- Yield: 8 mini pancakes
- Category: Breakfast, Brunch, Pancakes
- Method: Stovetop
- Cuisine: American
- Diet: Vegetarian
Ingredients
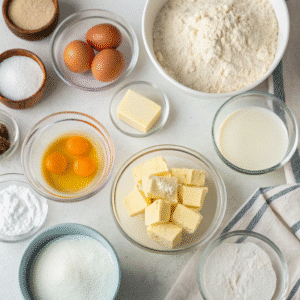
1 cup all-purpose flour 2 tbsp sugar 1 tsp baking powder 1/4 tsp salt 1 cup whole milk 1 large egg 2 tbsp melted butter 1 tsp vanilla extract
Instructions
Step 1: In a bowl, whisk together flour, sugar, baking powder, and salt.
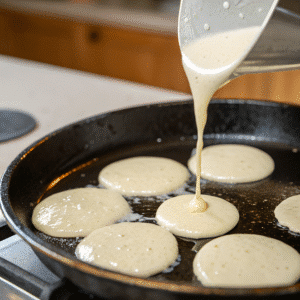
Step 2: In another bowl, whisk milk, egg, melted butter, and vanilla extract.
Step 3: Pour wet ingredients into dry ingredients and mix gently until just combined.
Step 4: Heat a nonstick skillet over medium heat and lightly grease.
Step 5: Drop batter by tablespoon onto skillet and cook until bubbles form.
Step 6: Flip pancakes and cook until golden brown on both sides.
Step 7: Serve warm with your favorite toppings.
Notes
For extra flavor, add mini chocolate chips or blueberries. Store leftovers in an airtight container up to 3 days. Freeze for up to 2 months; reheat in toaster.
The Magic Behind Perfect Mini Pancakes
Why Size Matters When Making Mini Pancakes
The charm of mini pancakes goes far beyond their adorable appearance. These bite-sized beauties cook faster than regular pancakes, making them perfect for feeding families or entertaining guests. Since they’re smaller, you can make more pancakes in the same amount of time, and they’re ideal for little hands to grab and dip in syrup. Mini pancakes also offer better portion control and create an interactive breakfast experience that gets everyone involved.
Mini pancakes typically measure about 2-3 inches in diameter, similar to the size of a silver dollar coin. This smaller size means they cook more evenly and develop those coveted crispy edges while maintaining a fluffy center. Additionally, since there’s more surface area relative to thickness, you get that perfect golden-brown color on both sides without overcooking the interior.
The psychological appeal of mini pancakes shouldn’t be underestimated either. There’s something satisfying about eating multiple small pancakes rather than one large one. Kids especially love them because they’re perfectly sized for their appetites and easy to handle with a fork or even fingers.
Essential Ingredients for Fluffy Results
Creating perfect mini pancakes starts with the right ingredient foundation. You’ll need all-purpose flour, which provides the best texture for light, fluffy pancakes. Baking powder acts as your leavening agent, creating those air bubbles that make pancakes rise and become fluffy. Fresh baking powder is crucial, so check your expiration date before starting.
The liquid components are equally important for achieving the perfect consistency. Whole milk creates richer, more tender pancakes, though you can substitute with buttermilk for extra tang or dairy-free alternatives if needed. One large egg helps bind everything together while adding structure and moisture.
Don’t forget the finishing touches that make mini pancakes extraordinary. A tablespoon of melted butter adds richness and helps prevent sticking, while a touch of vanilla extract elevates the flavor profile. A pinch of salt balances the sweetness, and just a tablespoon of sugar provides the perfect amount of sweetness without overwhelming the delicate pancake flavor.
How to Make Quick Mini Pancakes Like a Pro
Mini pancakes are a breakfast favorite for good reason they’re quick, fun, and always a crowd-pleaser. If you want to master making mini pancakes, it’s all about the right technique and timing. Start by mixing your dry ingredients: all-purpose flour, baking powder, a pinch of salt, and a touch of sugar. In a separate bowl, whisk together whole milk, one egg, melted butter, and vanilla extract. Gently combine the wet and dry ingredients, being careful not to overmix. Your batter should be slightly lumpy for the fluffiest mini pancakes.
Heat a nonstick skillet or griddle over medium heat and lightly grease it with butter or oil. Use a tablespoon or small cookie scoop to drop the batter onto the pan, forming pancakes about 2-3 inches wide. Cook until bubbles form on the surface this usually takes about 1-2 minutes. Flip each pancake and cook for another minute, until golden brown. The small size means you can make a batch quickly, perfect for busy mornings or feeding a hungry group.
If you’re looking for more breakfast inspiration, check out our breakfast recipe collection and try pairing your mini pancakes with our homemade berry compote.
Step-by-Step Cooking Technique
- Mix dry and wet ingredients separately, then combine gently.
- Use a tablespoon to portion batter for even, round pancakes.
- Cook on medium heat for even browning and fluffy centers.
- Flip when bubbles appear and edges look set.
Perfect Timing and Temperature Control
Getting the timing right is crucial for mini pancakes. Too hot, and they’ll burn outside while staying raw inside. Too low, and they’ll be pale and dry. Aim for medium heat and adjust as needed. Each side should take about a minute or less. Use a thin spatula for easy flipping.
If you want to try gluten-free options, visit our gluten-free sourdough recipes for more ideas.
Small Round Pancakes Cooking Secrets
Mini pancakes may look simple, but a few insider tips can make all the difference. The key is consistency in size and batter thickness. If your batter is too runny, pancakes will spread too thin; too thick, and they’ll be doughy. Aim for a pourable but slightly thick batter. Use a squeeze bottle or piping bag for perfect rounds.
Baking Time and Doneness Indicators
Mini pancakes don’t need baking in the oven, but if you’re making a large batch for a party, you can keep them warm on a baking sheet in a 200°F oven. To check doneness, look for bubbles on top and lightly golden edges before flipping. After flipping, the second side cooks even faster. Pancakes should spring back when gently pressed.
Equipment and Tools That Make a Difference
A good nonstick skillet or griddle is essential. Use a small cookie scoop or tablespoon for uniform size. Silicone spatulas make flipping easy. For extra convenience, a squeeze bottle ensures perfectly round pancakes every time.
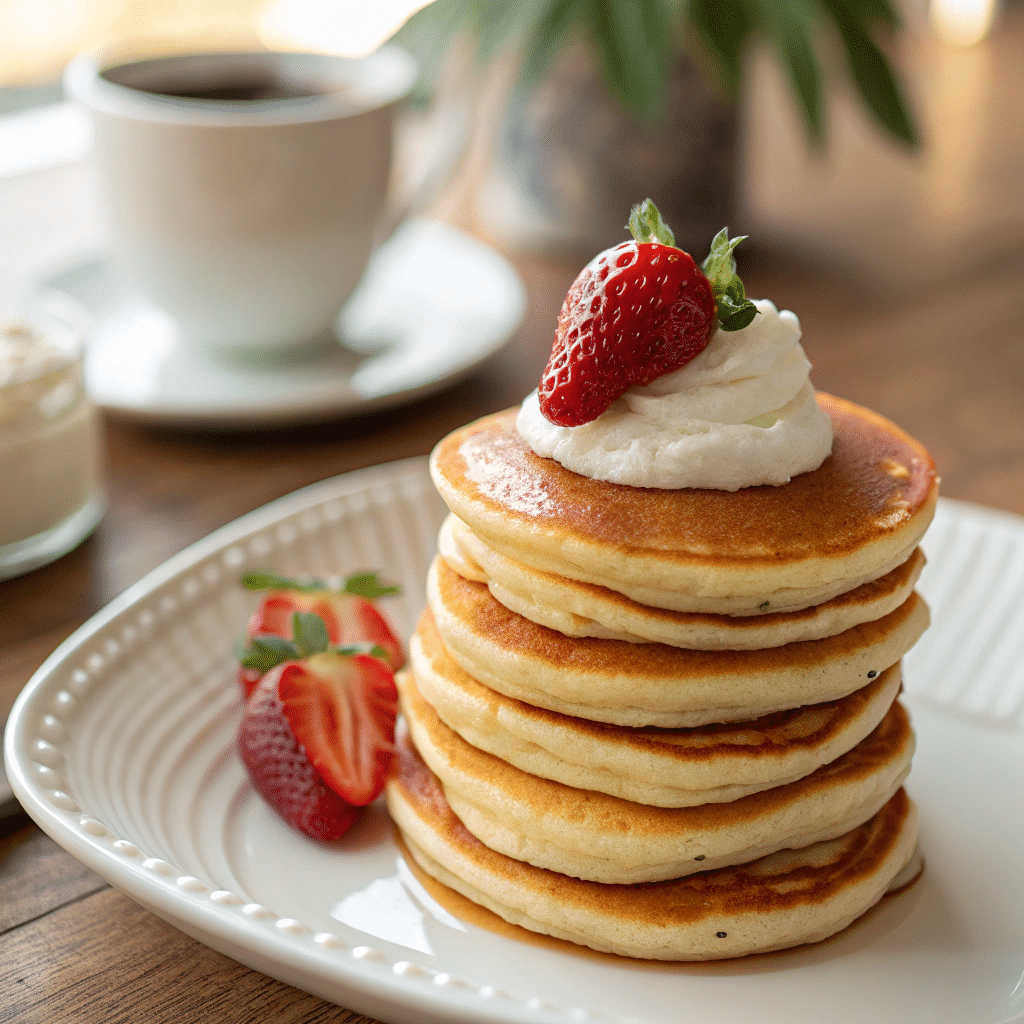
Creative Ways to Serve Mini Pancakes
Mini pancakes are incredibly versatile. Serve them stacked, skewered on sticks, or as a pancake “charcuterie” board for brunch parties. They’re perfect for dipping, stacking, or layering with your favorite toppings.
Sweet and Savory Topping Ideas
Sweet: Maple syrup, whipped cream, fresh berries, chocolate chips, or nut butter.
Savory: Cream cheese and smoked salmon, scrambled eggs, or crispy bacon.
Try a pancake bar at your next gathering let everyone customize their own stack!
| Sweet Toppings | Savory Toppings |
|---|---|
| Maple syrup, berries, whipped cream | Cream cheese, smoked salmon, bacon |
| Nut butter, chocolate chips | Scrambled eggs, herbs |
Storage Tips and Make-Ahead Options
Mini pancakes store well in the fridge for up to three days. Reheat in a toaster or oven for best texture. To freeze, place cooled pancakes in a single layer on a baking sheet, freeze until solid, then transfer to a zip-top bag. They’ll keep for up to two months. Reheat straight from frozen in the toaster or oven.
Frequently Asked Questions
Q: How to make quick mini pancakes?
A: Mix dry and wet ingredients separately, combine gently, and cook tablespoon-sized portions on a medium-hot skillet for 1-2 minutes per side.
Q: How do you cook mini pancakes?
A: Use a nonstick skillet, drop small amounts of batter, cook until bubbles form, then flip and finish until golden.
Q: How long do I bake mini pancakes?
A: Mini pancakes are cooked on the stovetop, not baked. Each side takes about 1 minute.
Q: How to make small round pancakes?
A: Use a tablespoon or squeeze bottle to portion batter evenly for perfectly round pancakes.
Conclusion
Mini pancakes are the ultimate breakfast treat quick, fun, and endlessly customizable. With the right ingredients, a few simple tools, and a bit of practice, you’ll be serving up stacks of fluffy, golden mini pancakes in no time. Whether you’re hosting brunch or just want to make mornings special, these tiny treasures will become a family favorite.
Article updated 10 July 2025
For more recipes, visit my Facebook page.