Table of Contents
Table of Contents
introduction
Halloween carries a certain magic the crunch of autumn leaves, the faint glow of carved pumpkins, and the thrill of sweet treats waiting around every corner. If you think back to childhood trick-or-treat nights, you might recall clutching a candy bucket almost as tightly as your costume. But now, as you step into the role of creator, you have the chance to bring that same magic into your own home.
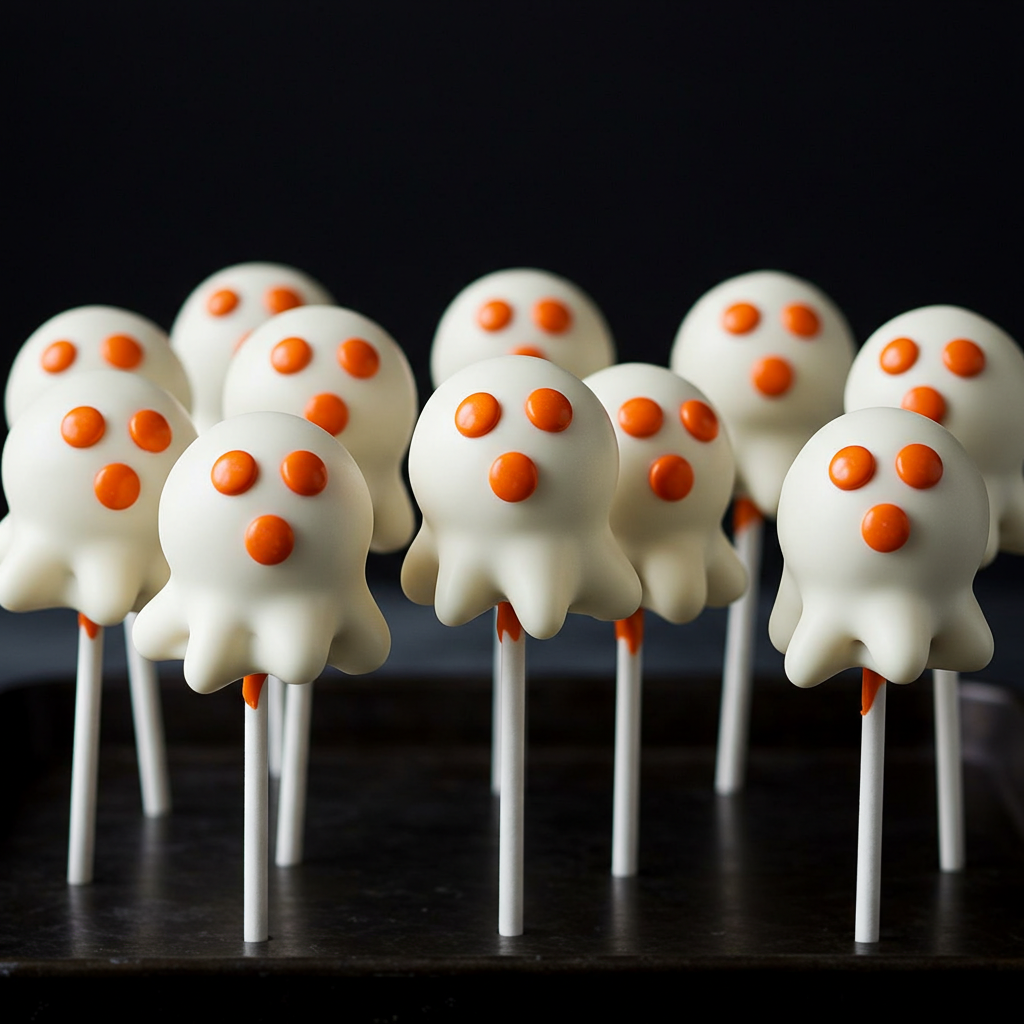
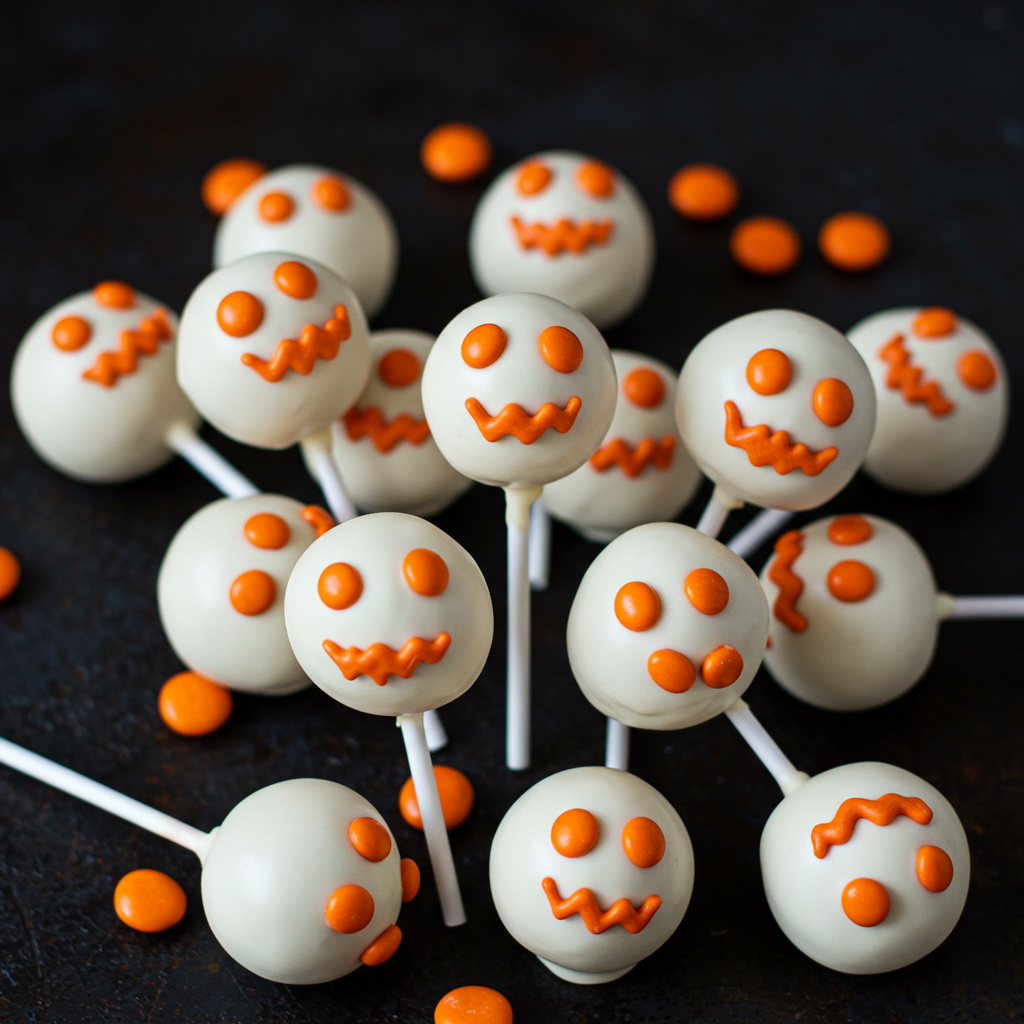
One of the easiest and most festive desserts you can make this season is Halloween cake pops with white frosting and orange candies shaped like ghost heads. They combine the fun of baking with the joy of decorating, and the final result is as Instagram-worthy as it is delicious.
What Are Halloween Cake Pops with White Frosting and Orange Candies?
Halloween cake pops are simply crumbled cake mixed with frosting, rolled into balls, then dipped in a candy coating. For Halloween, these pops get a spooky twist white candy coating forms tiny ghostly bodies, while orange candies bring playful, smiling expressions to life.
You can think of them as miniature edible ghosts on sticks. They’re festive, portable, and fit perfectly on a dessert table surrounded by cobwebs and pumpkins.
Why You’ll Love These Halloween Ghost Cake Pops
- Adorable Design: Their ghostly look will catch every eye at your table.
- Kid-Friendly Activity: Children love decorating faces and choosing candy expressions.
- Party-Ready: Easy to serve no forks, knives, or plates needed.
- Creative Freedom: You can make ghosts, pumpkins, witches, or even mummies with the same basic recipe.
Whether you’re hosting a family party, preparing school treats, or planning a Halloween get-together, these Halloween cake pops guarantee smiles before the first bite.
Ingredients You’ll Need
Cake and Frosting Base
| Ingredient | Quantity | Notes |
|---|---|---|
| Chocolate cake (baked) | 1 9×13 inch cake | Use homemade or boxed mix |
| Vanilla frosting | 1 cup | Helps hold the cake crumbs together |
| White candy melts | 2 cups | Creates smooth coating for ghost look |
| Lollipop sticks | 20–24 sticks | Essential for holding the cake pops |
Decorations for Ghost Faces
| Ingredient | Quantity | Purpose |
|---|---|---|
| Orange mini candies (M&Ms) | 24 pcs | Form ghost mouths or facial accents |
| Black edible gel pen | 1 pen | Used for eyes and ghost expressions |
| Optional spooky sprinkles | As needed | Creepy textures and details |
Step-by-Step Guide to Making Halloween Cake Pops
Step 1 : Prepare the Cake Crumbs
Start by baking a simple chocolate cake. Allow it to cool before crumbling it into fine crumbs in a bowl. The smoother the crumbs, the better your pops will hold together.
Step 2 : Combine with Frosting
Add your vanilla frosting to the crumbs. Mix with a spoon or hands until you form a dough-like consistency. This mixture should be sticky but moldable.
Step 3 : Shape Into Balls
Take small portions of the dough and roll into 1-inch balls. Place them on a lined baking sheet.
Step 4 : Add the Sticks
Dip the tip of each lollipop stick into melted candy melts, then push it halfway into each cake ball. This step ensures the pops stay secure. Refrigerate for about 30 minutes.
Step 5 : Dip in White Frosting
Melt the white candy melts until smooth. Dip each cake ball in, turning to coat fully. Tap gently to remove excess coating. Set them upright to dry.
Step 6 : Decorate Ghost Faces
While the coating is still tacky, place orange candies to form mouths or noses. Once dry, use a black edible gel pen to draw eyes, surprised O-mouths, or cheeky smiles. For added fun, finish with Halloween sprinkles like black bats or silver stars.
Within minutes, you’ll have a tray of ghostly treats staring back at you ready to haunt your Halloween table.
Tips for Professional-Looking Cake Pops
- Smooth Coating: Add a teaspoon of coconut oil to melted candy for silkier dipping.
- Avoid Cracks: Keep cake balls and coating at similar temperatures. Sudden cold meets hot often results in cracked shells.
- Firm Pops: Chill pops before dipping to strengthen their structure.
- Creative Faces: Mix up the ghost expressions grinning, shy, surprised to make them more entertaining.
Fun Variations You Can Try
Don’t stop at ghosts use the same process to create other Halloween characters:
- Pumpkin Pops: Use orange melts, green candy stems, and a chocolate chip smile.
- Mummy Pops: Overlap thin drizzle lines of white coating for a wrapped look.
- Monster Pops: Colorful candy melts in green or purple with wild candy eyes.
- Bat Pops: Add chocolate wafer wings to spooky-fy your creation.
These twists ensure your Halloween dessert spread stays vibrant and fun.
Serving and Storing Your Ghost Pops
- Serving: Display in a foam block, mason jar, or festive Halloween mug with candy corn at the bottom. This not only keeps them upright but doubles as a decoration.
- Room Temperature Storage: Keep them in an airtight container for up to 3 days.
- Refrigeration: Store covered pops in the fridge, but bring them to room temperature before serving for the best flavor.
- Freezing: Yes, you can freeze them. Wrap individually in plastic wrap, layer inside a freezer bag, and enjoy for up to a month.
FAQs About Halloween Cake Pops with White Frosting and Orange Candies
How far in advance can I make Halloween cake pops with white frosting and orange candies?
You can prepare and decorate them two to three days in advance. Store them properly in an airtight container for freshness.
Do I have to use orange candies for decoration?
No substitute with chocolate chips, candy eyes, mini jelly beans, or sprinkle accents. Orange candies simply add a classic Halloween ghostly contrast.
Can kids help make Halloween cake pops?
Absolutely! Kids can shape balls, place candies, and draw faces. The only adult supervision needed is for melting and dipping candy melts.
Can I make these cake pops healthier?
Yes use whole wheat cake mix, reduced sugar frosting, and white yogurt coating instead of candy melts. They’ll still look adorable and taste sweet.
Conclusion
Halloween isn’t just about costumes or pumpkins it’s about joy, laughter, and fun traditions that bring people together. By making Halloween cake pops with white frosting and orange candies shaped like ghost heads, you’re adding a treat to your celebration that delights kids and impresses adults at the same time.
So roll up your sleeves, melt those candy melts, and let the ghosts come out of hiding straight into your dessert table.