
Table of Contents
Table of Contents
Difficulty Level: ⭐⭐⭐ Moderate
Introduction: The Perfect Swiss Breakfast Treat
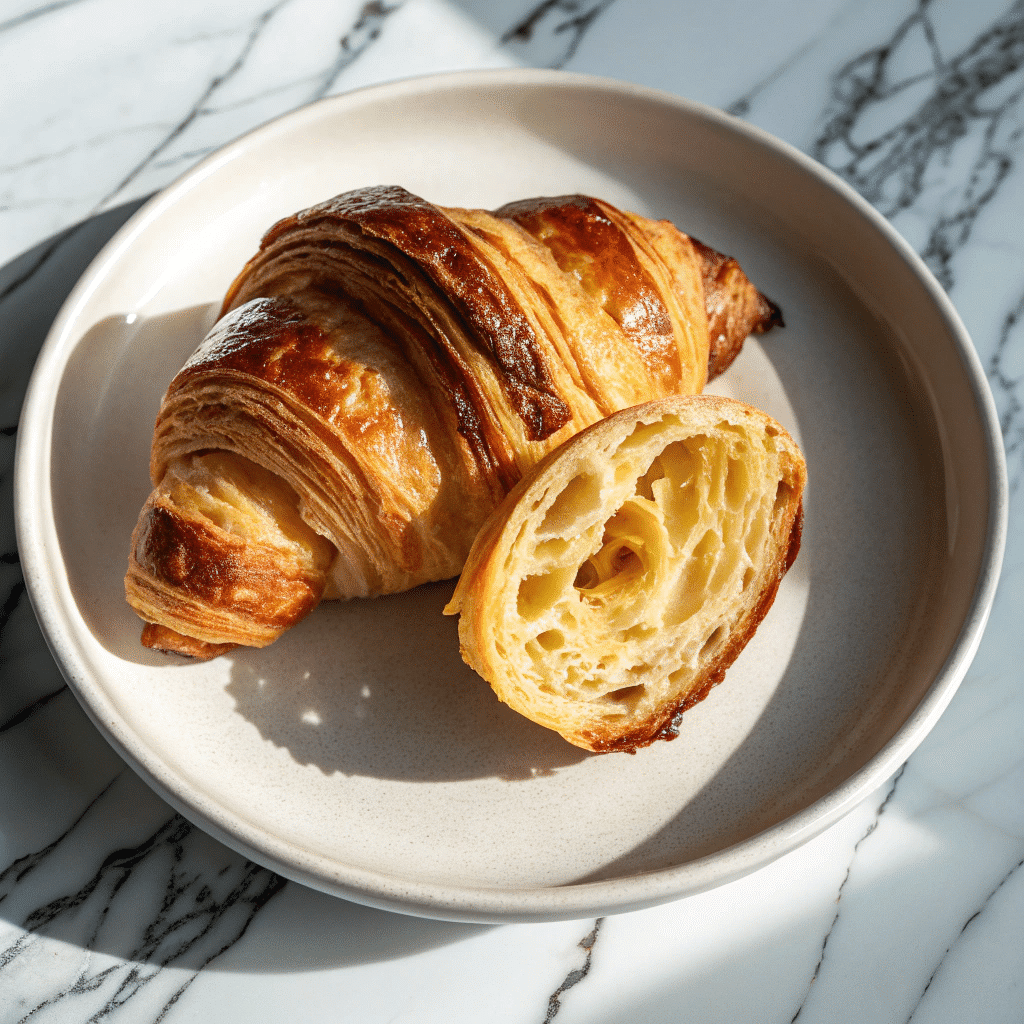
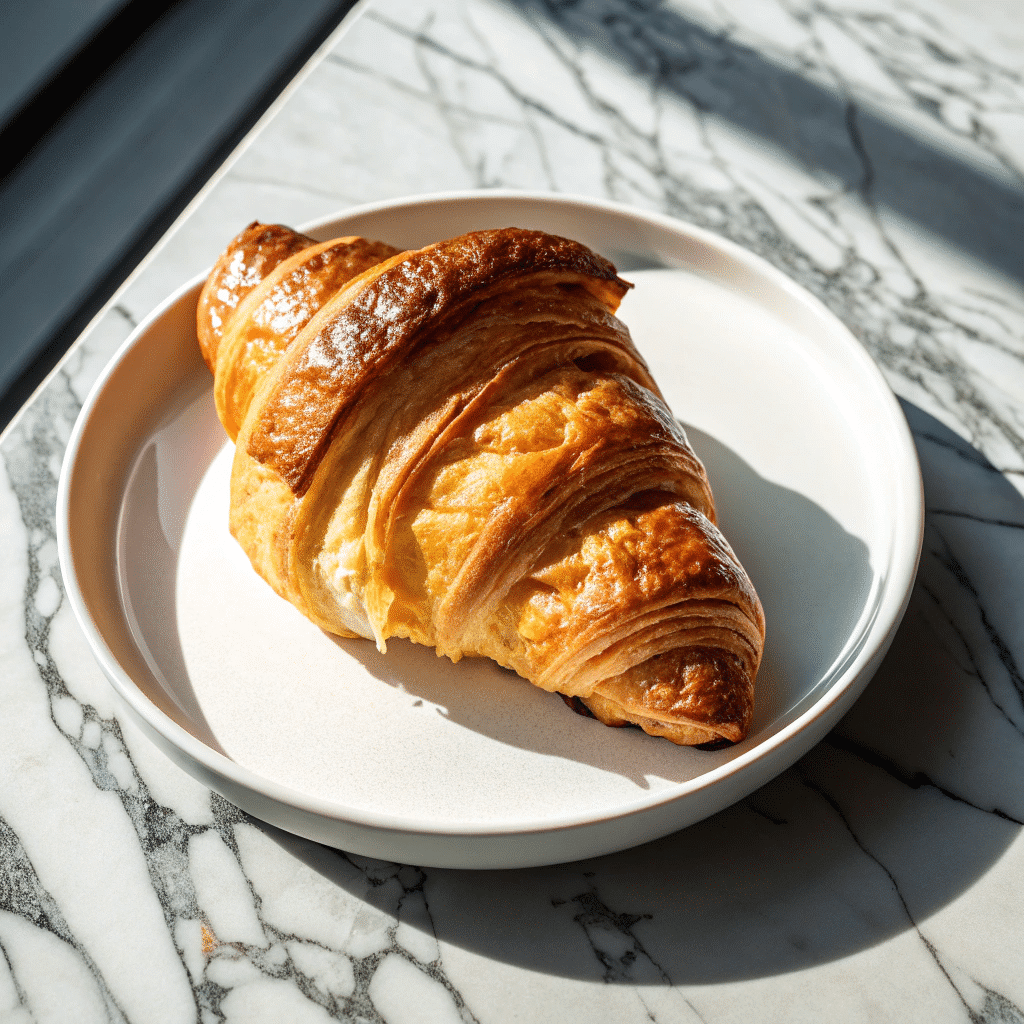
The aroma of freshly baked gipfeli wafting through your kitchen on a lazy Sunday morning is nothing short of magical. These golden, flaky Swiss pastries – with their delicate layers that shatter at first bite, revealing a buttery, tender interior – are the perfect companion to your morning coffee or afternoon tea. While often compared to their French cousin, the croissant, gipfeli have their own distinct character: slightly denser, with a more pronounced crispness and a subtle sweetness that makes them irresistible.
My first encounter with authentic gipfeli was during a trip to Zurich, where I watched locals casually picking them up from neighborhood bakeries before heading to work. What struck me most wasn’t just their perfect crescent shape, but how these pastries seemed to be an essential part of Swiss morning ritual – as important as the precision of their famous watches. The Swiss take immense pride in their gipfeli, and after mastering this recipe, you’ll understand why.
Making gipfeli at home might seem intimidating with all that folding and laminating, but I promise the effort is worthwhile. The process of creating those perfect buttery layers is almost meditative, and the results are far superior to anything store-bought. This recipe breaks down the technique into manageable steps, allowing even novice bakers to achieve bakery-quality results. The magic happens in the lamination process – where cold butter is encased in dough and then folded multiple times to create those signature flaky layers.
Whether you’re looking to impress weekend guests or simply want to elevate your breakfast routine, these Swiss gipfeli will transform your morning experience. They can be enjoyed plain with a smear of butter and jam, or filled with savory ingredients for a more substantial meal. The versatility of gipfeli is part of their charm – they’re equally at home on a breakfast table or as part of an elegant brunch spread.
PrintGipfeli Magic: 10 Delicious Swiss Pastry Secrets Revealed

Unlock the secrets of Swiss baking with these irresistible homemade Gipfeli! Flaky, buttery, and golden, these pastries are perfect for breakfast, brunch, or a special treat with coffee. Discover 10 tips to make your Gipfeli as magical as those in Switzerland.
- Prep Time: PT30M
- Cook Time: PT18M
- Total Time: PT2H (includes chilling and rising)
- Yield: 12 pastries
- Category: Breakfast or Brunch
- Method: Bake
- Cuisine: Swiss
Ingredients
For the Dough
- 3¼ cups (500g) high-protein bread flour, sifted
- 1 teaspoon fine sea salt
- ¼ cup (50g) granulated sugar
- ½ cup (120ml) cold milk
- 1 tablespoon fresh active yeast (or 2¼ teaspoons instant dry yeast)
- ¼ cup (60ml) cold water (adjust as needed for dough consistency)
For Lamination
- ½ cup (115g) high-quality European-style butter, cold and cut into small pieces
- Extra flour for rolling and dusting
For Finishing
- 1 egg, beaten (for egg wash)
- Pinch of salt (to mix with egg wash)
Instructions
1. Activate the Yeast
Mix 2¼ teaspoons active dry yeast with 1 cup warm milk (105-115°F) and a pinch of sugar. Let the mixture sit for 5-10 minutes until it becomes frothy and bubbly. This visual indicator confirms your yeast is alive and active.
2. Prepare the Dough Base
In a large mixing bowl, combine 3½ cups bread flour, ¼ cup sugar, and 1 teaspoon salt. Mix thoroughly. Create a well in the center and pour in the activated yeast mixture. Stir until the ingredients begin to come together into a shaggy dough.
3. Knead the Dough
Transfer the dough to a lightly floured surface and knead for 10 minutes until smooth and elastic. The dough should spring back when lightly pressed with your finger – a key success marker indicating proper gluten development.
4. First Rise
Place the dough in a lightly greased bowl, cover with a damp cloth or plastic wrap, and let it rise in a warm place for 1 hour, or until doubled in size. The dough should look puffy and significantly larger.
5. Prepare for Lamination
Roll the risen dough into a large rectangle approximately ¼ inch thick on a lightly floured surface. The rectangle should have clean, straight edges.
6. Add the Butter Layer
Distribute 1 cup of cold, cubed unsalted butter evenly over two-thirds of the dough rectangle. The butter should be cold but slightly pliable – firm enough to stay intact but soft enough to roll without breaking through the dough.
7. First Fold
Fold the unbuttered third of dough over the center third, then fold the remaining buttered third on top, creating a letter-fold with three layers. Seal the edges by gently pressing them together.
8. First Turn
Rotate the dough 90 degrees and roll it out again into a rectangle about ¼ inch thick. Fold into thirds again, wrap in plastic wrap, and refrigerate for 30 minutes.
9. Complete the Lamination
Repeat the rolling, folding, and chilling process two more times for a total of three turns. After the final fold, wrap the dough and refrigerate for at least 1 hour or overnight for best results.
10. Shape the Gipfeli
Roll the chilled dough into a large rectangle about ⅛ inch thick. Cut the dough into triangles with bases about 3-4 inches wide. Starting from the wide end, roll each triangle toward the point, gently stretching as you roll. Curve the ends slightly inward to form the classic crescent shape.
11. Final Proofing
Place the shaped gipfeli on parchment-lined baking sheets, leaving space between each one. Cover a damp cloth and let them rise for 30-45 minutes until visibly puffy.
12. Prepare for Baking
Preheat your oven to 400°F (200°C). Whisk together 1 egg with a pinch of salt and brush this egg wash over the proofed gipfeli for a glossy, golden finish.
13. Bake to Perfection
Bake for 5 minutes at 400°F, then reduce the temperature to 375°F (190°C) and continue baking for 10-12 minutes until the gipfeli are puffed and golden brown. They should have visible, flaky layers and a hollow sound when tapped on the bottom.
Notes
The success of your gipfeli depends significantly on ingredient quality. European-style butter contains higher fat content (at least 82%) and less water than standard American butter, creating more defined layers. If European butter isn’t available, use the highest quality unsalted butter you can find.
The Rich History of Gipfeli
The story of gipfeli is intertwined with the broader history of crescent-shaped pastries in Europe, dating back centuries. While the French croissant often steals the spotlight in the world of crescent pastries, the Swiss gipfeli has its own fascinating lineage that deserves recognition.
Gipfeli shares ancestry with the Austrian kipferl, a crescent-shaped pastry that has been documented as far back as the 13th century. According to historical records, the kipferl was mentioned in a poem as one of the Christmas treats presented to Duke Leopold in 1227, long before many of the popular legends about its creation began to circulate.
One persistent culinary legend claims that crescent-shaped pastries were created to celebrate the defeat of Ottoman forces, with the shape mimicking the crescent moon of the Ottoman flag – a symbol of triumph over the invaders. While this story adds romantic flair to the pastry’s history, food historians have largely debunked it as the kipferl predates these conflicts by centuries.
The evolution from kipferl to the modern gipfeli and croissant represents a fascinating culinary journey across European borders. The transformation began in earnest when August Zang, an Austrian entrepreneur, opened the first Viennese bakery in Paris in 1838. His bakery, Boulangerie Viennoise, introduced Parisians to the kipferl, which the French began calling “croissant” due to its crescent shape.
While the French developed their version with more emphasis on creating a lighter, flakier texture through lamination techniques, the Swiss gipfeli maintained a slightly denser, more substantial character. In Switzerland, gipfeli became more than just food – it evolved into a cultural icon representing Swiss dedication to quality and craftsmanship. The pastry embodies the Swiss approach to baking: precise, methodical, and resulting in perfect consistency.
Today, gipfeli remains a beloved staple in Swiss bakeries, where bakers still take pride in creating these pastries by hand, following techniques passed down through generations. The Swiss have developed numerous variations, including both sweet and savory versions, though the classic butter gipfeli (Butter-Gipfeli) remains the most popular and revered form.

Full Ingredient List
Creating perfect Swiss gipfeli requires quality ingredients that work together to achieve those signature flaky layers. Here’s everything you’ll need to make approximately 12 delicious gipfeli:
For the Dough
- 3¼ cups (500g) high-protein bread flour, sifted
- 1 teaspoon fine sea salt
- ¼ cup (50g) granulated sugar
- ½ cup (120ml) cold milk
- 1 tablespoon fresh active yeast (or 2¼ teaspoons instant dry yeast)
- ¼ cup (60ml) cold water (adjust as needed for dough consistency)
For Lamination
- ½ cup (115g) high-quality European-style butter, cold and cut into small pieces
- Extra flour for rolling and dusting
For Finishing
- 1 egg, beaten (for egg wash)
- Pinch of salt (to mix with egg wash)
Ingredient Quality Notes:
The success of your gipfeli depends significantly on ingredient quality. European-style butter contains higher fat content (at least 82%) and less water than standard American butter, creating more defined layers. If European butter isn’t available, use the highest quality unsalted butter you can find.
Substitution Options:
- Yeast: If fresh yeast is unavailable, substitute with instant dry yeast (use about 1/3 the amount).
- Milk: For dairy-free options, unsweetened almond or oat milk works well but may slightly alter the flavor.
- Flour: While bread flour is ideal for its higher protein content, all-purpose flour can work in a pinch (though expect less flakiness).
- Sugar: Superfine sugar dissolves more readily, but granulated works fine.
Avoid These Substitutions:
- Never use margarine instead of butter
- Avoid low-protein flours like cake flour
- Don’t substitute warm liquids for cold ones in this recipe
Time Breakdown
Creating perfect gipfeli requires patience, as much of the time involved is inactive resting and chilling periods that develop flavor and texture.
Total Time: 4 hours 50 minutes
Active Prep Time: 30-40 minutes
Inactive Time: 4 hours (includes dough resting, chilling between folds)
Baking Time: 15-20 minutes
Additional Timing Notes:
- First dough rest: 1 hour
- Lamination process: Approximately 2 hours (includes 30-minute chilling periods between folds)
- Final proofing: 30-60 minutes (until visibly puffy)
- Cooling time: 10-15 minutes before serving
Make-Ahead Options:
The laminated dough can be refrigerated overnight after the final fold, which actually improves flavor development. Shaped gipfeli can also be frozen before the final rise and baked directly from frozen (add 5-7 minutes to baking time).
Required Kitchen Equipment
Having the right tools makes the gipfeli-making process smoother and more enjoyable. Here’s what you’ll need to achieve professional-quality results:
Essential Tools
- Large mixing bowl: For combining ingredients and initial dough development
- Rolling pin: Preferably a French-style (tapered) rolling pin for better control during lamination
- Bench scraper: For handling dough and cleaning work surfaces
- Sharp knife or pastry wheel: For cutting triangles cleanly
- Baking sheets: Heavy-duty, non-warping sheets for even baking
- Parchment paper: Prevents sticking and ensures easy cleanup
- Pastry brush: For applying egg wash evenly
- Kitchen scale: For precise measurements (especially important for flour)
- Measuring cups and spoons: If not using a scale
Helpful But Optional
- Ruler or measuring tape: For consistent sizing of dough rectangles and triangles
- Spray bottle: For misting water before baking (creates steam for better rise)
- Stand mixer with dough hook: Can make initial dough mixing easier, though hand kneading works perfectly
- Silicone baking mat: Provides a non-stick surface for rolling and shaping
- Wire cooling rack: Allows air circulation for cooling
Alternative Equipment Options
If you don’t have specialized equipment, these household items can work as substitutes:
- Wine bottle: Can substitute for a rolling pin in a pinch
- Large knife: Works instead of a bench scraper for cutting dough
- Clean kitchen towel: Can replace parchment paper (though less ideal)
- Fingers: Can substitute for a pastry brush when applying egg wash
Temperature Control Note:
The most important “equipment” for successful gipfeli is actually your refrigerator. Maintaining cold temperatures throughout the lamination process is crucial for distinct layers. If your kitchen is warm, you may need to chill the dough more frequently than indicated in the recipe.
Step-by-Step Preparation
Follow these detailed steps to create perfect Swiss gipfeli that are golden, flaky, and irresistibly buttery. The process requires patience, but each step builds toward creating those signature layers that make gipfeli so special.
1. Activate the Yeast
Mix 2¼ teaspoons active dry yeast with 1 cup warm milk (105-115°F) and a pinch of sugar. Let the mixture sit for 5-10 minutes until it becomes frothy and bubbly. This visual indicator confirms your yeast is alive and active.
2. Prepare the Dough Base
In a large mixing bowl, combine 3½ cups bread flour, ¼ cup sugar, and 1 teaspoon salt. Mix thoroughly. Create a well in the center and pour in the activated yeast mixture. Stir until the ingredients begin to come together into a shaggy dough.
3. Knead the Dough
Transfer the dough to a lightly floured surface and knead for 10 minutes until smooth and elastic. The dough should spring back when lightly pressed with your finger – a key success marker indicating proper gluten development.
4. First Rise
Place the dough in a lightly greased bowl, cover with a damp cloth or plastic wrap, and let it rise in a warm place for 1 hour, or until doubled in size. The dough should look puffy and significantly larger.
5. Prepare for Lamination
Roll the risen dough into a large rectangle approximately ¼ inch thick on a lightly floured surface. The rectangle should have clean, straight edges.
6. Add the Butter Layer
Distribute 1 cup of cold, cubed unsalted butter evenly over two-thirds of the dough rectangle. The butter should be cold but slightly pliable – firm enough to stay intact but soft enough to roll without breaking through the dough.
7. First Fold
Fold the unbuttered third of dough over the center third, then fold the remaining buttered third on top, creating a letter-fold with three layers. Seal the edges by gently pressing them together.
8. First Turn
Rotate the dough 90 degrees and roll it out again into a rectangle about ¼ inch thick. Fold into thirds again, wrap in plastic wrap, and refrigerate for 30 minutes.
9. Complete the Lamination
Repeat the rolling, folding, and chilling process two more times for a total of three turns. After the final fold, wrap the dough and refrigerate for at least 1 hour or overnight for best results.
10. Shape the Gipfeli
Roll the chilled dough into a large rectangle about ⅛ inch thick. Cut the dough into triangles with bases about 3-4 inches wide. Starting from the wide end, roll each triangle toward the point, gently stretching as you roll. Curve the ends slightly inward to form the classic crescent shape.
11. Final Proofing
Place the shaped gipfeli on parchment-lined baking sheets, leaving space between each one. Cover with a damp cloth and let them rise for 30-45 minutes until visibly puffy.
12. Prepare for Baking
Preheat your oven to 400°F (200°C). Whisk together 1 egg with a pinch of salt and brush this egg wash over the proofed gipfeli for a glossy, golden finish.
13. Bake to Perfection
Bake for 5 minutes at 400°F, then reduce the temperature to 375°F (190°C) and continue baking for 10-12 minutes until the gipfeli are puffed and golden brown. They should have visible, flaky layers and a hollow sound when tapped on the bottom.
Nutritional Information
Understanding the nutritional profile of gipfeli is important for those monitoring their dietary intake. These buttery Swiss pastries are delicious but relatively calorie-dense due to their high butter content. Below is a comprehensive breakdown of the nutritional content per serving.
Nutritional Values Per Serving
| Nutrient | Amount per Gipfeli | % Daily Value* |
|---|---|---|
| Calories | 210 | – |
| Total Fat | 12g | 15% |
| Saturated Fat | 7g | 35% |
| Cholesterol | 32mg | 11% |
| Sodium | 212mg | 9% |
| Total Carbohydrate | 21g | 8% |
| Dietary Fiber | 0.7g | 3% |
| Total Sugars | 3.5g | – |
| Protein | 3.5g | 7% |
| Vitamin D | 0IU | 0% |
| Calcium | 14mg | 1% |
| Iron | 1mg | 6% |
| Potassium | 70mg | 1% |
*Percent Daily Values are based on a 2,000 calorie diet. Your daily values may be higher or lower depending on your calorie needs.
Serving Size Information
One serving equals one gipfeli (approximately 50g). A batch of this recipe yields approximately 12 gipfeli, with each pastry containing about 210 calories. For those tracking macronutrients, each gipfeli provides a ratio of approximately 51% calories from fat, 40% from carbohydrates, and 9% from protein.
Allergen Information
Gipfeli contain several common allergens that individuals with food sensitivities should be aware of before consumption. The primary allergens in this recipe include:
Wheat: The bread flour used as the base of the dough contains gluten, making gipfeli unsuitable for those with celiac disease or gluten sensitivity.
Dairy: European-style butter is a key ingredient that provides the characteristic flaky layers. Those with milk allergies or lactose intolerance should avoid gipfeli or seek dairy-free alternatives.
Eggs: The egg wash used to create the golden-brown exterior contains egg proteins that can trigger allergic reactions in sensitive individuals.
While not typically included in traditional recipes, some variations may incorporate nuts or seeds as toppings or fillings, which are also common allergens.
Always inform guests about these potential allergens when serving gipfeli, especially at gatherings where individuals’ dietary restrictions may not be known.
Safety Precautions
Preparing gipfeli involves several steps that require careful attention to food safety and handling procedures to ensure a safe and enjoyable baking experience.
Temperature Control
Dough Handling: Maintain cold temperatures throughout the lamination process. Butter should remain cold but pliable to create distinct layers without melting into the dough. If your kitchen is warm, work quickly and return the dough to the refrigerator if it becomes too soft.
Baking Temperature: Preheat your oven to exactly 400°F (200°C) before reducing to 375°F (190°C) after the first 5 minutes of baking. Use an oven thermometer to verify accuracy, as incorrect temperatures can result in undercooked dough or burnt exteriors.
Kitchen Safety
Sharp Tools: Exercise caution when using sharp knives or pastry wheels to cut dough triangles. Always cut away from your body and keep fingers clear of cutting paths.
Hot Surfaces: Use proper oven mitts when handling hot baking sheets. Allow baked gipfeli to cool for at least 10 minutes before handling to prevent burns from hot butter or steam.
Cross-Contamination: Thoroughly clean all surfaces that come into contact with raw eggs used in the egg wash. Wash hands with soap and warm water after handling raw eggs to prevent potential salmonella contamination.
Flour Dust: Avoid inhaling excessive flour dust when working with dry ingredients, as this can irritate airways. Consider wearing a mask if you have respiratory sensitivities.
Pro Tips & Tricks
Mastering the art of gipfeli-making takes practice, but these expert insights will help you achieve bakery-quality results from the very beginning.
Temperature Control is Everything
The secret to those perfect flaky layers lies in maintaining cold temperatures throughout the lamination process. If your kitchen is warm, work quickly and return the dough to the refrigerator if the butter begins to soften. European-style butter with its higher fat content (at least 82%) creates more defined layers than standard American butter.
Perfect Your Lamination Technique
When folding the dough, aim for clean, straight edges and precise folds. Use a ruler to measure your dough rectangle for consistent sizing. The sharper your folds, the more distinct your layers will be in the finished product. Complete three full turns (each consisting of a roll and fold) for the optimal number of layers.
Visual Indicators of Success
Look for these signs that your gipfeli are on track:
- The dough should feel smooth and elastic after kneading
- Butter should remain visible in streaks but not leak out during folding
- Shaped gipfeli should have a slight sheen before baking
- Properly proofed gipfeli will be puffy and slightly increased in size
- When baked, the exterior should have visible, distinct layers
Enhance Flavor Development
For deeper flavor, consider refrigerating the laminated dough overnight after the final fold. This slow, cold fermentation develops complexity while maintaining the butter’s integrity. A light misting of water in the oven during the first few minutes of baking creates steam that helps with the initial rise.
Serving & Pairing Guide
Gipfeli shine brightest when served in ways that complement their buttery, flaky texture. Here’s how to elevate your gipfeli experience with perfect pairings and presentation.
Classic Swiss Breakfast
In Switzerland, gipfeli are a breakfast staple, typically served alongside a strong coffee or hot chocolate. Create an authentic Swiss morning spread by pairing your freshly baked gipfeli with:
- High-quality European butter and assorted jams
- Sliced Swiss cheeses like Emmental or Gruyère
- Fresh fruit, particularly berries or sliced apples
- Bircher muesli for a complete Swiss breakfast experience
Elegant Brunch Presentation
For a more elaborate brunch setting, arrange warm gipfeli in a cloth-lined basket to maintain their warmth and crispness. Serve with small ramekins of honey, fruit preserves, and whipped butter. A sprinkle of powdered sugar adds a touch of elegance for special occasions.
Savory Accompaniments
While traditionally enjoyed with sweet accompaniments, gipfeli also pair beautifully with savory elements:
- Thinly sliced prosciutto or smoked salmon
- Soft-boiled eggs and fresh herbs
- Creamy spreads like herb-infused cream cheese
- Light salads with a simple vinaigrette
Beverage Pairings
The ideal beverages to serve with gipfeli include:
- Swiss hot chocolate for a traditional pairing
- Strong coffee or espresso to balance the buttery richness
- Black tea with a splash of milk
- For special occasions, a glass of prosecco or champagne creates a festive breakfast
Remember that gipfeli are best enjoyed fresh from the oven or within a few hours of baking when their texture is at its peak.
Recipe Variations
The classic butter gipfeli provides a perfect canvas for creativity. Here are delicious variations to explore once you’ve mastered the basic recipe.
Sweet Adaptations
Transform your gipfeli into delightful sweet treats with these variations:
- Chocolate Gipfeli: Place a piece of high-quality dark or milk chocolate at the wide end of each triangle before rolling.
- Almond Gipfeli: Brush the shaped dough with egg wash, then sprinkle with sliced almonds before baking.
- Cinnamon Sugar: After baking, brush warm gipfeli lightly with melted butter and roll in cinnamon sugar for a churro-inspired treat.
- Fruit-Filled: Add a small amount of thick fruit preserves before rolling, being careful not to overfill.
Savory Variations
For a more substantial offering, try these savory adaptations:
- Cheese Gipfeli: Sprinkle grated Gruyère or Emmental cheese over the dough before shaping.
- Ham and Cheese: Layer thin slices of ham and cheese before rolling for a complete breakfast in one bite.
- Herb Butter: Incorporate finely chopped fresh herbs into softened butter before using it for lamination.
- Pesto Swirl: Spread a thin layer of basil pesto on the dough before cutting and shaping.
Seasonal Specialties
Swiss bakeries often offer seasonal variations of gipfeli throughout the year:
- Christmas Gipfeli: Add warming spices like cinnamon, nutmeg, and cloves to the dough, perhaps with a touch of orange zest.
- Easter Variations: Slightly sweeten the dough and add vanilla for a festive spring version.
- Autumn Harvest: Incorporate pumpkin puree and spices into the dough for a fall-inspired variation.
- Summer Berries: Serve plain gipfeli with macerated seasonal berries and a dollop of whipped cream.
Dietary Adaptations
With some adjustments, gipfeli can be made to accommodate various dietary needs:
- Vegan: Replace butter with high-quality plant-based butter alternatives and use plant milk instead of dairy. Brush with plant milk instead of egg wash.
- Whole Grain: Substitute up to half of the white flour with whole wheat flour for a more rustic, nutty flavor.
Storage & Reheating Guide
Properly storing your freshly baked gipfeli ensures you can enjoy their delicious flavor and texture even days after baking.
Short-Term Storage (Same Day)
For optimal freshness, enjoy your gipfeli the same day they’re baked. If you need to store them for a few hours, simply place them in a paper bag at room temperature. This method preserves their crisp exterior while preventing them from drying out too quickly.
Medium-Term Storage (1-3 Days)
To keep gipfeli fresh for up to three days:
- Allow them to cool completely to room temperature
- Wrap each gipfeli individually in aluminum foil or plastic wrap
- Store in an airtight container in the refrigerator
- Keep away from strong-smelling foods as pastries easily absorb odors
Long-Term Storage (Up to 1 Month)
For longer storage:
- Wrap completely cooled gipfeli individually in plastic wrap
- Place wrapped pastries in a freezer-safe bag or container
- Label with the date
- Store in the freezer for up to one month
Reheating Methods
To restore your gipfeli to their fresh-baked glory:
Oven Method (Preferred)
- Preheat your oven to 350°F (180°C)
- For refrigerated gipfeli: Warm for 5-8 minutes
- For frozen gipfeli: Thaw at room temperature for 30 minutes, then heat for 7-10 minutes
- For extra crispness, unwrap during the final 2 minutes of heating
Toaster Oven Method
- Preheat to 350°F (180°C)
- Wrap gipfeli in aluminum foil to prevent drying
- Heat for 3-5 minutes until warmed through
Avoid microwaving gipfeli as this makes them soggy and ruins their flaky texture.
Troubleshooting Guide
Even experienced bakers encounter challenges when making gipfeli. Here are solutions to common problems:
Butter Leaking During Baking
- Cause: Underproofed dough or improper lamination
- Solution: Ensure your shaped gipfeli are properly proofed until visibly puffy and slightly increased in size. They should wobble slightly when the baking sheet is gently shaken.
Dough Resisting When Rolling
- Cause: Gluten development causing tension in the dough
- Solution: If the dough shrinks back when rolling, cover it and let it rest in the refrigerator for 15-20 minutes before continuing. Never force resistant dough as this damages the butter layers.
Dense Texture Instead of Flaky Layers
- Cause: Overhandling the dough or butter too warm during lamination
- Solution: Use minimal pressure when rolling, work quickly, and return dough to the refrigerator if it becomes too soft. The butter should remain visible in streaks but not leak out during folding.
Uneven Baking or Browning
- Cause: Inconsistent dough thickness or oven hot spots
- Solution: Roll dough to even thickness and rotate baking sheets halfway through baking. Consider using an oven thermometer to verify temperature accuracy.
Gipfeli Not Rising Properly
- Cause: Insufficient proofing or damaged lamination
- Solution: Allow adequate proofing time (30-60 minutes) until pastries are visibly puffy. Handle dough gently during shaping to preserve layers.
Common Mistakes
Avoid these pitfalls to achieve perfect gipfeli every time:
Using Volume Instead of Weight Measurements
Precision matters in laminated pastries. Always use a kitchen scale for accurate measurements, especially for flour and butter.
Working with Incorrect Butter Temperature
Butter should be cold but pliable. If too cold, it will crack and break through the dough; if too warm, it will be absorbed into the dough instead of creating distinct layers.
Rushing the Process
Gipfeli require patience. Skipping resting periods between folds prevents proper gluten relaxation and results in tough pastries with fewer layers.
Overhandling the Dough
Excessive handling warms the butter with body heat. Use light, gentle pressure when rolling and shaping to preserve the integrity of your layers.
Improper Proofing
Both underproofing and overproofing lead to poor results. Underproofed gipfeli leak butter and remain dense; overproofed ones collapse and become bread-like.
Using Regular Butter
Standard butter has lower fat content than European-style butter. For best results, use high-fat (82%+) European-style butter that creates more distinct layers.
Fun Facts & Trivia
The word “gipfeli” comes from the Swiss German word “Gipfel,” meaning “peak” or “summit” – a reference to their pointed shape that resembles the Swiss Alps. This linguistic connection beautifully ties the pastry to Switzerland’s iconic landscape.
While modern gipfeli are made with yeast, historical versions dating back to the 17th century used a simpler water-flour-butter dough without leavening. The addition of yeast came later as baking techniques evolved across Europe.
The average Swiss person consumes approximately 70-80 gipfeli per year, making them one of the most popular breakfast items in Switzerland. In Swiss cities, it’s common to see people picking up fresh gipfeli on their morning commute.
Gipfeli played a role in Switzerland’s industrial revolution, as these portable pastries provided a convenient breakfast for factory workers. Their popularity grew as urbanization increased and more people needed quick, on-the-go morning meals.
The lamination technique used in gipfeli creates between 27 and 81 alternating layers of dough and butter, depending on how many folds are performed. Each fold triples the number of layers, creating that signature flaky texture.
In Swiss bakeries, gipfeli are traditionally made by hand rather than with automated equipment, even in larger operations. Many Swiss bakers consider the hand-folding process essential to creating authentic texture and appearance.
Final Summary and Call to Action
Mastering the art of Swiss gipfeli brings a piece of Alpine culinary tradition right into your kitchen. These golden, flaky crescents represent more than just a delicious breakfast pastry – they embody the Swiss dedication to craftsmanship and quality that has made their baking traditions world-renowned. While the process may seem intimidating at first, the step-by-step approach in this recipe breaks it down into manageable stages that even novice bakers can follow.
The magic of homemade gipfeli lies in the process itself – the meditative rhythm of folding and rolling, the anticipation as they proof, and finally, the incomparable aroma that fills your home as they bake. There’s something deeply satisfying about creating these buttery layers from scratch, knowing you’re participating in a centuries-old baking tradition.
I encourage you to set aside a weekend morning to try this recipe. Start early, embrace the process, and don’t rush – good things come to those who wait, and perfectly flaky gipfeli are definitely worth waiting for. Take photos of your creation and share them on social media with #HomemadeGipfeli – I’d love to see how yours turn out!
For those who fall in love with the process, consider exploring other laminated pastries like kouign-amann or pain au chocolat, which use similar techniques. Or experiment with the variations suggested in this recipe to create your own signature gipfeli.
Remember, baking is both science and art – precision matters, but so does the joy of creation. Whether your first batch is picture-perfect or has room for improvement, you’ll have embarked on a rewarding culinary journey that connects you to Swiss baking heritage. So heat up that oven, chill that butter, and prepare to delight in the simple pleasure of a perfectly flaky, homemade Swiss gipfeli.
For more recipes, visit my Facebook page.
Frequently Asked Questions
Q: What’s the difference between gipfeli and croissants?
A: While both are crescent-shaped laminated pastries, gipfeli are typically denser and crispier than French croissants. Swiss gipfeli have a more pronounced buttery flavor, slightly less leavening, and are often smaller in size. The lamination technique is similar, but gipfeli dough usually contains a bit more sugar, giving them a subtle sweetness that distinguishes them from their French cousins.
Q: Can I make gipfeli dough ahead of time?
A: Absolutely! In fact, making the dough ahead often improves flavor development. After completing the final fold in the lamination process, you can refrigerate the dough for up to 24 hours before shaping. For longer storage, freeze the laminated dough (tightly wrapped) for up to one month. Thaw overnight in the refrigerator before shaping and proofing.
Q: Why did my butter leak out during baking?
A: Butter leakage typically occurs when the dough wasn’t properly proofed or the oven temperature was too low. Ensure your shaped gipfeli have proofed until visibly puffy (30-60 minutes depending on room temperature) and that your oven is fully preheated to 400°F (200°C) before baking. Also, make sure your butter remains cold but pliable throughout the lamination process.
Q: Can I use all-purpose flour instead of bread flour?
A: While bread flour is preferred for its higher protein content (which creates better structure), all-purpose flour can work in a pinch. If using all-purpose flour, you may need to reduce the liquid slightly and expect a somewhat less chewy texture. For the best compromise, try using a blend of 75% all-purpose and 25% bread flour if you can’t find pure bread flour.
Q: How can I make gipfeli without dairy?
A: For dairy-free gipfeli, substitute the butter with a high-quality plant-based butter alternative that’s designed for baking (look for options with at least 75% fat content). Replace milk with unsweetened almond, oat, or soy milk. Be aware that plant-based alternatives may behave differently during lamination, so keep the dough extra cold throughout the process.
Q: Why aren’t my gipfeli flaky?
A: Lack of flakiness usually stems from improper lamination technique. Ensure you’re completing three full turns with proper chilling between each turn. Work with cold but pliable butter, and avoid overworking the dough which can damage the layers. Also, check that you’re using high-fat butter (at least 82% fat) as lower-fat butters contain more water, which creates steam rather than distinct layers.
Comments are closed.