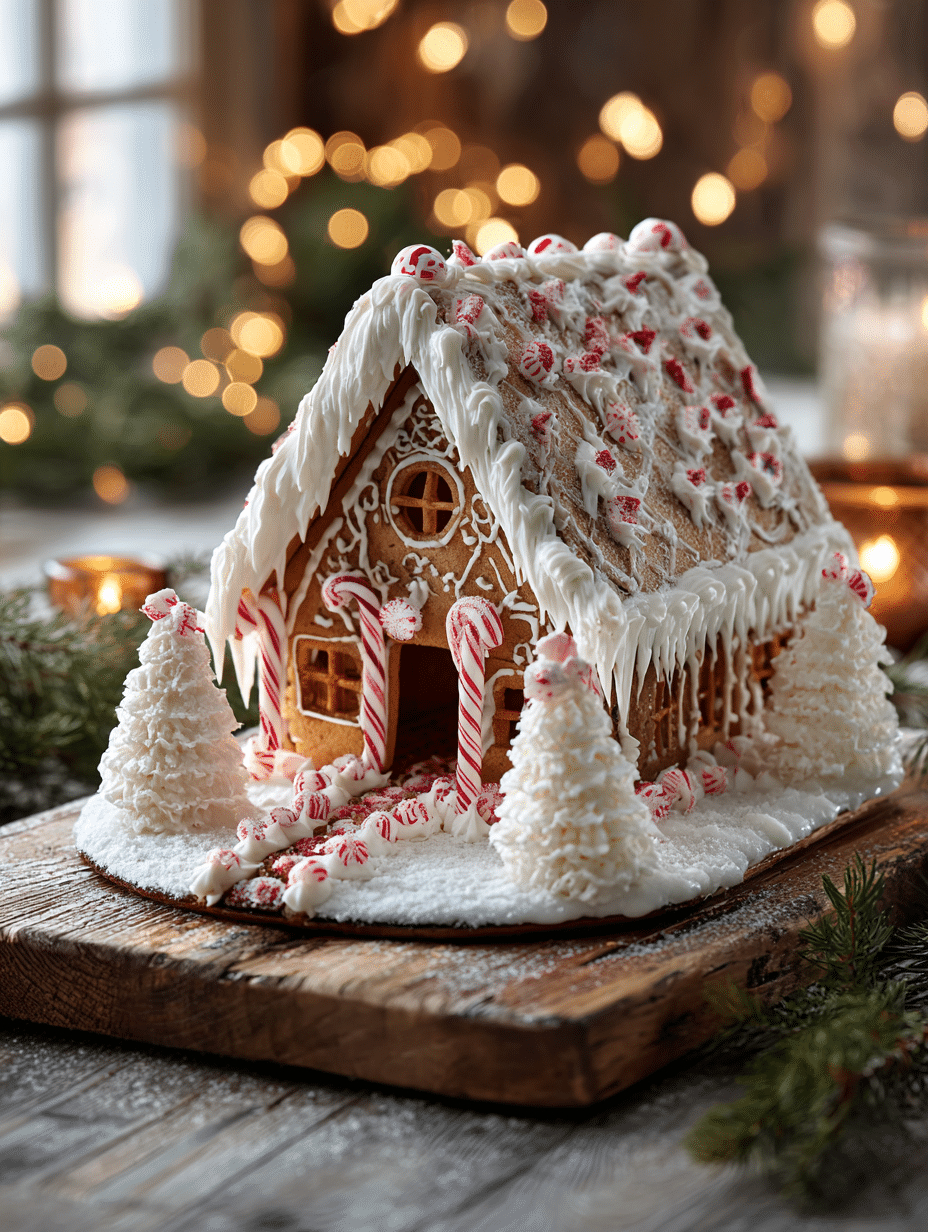
Creating a homemade gingerbread house is one of the most magical holiday baking traditions you can share with family and friends. This complete gingerbread house recipe walks you through every step, from mixing the perfectly spiced dough to assembling and decorating your edible masterpiece. Whether you’re an experienced baker or trying this Christmas classic for the first time, you’ll find everything you need to build a stunning gingerbread house that’s worthy of your holiday table.
Table of Contents
Why This Gingerbread House Recipe Works
This isn’t just any gingerbread recipe it’s specifically designed for construction. The dough bakes thick and sturdy, holding its shape without warping or crumbling. The combination of molasses, brown sugar, and warm spices creates that authentic gingerbread flavor we all love during the holidays. Plus, you’ll get a free printable template that takes the guesswork out of cutting your pieces to the right size.
The secret to success? Royal icing acts as incredibly strong “glue” that holds your house together, while the crusting buttercream creates beautiful snow-like decorations that look professional and taste delicious.
Essential Ingredients for Your Gingerbread House
For the Gingerbread Dough
| Ingredient | Amount | Purpose |
|---|---|---|
| All-purpose flour | 3 cups (375g) | Structure and body |
| Baking soda | 1/4 teaspoon | Slight rise and texture |
| Ground ginger | 2 teaspoons | Classic spiced flavor |
| Ground cinnamon | 2 teaspoons | Warmth and aroma |
| Ground allspice | 1/2 teaspoon | Depth of flavor |
| Salt | 1/4 teaspoon | Flavor enhancement |
| Unsalted butter | 6 Tablespoons (85g) | Richness and texture |
| Brown sugar | 3/4 cup (150g) | Sweetness and moisture |
| Large egg | 1 | Binding agent |
| Molasses | 1/2 cup (120ml) | Deep flavor and color |
| Water | 1 Tablespoon (15ml) | Moisture balance |
For the Royal Icing (The “Glue”)
Royal icing is non-negotiable for gingerbread house construction. It dries rock-hard, creating a stable structure that holds all your pieces together. You’ll need egg whites or meringue powder mixed with confectioners’ sugar and a touch of lemon juice.
For the Crusting Buttercream
| Ingredient | Amount |
|---|---|
| Shortening | 1/2 cup (95g) |
| Unsalted butter | 1/2 cup (113g) |
| Confectioners’ sugar | 4 cups (480g) |
| Milk | 2 Tablespoons (30ml) |
| Vanilla extract | 1/4 teaspoon |
| Salt | 1/8 teaspoon |
Step-by-Step Instructions
Preparing the Dough
- Mix dry ingredients: Whisk together flour, baking soda, ginger, cinnamon, allspice, and salt in a large bowl. This ensures even spice distribution throughout your dough.
- Cream butter and sugar: Beat softened butter with brown sugar until completely smooth and creamy, about 2 minutes. This creates the foundation for your cookie texture.
- Add wet ingredients: Beat in the egg, molasses, and water on high speed. Scrape down the bowl to ensure everything combines evenly.
- Combine: Slowly mix dry ingredients into wet ingredients on low speed. The dough will be very thick this is exactly what you want for sturdy construction pieces.
- Chill: Divide dough in half, flatten into 4-5 inch discs, wrap tightly in plastic wrap, and refrigerate for at least 2 hours or up to 3 days.
Cutting and Baking
- Roll between parchment: This is crucial! Gingerbread dough sticks to counters even when floured. Roll chilled dough between two pieces of parchment paper to 1/4 inch thickness.
- Cut shapes: Print the free template, lightly flour the underside, and cut dough using a pizza cutter or knife. You need TWO of each piece for a complete house.
- Bake properly: Arrange on lined baking sheets 3 inches apart. Bake house pieces for 18-20 minutes, chimney pieces for 12-13 minutes, until edges are lightly browned.
- Cool flat: Let pieces cool completely on a flat surface to prevent edges from curling.
Assembly
- Build the base: Start with the front piece and one side piece. Apply thick royal icing lines along edges, press to your base, and prop up with clips or cans while the icing sets.
- Complete walls: Add remaining side and back pieces one at a time, allowing each to partially set before adding the next.
- Attach roof: Run thick royal icing lines on roof edges and where the two pieces meet at the top. Hold in place until set.
- Add chimney (optional): Assemble chimney pieces separately upside-down, let set, then attach to roof with royal icing.
- Wait: Allow the entire structure to set for at least 3-6 hours or overnight before decorating.
Decorating
- Make buttercream: Beat shortening and butter until creamy, add confectioners’ sugar, milk, vanilla, and salt. Beat on high for 3 minutes until thick and fluffy.
- Decorate: Use buttercream, royal icing, and candies to bring your house to life. A small star piping tip creates beautiful snow-like textures.
Pro Tips for Success
Use parchment paper: Gingerbread dough is sticky. Rolling between parchment prevents frustration and ensures even thickness.
Don’t skimp on royal icing: Apply generous amounts at all seams. When it dries, it looks like snow and creates an incredibly strong bond.
Let it set completely: Patience is key. Rushing the assembly will lead to collapsed walls and disappointment.
Choose sturdy candies: Gumdrops, peppermints, candy canes, and chocolate chips work beautifully. Avoid candies that melt easily.
Store properly: Once decorated, your gingerbread house can be displayed at room temperature for 1-2 weeks. After that, it becomes stale but remains decorative.
Best Candy Decorations
- Roof shingles: Necco wafers, gum squares, or overlapping M&Ms
- Windows: Yellow hard candies or pretzel sticks as panes
- Door: Graham cracker piece or rectangular chocolate bar
- Pathway: White Chiclets or flat peppermints
- Landscaping: Green gumdrops as bushes, pretzel sticks as trees
- Snow: Shredded coconut or white sanding sugar
Frequently Asked Questions
Can I make the gingerbread pieces ahead of time?
Absolutely! Baked and cooled gingerbread pieces can be made up to 1 week in advance. Store tightly covered at room temperature or in the refrigerator. They also freeze beautifully for up to 3 months just thaw at room temperature before assembling.
Why did my gingerbread house collapse?
The most common reason is not allowing the royal icing to set completely between assembly steps. Each section needs at least 1 hour to partially set, and the entire structure needs 3-6 hours before decorating. Also ensure you’re using enough royal icing at all seams.
Can I use blackstrap molasses?
No, blackstrap molasses is too bitter and strong for this recipe. Use unsulphured or dark molasses for the best flavor. Grandma’s brand is highly recommended.
Is the gingerbread house edible?
Yes! The gingerbread, royal icing, buttercream, and candies are all completely edible. However, the house tastes best within the first few days. After that, it makes a beautiful decoration but may be too stale to enjoy eating.
What if I don’t have a piping bag?
You can use a zip-top plastic bag with the corner snipped off for applying royal icing and buttercream. For more precision, invest in a squeeze bottle for royal icing and disposable piping bags for buttercream.
Can kids help with this project?
Definitely! Kids love decorating gingerbread houses. Adults should handle the baking and initial assembly, then let children unleash their creativity with candy decorations. It’s a wonderful holiday tradition that creates lasting memories.
Make This Holiday Tradition Your Own
Building a gingerbread house from scratch is more than just a baking project it’s a cherished holiday tradition that brings families together. The process of mixing spiced dough, carefully assembling walls, and decorating with colorful candies creates memories that last far longer than the house itself.
This recipe gives you a sturdy, reliable structure that won’t collapse halfway through decorating. The free printable template removes the guesswork, and the detailed instructions guide you through every step. Whether you’re creating a simple cottage or an elaborate winter wonderland scene, you’ll have the foundation for success.
Ready to start your gingerbread house tradition? Gather your ingredients, print your template, and prepare for hours of festive fun. Your kitchen will smell amazing, your family will create beautiful memories, and you’ll have a stunning centerpiece for your holiday celebrations. Happy baking!
PrintHow to Make a Gingerbread House from Scratch
Creating a homemade gingerbread house is one of the most magical holiday baking traditions. This complete recipe includes perfectly spiced gingerbread dough, royal icing “glue,” crusting buttercream, and a free printable template for construction. Perfect for Christmas celebrations and family traditions.
- Prep Time: 30 minutes
- Cook Time: 20 minutes
- Total Time: 6 hours (including chilling and setting)
- Yield: 1 gingerbread house
- Category: Dessert
- Method: Baking
- Cuisine: American
- Diet: Vegetarian
Ingredients
3 cups (375g) all-purpose flour (spooned & leveled)
1/4 teaspoon baking soda
2 teaspoons ground ginger
2 teaspoons ground cinnamon
1/2 teaspoon ground allspice
1/4 teaspoon salt
6 Tablespoons (85g) unsalted butter, softened to room temperature
3/4 cup (150g) packed light or dark brown sugar
1 large egg, at room temperature
1/2 cup (120ml) unsulphured or dark molasses (do not use blackstrap)
1 Tablespoon (15ml) water
Royal icing (for assembly)
Assorted candies for decoration
CRUSTING BUTTERCREAM:
1/2 cup (95g) shortening, at room temperature
1/2 cup (8 Tbsp; 113g) unsalted butter, softened
4 cups (480g) confectioners’ sugar
2 Tablespoons (30ml) milk
1/4 teaspoon pure vanilla extract
1/8 teaspoon salt
Instructions
1. Print gingerbread house template and cut out shapes. Set aside.
2. Whisk flour, baking soda, ginger, cinnamon, allspice, and salt in a large bowl.
3. Beat butter and brown sugar until smooth and creamy (2 minutes). Beat in egg, molasses, and water. Scrape bowl and combine.
4. Slowly mix dry ingredients into wet ingredients on low speed. Dough will be very thick.
5. Divide dough in half, flatten into 4-5 inch discs, wrap tightly in plastic, and chill 2 hours or up to 3 days.
6. Preheat oven to 350°F (177°C). Line 2-3 baking sheets with parchment paper.
7. Roll chilled dough between two pieces of parchment paper to 1/4 inch thickness. Lightly flour template shapes and cut dough with pizza cutter or knife. You need TWO of each shape. Re-roll scraps.
8. Arrange shapes on baking sheets 3 inches apart. Straighten edges if needed.
9. Bake house pieces 18-20 minutes, chimney pieces 12-13 minutes, until edges are lightly browned. Cool completely on flat surface.
10. Construct base: Run thick royal icing line on edges of side piece, stick to base, prop up. Add front piece with royal icing on bottom edge, adhering to side. Hold and prop until partially set. Repeat with remaining walls. Pipe royal icing in all seams. Let set 1 hour.
11. Add roof: Run thick royal icing on edges of roof pieces, adhere to base one at a time. Pipe icing where roof pieces meet at top. Hold in place.
12. Optional chimney: Assemble chimney pieces upside-down with royal icing. Let set, then adhere to roof.
13. Let entire house set 3-6 hours or overnight before decorating.
14. Make buttercream: Beat shortening and butter 2 minutes. Add confectioners’ sugar, milk, vanilla, and salt. Beat on low 30 seconds, then high 3 minutes until thick.
15. Decorate with buttercream, royal icing, and candies using piping tips and creativity!
Notes
Gingerbread pieces can be made 1 week ahead and stored covered at room temperature or refrigerated. They freeze for up to 3 months.
Always roll dough between parchment paper to prevent sticking.
Don’t skimp on royal icing—it’s the glue that holds everything together.
Allow adequate setting time between assembly steps for best results.
Use sturdy candies like gumdrops, peppermints, M&Ms, and candy canes for decoration.
Decorated house can be displayed at room temperature for 1-2 weeks.