Table of Contents
Table of Contents
Frosted Cookies: A Sweet Treat That’s Pure Nostalgia
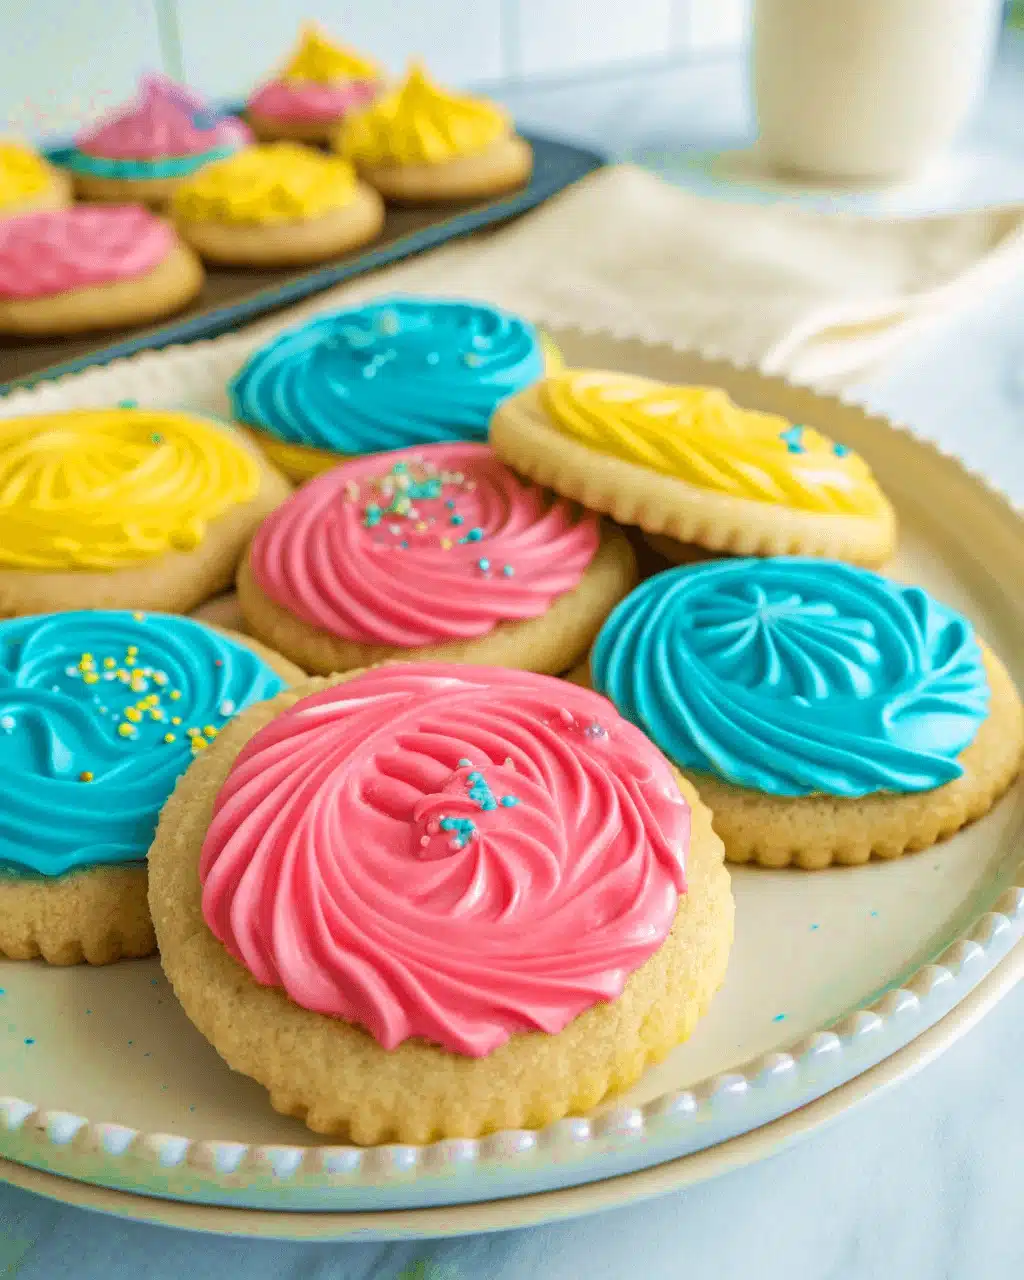
There’s something magical about biting into a soft frosted cookie. The sweet snap of icing. The tender crumb underneath. The colors, the sprinkles, the sense that you’re about to enjoy something made just for you. Frosted cookies don’t just taste good, they feel good.
In this article, we’ll dive into what makes frosted cookies so beloved, how to make cookie frosting, and why brands like Lofthouse cookies have become iconic. We’ll also share simple techniques for frosting cookies at home and highlight the difference between store-bought and homemade options.
So pour a glass of milk, and let’s explore the frosted cookie world from a Southern kitchen that knows a thing or two about baking with love.
The Story & Intro: Why Frosted Cookies Always Steal the Show
A Memory You Can Taste
Back in Madison, Georgia, every church bake sale and school birthday party had one guaranteed hit: a big tray of soft frosted cookies. They weren’t fancy, but they disappeared faster than anything else. Kids loved the icing. Adults loved the nostalgia. And I loved how just one cookie could turn an ordinary afternoon into something sweet and worth remembering.
My favorite version was a vanilla sugar cookie with thick pink frosting and rainbow sprinkles. It was simple, colorful, and somehow always perfect with a cold drink or hot coffee. These memories led me to develop my own frosted cookie recipe, combining that soft-bake texture with homemade buttercream icing that stays just firm enough to stack.
If you’re someone who loves cookies like toll house classics or the sweet tang of lemon cookies, you’ll find that frosted cookies add another layer of joy and creativity to your baking.
What Makes a Frosted Cookie So Special?
Unlike crisp or chewy cookies, frosted cookies aim to be tender and soft, almost cake-like. The frosting, whether it’s a whipped vanilla or colored glaze, adds texture, sweetness, and visual flair. Each bite delivers a contrast that’s both satisfying and fun.
And while you can find frosted cookies in every grocery store, the homemade versions are unmatched. They allow you to adjust the flavor, the thickness of the icing, and even the style of decoration. Whether you’re making them for a birthday, holiday tray, or just a Tuesday, they’re endlessly adaptable.
PrintFrosted Cookies: 7 Irresistible Recipes for Sweet Joy

Soft frosted cookies made from scratch, topped with creamy buttercream and colorful sprinkles. Easy, fun, and delicious for all ages.
- Prep Time: PT20M
- Cook Time: PT10M
- Total Time: PT30M
- Yield: 24 cookies
- Category: Dessert
- Method: Baking
- Cuisine: American
- Diet: Vegetarian
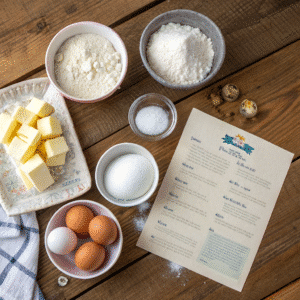
Ingredients
2 ½ cups all-purpose flour
1 teaspoon baking powder
½ teaspoon salt
¾ cup unsalted butter, softened
¾ cup granulated sugar
1 large egg
1 tablespoon sour cream
1 teaspoon vanilla extract
Frosting:
1 cup powdered sugar
2 tablespoons butter, softened
1 tablespoon milk
½ teaspoon vanilla extract
Optional: food coloring and sprinkles
Instructions
Step 1: Preheat the oven to 350°F and line a baking sheet with parchment paper.
Step 2: In a bowl, whisk together flour, baking powder, and salt. Set aside.
Step 3: In another bowl, beat the butter and sugar until light and fluffy.
Step 4: Add the egg, sour cream, and vanilla extract to the butter mixture. Mix well.
Step 5: Gradually add the dry ingredients to the wet mixture and stir until a dough forms.
Step 6: Cover the dough and refrigerate for 30 minutes.
Step 7: Scoop the dough into balls, flatten slightly, and place on the baking sheet.
Step 8: Bake for 9 to 11 minutes or until the edges are set. Let cool completely.
Step 9: In a bowl, mix powdered sugar, butter, vanilla, and milk until smooth. Add food coloring if desired.
Step 10: Frost the cookies and decorate with sprinkles. Let set for 30 minutes before serving or storing.

Notes
Let cookies cool completely before frosting.
Store in an airtight container at room temperature for up to 5 days.
Freeze unfrosted cookies for up to 1 month.
How to Make Frosted Cookies from Scratch
Frosted cookies may look like bakery-level creations, but they’re surprisingly easy to make at home. With a soft cookie base and simple frosting ingredients, you can create your own version that’s every bit as sweet, soft, and beautiful as store-bought, if not better.
How Do I Make Cookie Frosting?
Start with the basics. A classic cookie frosting requires just a few ingredients: powdered sugar, butter, vanilla extract, and a splash of milk or cream. For a glossy glaze, skip the butter and use corn syrup or lemon juice instead.
Here’s a simple buttercream-style frosting that works beautifully on frosted cookies:
- 1 cup powdered sugar
- 2 tablespoons unsalted butter, softened
- 1 tablespoon milk (add more if needed)
- ½ teaspoon vanilla extract
- Food coloring and sprinkles, optional
Mix everything in a bowl until smooth. You want a thick but spreadable consistency. Too thin, and it will drip off the cookie. Too thick, and it won’t spread evenly. Adjust with more milk or sugar as needed.
If you prefer a thinner glaze, use 2 tablespoons of corn syrup instead of butter and thin with milk to reach the desired texture. This version dries shiny and firm.
For more cookie inspiration, try these soft-centered lemon cookies or dive into toll house cookies for a deeper flavor base.
How Do You Frost a Cookie?
Frosting a cookie doesn’t require fancy tools. Start by cooling the cookies completely. Warm cookies will melt your frosting and make a mess.
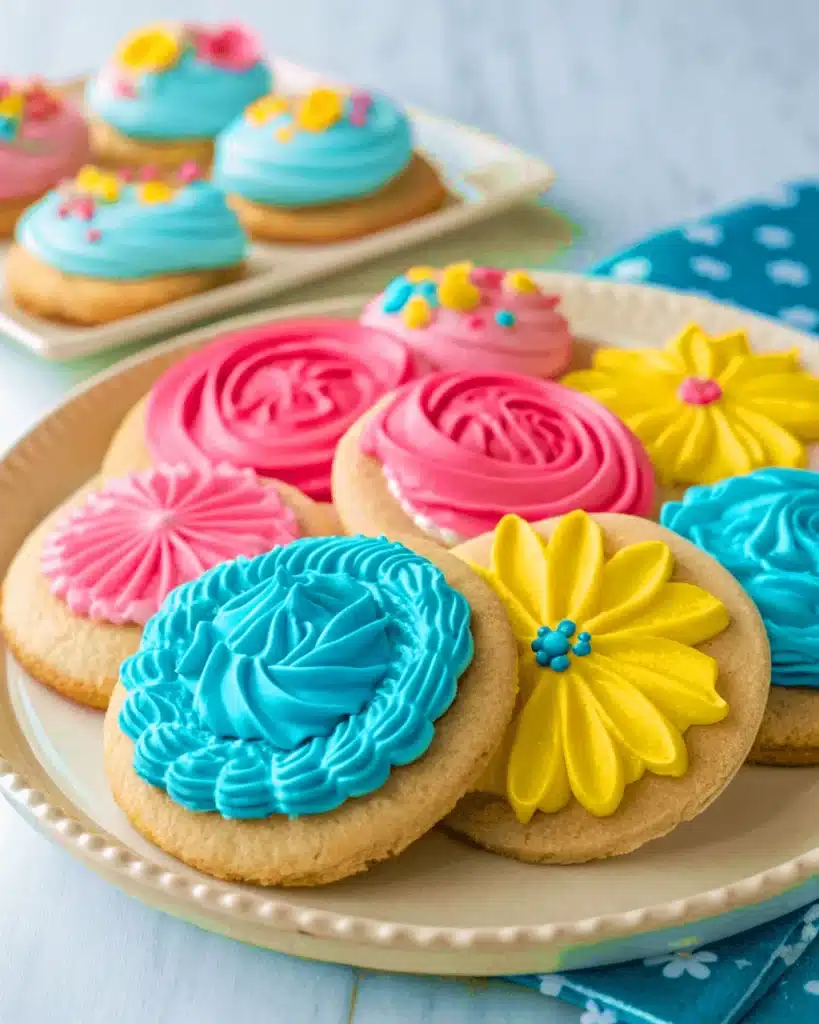
Use a butter knife or offset spatula to spread frosting in a circular motion from the center outward. If you’re using a piping bag, go slow and keep the pressure even. Want that bakery swirl? Use a star tip and spiral from the outside in.
Add sprinkles right after frosting. This helps them stick before the top crust forms. Then let your cookies set for 20 to 30 minutes before stacking or serving. If you’re making a large batch, place wax paper between layers to prevent sticking.
Why Frosted Cookies Are So Popular
Frosted cookies aren’t just sweet treats. They’re a celebration in every bite. Whether they’re made at home, picked up from a bakery, or grabbed in a grocery store, there’s something irresistible about the combination of soft dough and creamy icing. But what really sets them apart is how they make people feel.
Why Are Lofthouse Cookies So Good?
Lofthouse cookies are one of the most recognized brands when it comes to frosted cookies. You’ll find them in nearly every supermarket bakery section, stacked in clear containers and topped with pastel icing and sprinkles.
So what makes them so good? Texture. Lofthouse cookies have a unique soft-bake texture that almost feels like cake. That lightness is often due to the use of sour cream or a whipped dough that holds moisture longer than traditional cookies. The icing is sweet and smooth, not too thick, and always generously applied.
The nostalgia factor also plays a big role. For many, Lofthouse cookies were the party treat of choice in school or a lunchbox reward. They carry emotional value, which only boosts their appeal. But while the store-bought version has its place, homemade frosted cookies offer even more versatility and freshness.
If you’re a fan of dessert nostalgia, pair your homemade version with ice cream cake or layer them with strawberry shortcake ice cream for a playful dessert spread.
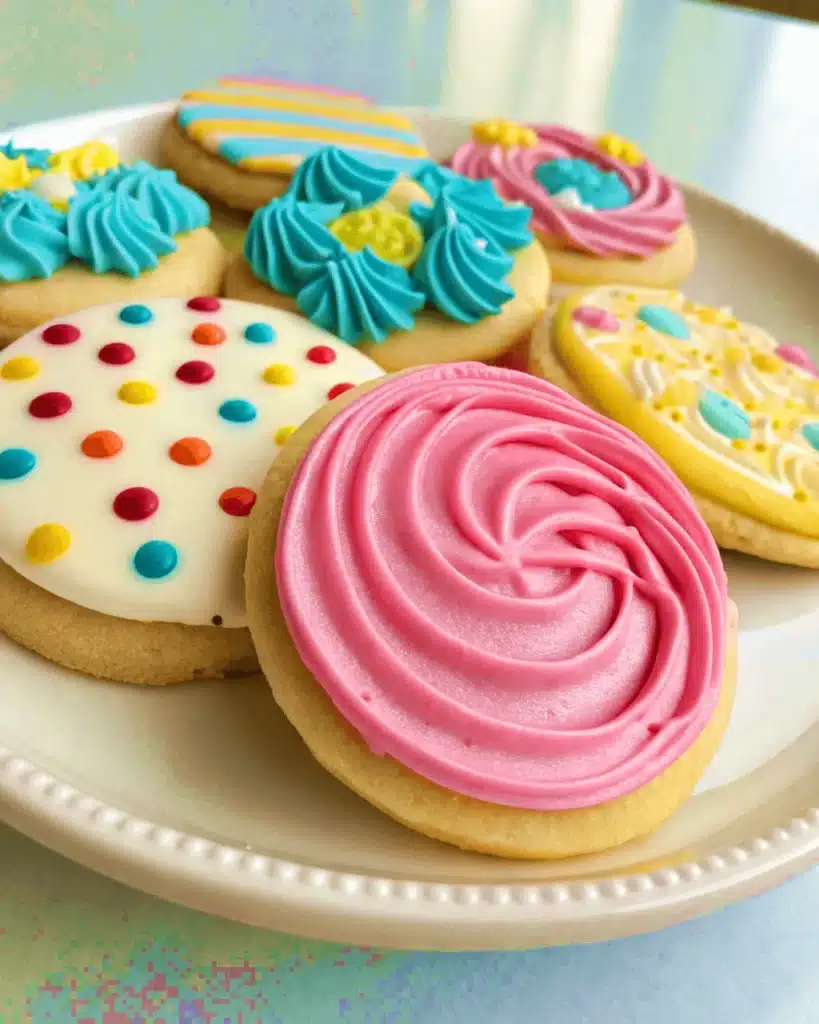
Frosted Cookies as a Creative Outlet
Beyond flavor, frosted cookies are fun to decorate. They become edible canvases. From seasonal themes to personalized messages, they allow bakers of all levels to express themselves with color and style.
They’re also perfect for making with kids. You can set up a frosting station, provide sprinkles in every shape, and let everyone decorate their own. Whether for birthdays, holidays, or just a weekend project, frosted cookies turn into memorable moments.
Frosted Cookies FAQs Answered
Curious about the best ways to make, frost, and enjoy these colorful treats? Here are the most frequently asked questions about frosted cookies, answered clearly to help you bake with confidence.
Q: How Do I Make Cookie Frosting?
A: To make frosting for cookies, you only need powdered sugar, softened butter, vanilla extract, and a splash of milk. Beat the ingredients until smooth and creamy. For a firm, glossy finish, you can substitute butter with corn syrup or use a mix of lemon juice and sugar for a tangy glaze.
Add food coloring for festive designs and adjust the texture with more sugar to thicken or more milk to thin. If you’re new to homemade frosting, start with a basic buttercream and work from there.
You can pair your homemade icing with soft sugar cookies or even cake mix cookie bars for a sweet shortcut.
Q: Is Frosted Cookies a Sativa or Indica?
A: This question refers to a cannabis strain called “Frosted Cookies,” which has nothing to do with actual baked cookies. That version is a hybrid strain with indica and sativa lineage, known for its calming effects. But here, we’re focused on the kind of frosted cookies you eat, not smoke. No confusion. Just sugar, butter, and love.
Q: How Do You Frost a Cookie?
A: Always let cookies cool before frosting. Use a spatula or piping bag depending on the design you want. For a smooth, spreadable finish, use buttercream. For detailed piping or writing, go with royal icing or a thick glaze. Add sprinkles immediately after frosting so they stick well.
Let cookies dry for 30 minutes before stacking or storing. This helps set the icing and keeps your frosted cookies looking clean and polished.
Want inspiration for flavor pairings? Try frosting cookies alongside a bowl of creamy banana pudding or serve them beside fruity desserts for balance.
Q: Why Are Lofthouse Cookies So Good?
A: Lofthouse cookies are known for their soft, cake-like texture and sweet vanilla frosting. Their signature look, soft feel, and nostalgic charm make them hard to resist. But many bakers recreate the Lofthouse experience at home with even better results.
Homemade frosted cookies give you more control over the texture, sweetness, and toppings. Plus, they don’t come with preservatives, and they can be made fresh in under an hour.
Conclusion
Frosted cookies are more than a dessert. They’re a bite of joy, a canvas for creativity, and a connection to simple moments we all remember. Whether you’re baking them from scratch or upgrading store-bought favorites, there’s something deeply satisfying about a soft cookie topped with a swirl of sweet frosting.
You don’t need a special occasion to enjoy them. You just need a little time, a few ingredients, and the willingness to make something beautiful and delicious. From the first step of mixing dough to the final touch of sprinkles, frosted cookies invite you to play, share, and savor.
If you’ve ever loved a Lofthouse-style cookie, or wondered how to recreate that magic at home, now you know it’s totally doable. Try them with a side of 7 Crumbl cookie secrets for even more baking fun, or tuck a few in with a scoop of ice cream for the ultimate sweet plate.
In my kitchen, these cookies remind me that joy can come in small packages. And when they’re frosted, sprinkled, and made with love, they’re even better.
Article updated 22 June 2025.
For more recipes, visit my Facebook page.