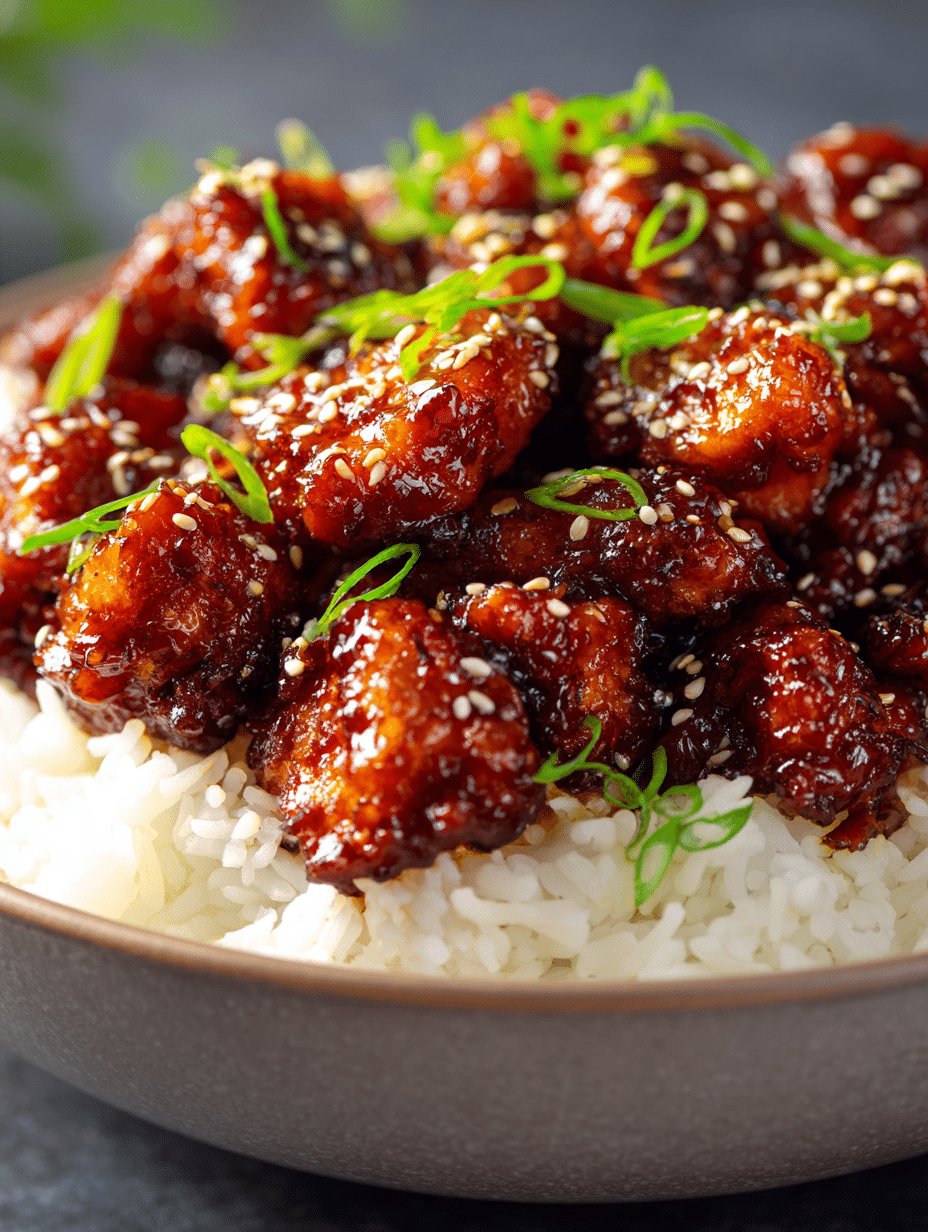
If you’re after a lightning-fast, flavor-packed meal, you need to try this Easy Teriyaki Chicken recipe! This post may contain affiliate links. Please read our disclosure policy.
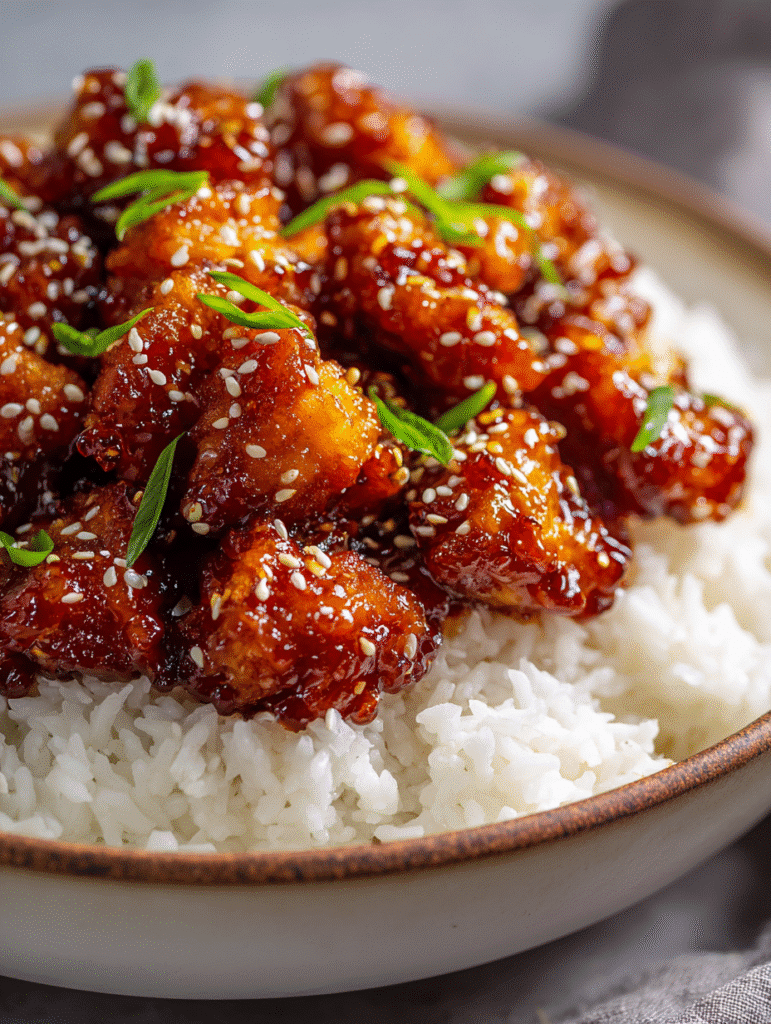
There’s nothing better than whipping up a homemade chicken dish that’s sweet, savory, and perfectly glazed all in less than 30 minutes. This Easy Teriyaki Chicken uses classic Asian flavors and easy-to-find pantry staples, making it perfect for busy weeknights. With tender chicken breast pieces tossed in a glossy, flavorful teriyaki sauce, this dish will quickly become a go-to in your household.
Not only does this recipe tick all the boxes for a quick dinner idea, but it also works beautifully for meal prep, lunchboxes, and whenever you crave a fuss-free but impressive chicken meal.
Table of Contents
Why You’ll Love This Teriyaki Chicken
- 30-minute total prep and cook time
- Family-friendly flavors
- Effortless pantry ingredients
- Versatile serving: over rice, noodles, or veggies
Let’s get cooking!
Ingredients Table
| Ingredient | Amount | Notes |
|---|---|---|
| Chicken breasts | 2 | Cut into 1-inch pieces |
| Garlic powder | 1/2 teaspoon | |
| Pepper | To taste | |
| Cornstarch | 3 tablespoons | For coating chicken |
| Olive oil | 3 tablespoons | Divided |
| Brown sugar | 1/4 cup (packed) | Sauce ingredient |
| Fresh ginger | 1 teaspoon (grated) | Sauce ingredient |
| Garlic | 2 cloves (minced) | Sauce ingredient |
| Mirin | 3 tablespoons | See note |
| Soy sauce | 2 tablespoons | Sauce ingredient |
| Rice vinegar | 1 teaspoon | or apple cider vinegar |
| Water | 1/2 cup | Sauce ingredient |
| Cornstarch | 1 tablespoon | For sauce |
| Scallions & sesame seeds | To taste | Optional garnish |
Equipment You’ll Love
- Skillet
- Chef’s knives for prepping chicken and veggies
- Measuring cups and spoons set
- Mixing bowls
- Cutting board
See more must-have kitchen gear below!
Step-by-Step Instructions
1. Make the Teriyaki Sauce
In a small bowl, whisk together the brown sugar, grated ginger, minced garlic, mirin, soy sauce, rice vinegar, water, and 1 tablespoon cornstarch until smooth.
2. Prep the Chicken
Cut chicken breasts into 1-inch chunks. Place in a bowl, sprinkle with garlic powder and pepper, and toss to coat. Add 3 tablespoons cornstarch and mix until the chicken is evenly dusted.
3. Sear the Chicken
Add 2 tablespoons olive oil to a hot skillet over medium-high heat (using a quality skillet ensures even cooking – check out our favorite here). Cook chicken in 2 separate batches to avoid crowding. Sear for 4 minutes, flip, and cook another 3–4 minutes until edges are golden and meat is cooked through to 165F. Add the remaining tablespoon of olive oil for the second batch if needed.
4. Combine and Finish
Return all the chicken to the skillet. Pour in the prepared sauce and bring to a gentle bubble. Stir as the sauce thickens and glazes the chicken in about 1 minute.
5. Serve
Dish the teriyaki chicken over hot rice or steamed veggies, and garnish with chopped scallions and sesame seeds.
Tips for Success
- Cut your chicken evenly for consistent cooking.
- Sear in batches for the crispiest texture.
- If you’re short on time, use a food processor for quick veggie prep.
- Leftovers keep well for up to 3 days perfect for meal prep!
- Use low-sodium soy sauce if you’re watching your salt intake.
Equipment Section
Below are some kitchen tools that make this recipe even easier:
- Air fryer: For a crispier, oil-free teriyaki chicken.
- Thermomix: Quick sauce blending and chicken shredding.
- Oven: Ideal for baking if you prefer hands-off cooking.
- Electric mixer
- Food processor
- Pots
- Frying pans
- Kitchen utensils
- Cutting board
- Chef’s knives
- Measuring cups and spoons set
- Mixing bowls
- Blender
- Baking sheets
- Electric can opener
- Colander strainer basket
- Peeler
- Meat tenderizer
- Garlic press
- Rolling pin
- Steamer insert
- Weight kitchen scale
Frequently Asked Questions: Easy Teriyaki Chicken
Can I use chicken thighs instead of breasts?
Yes, boneless, skinless chicken thighs work perfectly and add extra juiciness.
What can I use instead of mirin?
If you don’t have mirin, try dry sherry, rice wine vinegar (with a pinch of sugar), or apple juice as a substitute.
Is this recipe meal-prep friendly?
Absolutely! Store leftovers in the fridge and reheat for a quick lunch or dinner.
Can I bake this teriyaki chicken?
Yes, after tossing the chicken in cornstarch and seasonings, you can spread it on a baking sheet and bake at 400°F for about 15–18 minutes until cooked through, then toss with sauce.
PrintEasy Teriyaki Chicken: The Ultimate 30-Minute Dinner Solution
A fast, family-friendly Easy Teriyaki Chicken made with everyday pantry ingredients and tossed in a sweet, sticky homemade sauce. Ready in 30 minutes for a perfect weeknight meal!
- Prep Time: 10 minutes
- Cook Time: 20 minutes
- Total Time: 30 minutes
- Yield: 4 servings
- Category: Dinner
- Method: Stovetop
- Cuisine: Asian
Ingredients
2 chicken breasts, cut into 1″ pieces
1/2 teaspoon garlic powder
Pepper, to taste
3 tablespoons cornstarch
3 tablespoons olive oil, divided
Garnish (optional): chopped scallions & sesame seeds to taste
Sauce Ingredients:
1/4 cup brown sugar (packed)
1 teaspoon grated fresh ginger
2 cloves garlic, minced
3 tablespoons mirin
2 tablespoons soy sauce
1 teaspoon rice vinegar (or apple cider vinegar)
1/2 cup water
1 tablespoon cornstarch
Instructions
1. Add the sauce ingredients to a small bowl and whisk together.
2. Cut the chicken into about 1″ pieces and add it to another bowl. Add the garlic powder and pepper and stir until coated, then add the cornstarch and stir again to coat.
3. Add 2 tablespoons of oil to a skillet. Let it heat for a few minutes over medium-high heat. Cook the chicken in 2 batches (don’t crowd the pan). Cook the chicken for 4 minutes and then flip and cook for another 3-4 minutes until browned and cooked through (165F). Transfer chicken to plate.
4. For the second batch, add another tablespoon of olive oil to the pan. Once done, return all chicken to the skillet.
5. Stir in the teriyaki sauce and let it bubble for 1 minute until thickened. Serve immediately over rice, garnish with scallions & sesame seeds.
Notes
Cut chicken evenly for best results.
Cook in batches for optimal browning.
Store leftovers in a sealed container in the fridge for up to 3 days.
If you found this recipe helpful, feel free to check out the kitchen equipment below. Click on any image to view and purchase the product through our Amazon affiliate links at no extra cost to you. Your support helps us keep Deliciousavors.com running and bringing you great recipes!