This post may contain affiliate links. Please read our disclosure policy.
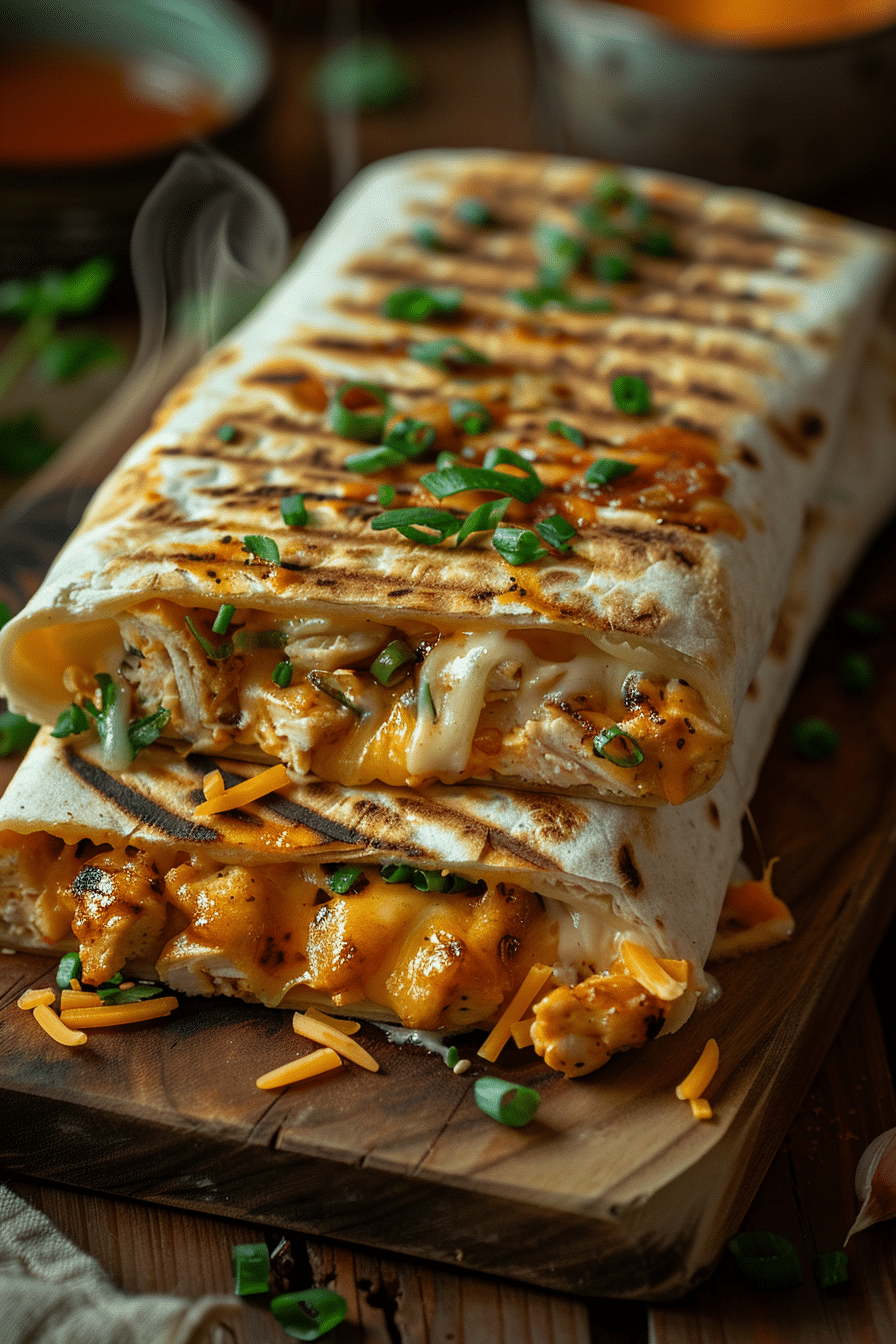
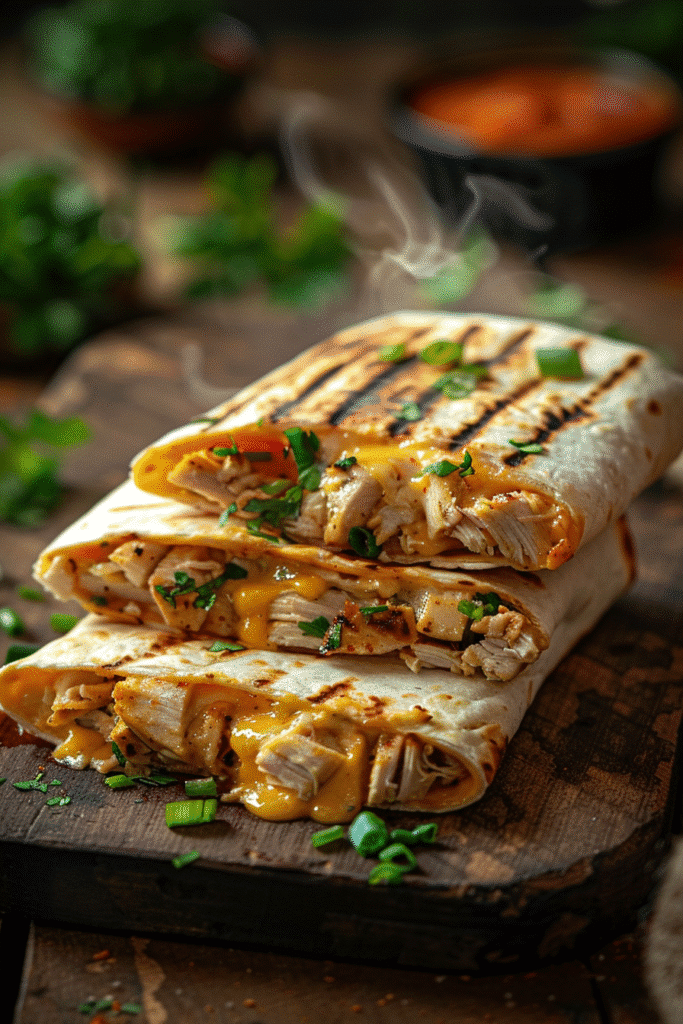
Looking for quick dinner ideas that won’t leave you stuck in the kitchen for hours? These Cheesy Garlic Chicken Wraps are about to become your new favorite easy weeknight dinner! Packed with tender chicken, gooey melted cheese, and bold garlic flavor, these wraps are crispy on the outside, warm and cheesy on the inside, and ready in just 15 minutes. Whether you’re searching for dinner ideas for family meals, lazy dinners after a long day, or kid friendly dinners that everyone will actually eat, this recipe checks all the boxes. Plus, it’s budget-friendly and uses simple ingredients you probably already have on hand!
Table of Contents
Why You’ll Love These Cheesy Garlic Chicken Wraps
These wraps are the ultimate solution for busy weeknights when you need dinner on the table fast. They’re incredibly versatile use leftover rotisserie chicken or any cooked chicken you have, swap the cheese for your favorite variety, and adjust the garlic and hot sauce to your taste. The best part? They’re cooked in a frying pan until perfectly crispy, giving you that satisfying crunch with every bite. This is one of those dinner dishes that feels indulgent but is actually quite simple to make.
If you’re looking for cheap dinners for a family, this recipe is a winner. With just a handful of affordable ingredients, you can feed the whole crew without breaking the bank. And because it comes together so quickly, it’s perfect for those nights when you need supper ideas that don’t require a lot of planning or prep work.
Ingredients You’ll Need
Here’s everything you need to make these delicious wraps:
| Ingredient | Amount | Notes |
|---|---|---|
| Large tortillas | 2 | Regular or low-carb/high-protein options work great |
| Cooked chicken | 7 oz (200g) | Rotisserie chicken is perfect for this recipe |
| Garlic cloves | 2 | Minced or grated; adjust to your preference |
| Light mayonnaise | 2 tablespoons | Adds creaminess to the filling |
| Light Greek yogurt | 1 tablespoon | Can substitute with plain yogurt |
| Hot sauce | 2 teaspoons | Frank’s RedHot recommended |
| Salt | ¼ teaspoon | Season to taste |
| Grated cheese | 3 oz (90g) | Cheddar blend works beautifully |
| Green onion | 1 | Chopped for fresh flavor |
| Olive oil spray | As needed | For crisping the wraps |
You can easily prep your ingredients using essential kitchen utensils like a good chef’s knife and a sturdy cutting board. If you’re working with fresh garlic, a garlic press makes quick work of mincing.
Step-by-Step Instructions
Step 1: Prepare the Chicken Mixture
In a mixing bowl, combine the chopped cooked chicken, minced garlic, light mayonnaise, Greek yogurt, hot sauce, and salt. Mix everything together until well combined. The mixture should be creamy and evenly coated. If you’re using a rotisserie chicken, simply chop or shred the meat it’s already perfectly seasoned and juicy.
Step 2: Assemble Your Wraps
Lay out your tortillas on a clean surface. On the lower third of each tortilla, sprinkle about 2 tablespoons of grated cheese. This creates a melty base for your filling. Next, add about ⅔ cup of the chicken mixture on top of the cheese. Top with another tablespoon of cheese and a generous sprinkle of chopped green onion. The layering technique ensures every bite has that perfect cheese-to-chicken ratio!
Step 3: Fold and Roll
Fold in the left and right sides of the tortilla toward the center, then roll it up tightly from the bottom, burrito-style. Rolling it tightly ensures your wrap stays together while cooking and makes it easier to eat. Don’t worry if it takes a try or two to get the hang of it you’ll be a wrap-rolling pro in no time!
Step 4: Cook Until Golden and Crispy
Heat a non-stick frying pan over medium-high heat and spray it with olive oil. Place your wraps seam-side down in the pan this helps seal them shut as they cook. Cook for 3-4 minutes per side until the tortillas are crispy and golden brown. Cover the pan with a lid during cooking to help heat the inside thoroughly and melt all that delicious cheese. The result? A perfectly crispy exterior with a warm, gooey, cheesy center.
Step 5: Slice and Serve
Remove the wraps from the pan and let them cool for just a minute or two. Then slice each wrap in half diagonally and serve immediately. These wraps are best enjoyed hot and fresh when the cheese is still melty and the tortilla is at peak crispiness!
Helpful Tips for Perfect Wraps Every Time
- Use room temperature tortillas: Cold tortillas from the fridge are more likely to crack when you fold them. Let them sit at room temperature for a few minutes before assembling.
- Don’t overfill: While it’s tempting to pack in as much filling as possible, overfilling makes the wraps difficult to roll and more likely to burst while cooking.
- Adjust the heat: If your pan is too hot, the outside will burn before the inside heats through. Medium-high heat with a lid is the sweet spot.
- Make it your own: Add diced bell peppers, jalapeños, or even some crispy bacon for extra flavor and texture.
- Meal prep friendly: You can assemble these wraps ahead of time, wrap them in foil, and store them in the fridge for up to 2 days. When you’re ready to eat, just cook them in your frying pan as directed.
Recipe Variations
Spicy Kick: Double the hot sauce or add diced jalapeños to the chicken mixture for extra heat.
Veggie Boost: Add shredded lettuce, diced tomatoes, or sliced avocado after cooking for a fresh crunch.
Different Proteins: Swap the chicken for cooked turkey, pulled pork, or even seasoned black beans for a vegetarian option.
Cheese Options: Try pepper jack for spice, mozzarella for a milder flavor, or a Mexican cheese blend for authentic flair.
Frequently Asked Questions
Q: Can I use a different type of tortilla?
A: Absolutely! Whole wheat, spinach, sun-dried tomato, or low-carb tortillas all work wonderfully. Choose whatever fits your dietary preferences.
Q: How do I store leftovers?
A: Store cooked wraps in an airtight container in the refrigerator for up to 2 days. Reheat in a frying pan over medium heat or in an air fryer at 350°F for 3-4 minutes until crispy again.
Q: Can I freeze these wraps?
A: Yes! Wrap them individually in foil and store in a freezer-safe bag for up to 2 months. Thaw in the refrigerator overnight before reheating.
Q: What can I serve with these wraps?
A: These wraps pair beautifully with a simple side salad, sweet potato fries, tortilla chips with salsa, or fresh fruit. Keep it light since the wraps are already quite filling!
Q: Can I make these in an air fryer?
A: Definitely! Spray the wraps with olive oil and cook in your air fryer at 375°F for 6-8 minutes, flipping halfway through, until golden and crispy.
Why This Recipe Works for Busy Families
When you’re juggling work, kids, and everything in between, healthy dinner ideas that come together quickly are essential. These Cheesy Garlic Chicken Wraps deliver on flavor, nutrition, and convenience. The protein from the chicken keeps everyone satisfied, while the garlic adds a flavor punch that makes this more than just another boring wrap. It’s one of those dinner ideas recipes that you’ll find yourself making on repeat because it’s just that easy and that good.
For parents looking for kid friendly dinners, this recipe is a home run. Kids love the cheesy, mild flavor, and you can easily adjust the garlic and hot sauce to suit younger palates. Serve it with their favorite dipping sauce like ranch or extra hot sauce on the side for adults, and everyone’s happy!
Essential Kitchen Equipment
Having the right tools makes cooking these wraps even easier. Here’s what I recommend:
- Frying Pan: Essential for getting that perfect crispy exterior
- Mixing Bowls: For combining your chicken mixture
- Chef’s Knife: Makes chopping chicken and green onions a breeze
- Cutting Board: A sturdy surface for all your prep work
- Kitchen Utensils: Spatulas and spoons for mixing and flipping
- Garlic Press: Optional but makes garlic prep so much faster
- Measuring Cups and Spoons Set: For accurate measurements every time
Final Thoughts
These Cheesy Garlic Chicken Wraps are proof that quick dinner ideas don’t have to be complicated or boring. With just 15 minutes and a handful of simple ingredients, you can create a meal that’s satisfying, delicious, and perfect for any night of the week. Whether you’re feeding a hungry family, meal prepping for the week ahead, or just looking for easy weeknight dinners that actually taste good, this recipe has you covered.
The beauty of this recipe lies in its simplicity and versatility. You can customize it to your family’s tastes, make it ahead for busy nights, and feel good about serving a homemade meal that everyone will love. So next time you’re stuck wondering what to make for dinner, remember these wraps they’re quick, they’re tasty, and they’re about to become your new go-to dinner solution!
PrintEasy Cheesy Garlic Chicken Wraps Recipe : Quick 15-Minute Dinner Idea
These Cheesy Garlic Chicken Wraps are the perfect quick weeknight dinner! Packed with tender chicken, melted cheese, and bold garlic flavor, these crispy wraps are ready in just 15 minutes. A family-friendly meal everyone will love!
- Prep Time: 5
- Cook Time: 10
- Total Time: 15
- Yield: 2
- Category: Main Course
- Method: Pan-Fried
- Cuisine: American
Ingredients
2 large tortillas (regular or low-carb/high-protein)
7 oz cooked chicken (about 200 grams, chopped – rotisserie is great)
2 garlic cloves (minced or grated, adjust to taste)
2 tablespoons light mayonnaise
1 tablespoon light Greek yogurt or plain yogurt
2 teaspoons hot sauce (like Frank’s)
¼ teaspoon salt
3 oz grated cheese (about 90 grams – cheddar blend works great)
1 green onion (chopped)
Olive oil spray
Instructions
1. In a bowl, mix chopped chicken, garlic, mayonnaise, yogurt, hot sauce, and salt.
2. Lay out your wrap. On the lower third of the tortilla, sprinkle about 2 tablespoons of cheese, then top with about ⅔ cup of the chicken mixture. Add another tablespoon of cheese and a sprinkle of green onion.
3. Fold in the sides of the tortilla, then roll it up tightly from the bottom.
4. Heat a non-stick pan over medium-high. Spray with olive oil.
5. Place wraps seam-side down. Cook for 3–4 minutes per side until crispy and golden. Cover with a lid to help heat the inside.
6. Slice in half and serve!
Notes
Room temperature tortillas fold better without cracking.
Don’t overfill the wraps or they’ll be difficult to roll.
You can assemble these ahead and store in the fridge for up to 2 days before cooking.
To reheat leftovers, use a pan or air fryer to restore crispiness.
Adjust garlic and hot sauce to your family’s taste preferences.
If you found this recipe helpful, feel free to check out the kitchen equipment below. Click on any image to view and purchase the product through our Amazon affiliate links at no extra cost to you. Your support helps us keep Deliciousavors.com running and bringing you great recipes!