If you’ve been scrolling through Pinterest looking for healthy breakfast ideas that are both nutritious and Instagram-worthy, your search ends here. Baked Protein Pancake Bowls are taking the breakfast world by storm, and for good reason. These fluffy, protein-packed bowls combine the comfort of traditional pancakes with the convenience of meal prep, all while delivering serious nutrition. Whether you’re a fitness enthusiast, busy professional, or simply someone who loves delicious morning meals, this recipe will transform your breakfast routine.
Table of Contents
What Are Baked Protein Pancake Bowls?
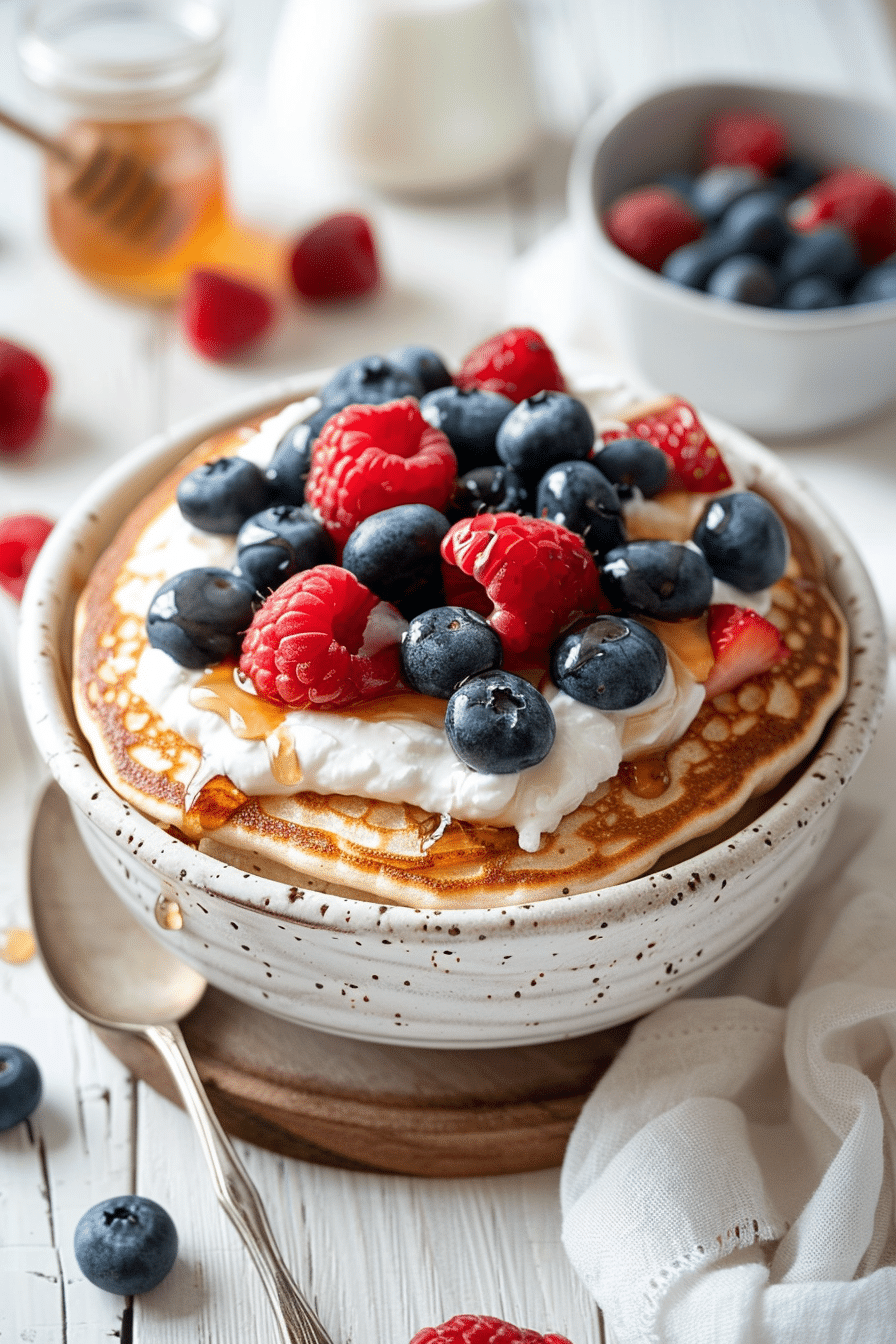
Baked Protein Pancake Bowls are exactly what they sound like – fluffy pancake batter baked directly in individual oven-safe bowls. Unlike traditional stovetop pancakes that require constant attention and flipping, these beauties bake hands-free in your oven while you get ready for your day. The result? A perfectly cooked, protein-rich breakfast that’s portion-controlled, customizable, and absolutely delicious.
The magic lies in the simplicity. With just six basic ingredients – egg, yogurt, milk, flour, protein powder, and baking powder – you create a batter that transforms into a fluffy, cake-like texture in the oven. The addition of protein powder not only boosts the nutritional profile but also creates that signature dense-yet-fluffy texture that makes these bowls so satisfying.
Why You’ll Love This Recipe
High-Protein Nutrition
Each bowl delivers over 20 grams of protein, making it perfect for post-workout recovery, weight management, or simply staying full until lunch. The combination of whole egg, Greek yogurt, milk, and protein powder creates a complete amino acid profile that supports muscle maintenance and keeps hunger at bay.
Meal Prep Friendly
Unlike traditional pancakes that lose their magic when reheated, these baked bowls are ideal for meal prep. Make a batch of 4-6 bowls on Sunday, refrigerate them, and you’ll have grab-and-go breakfasts all week long. Simply reheat in the microwave for 45-60 seconds, and you’re good to go.
Incredibly Versatile
The beauty of this recipe is its versatility. Keep the base plain and change up your toppings throughout the week, or mix different ingredients directly into the batter before baking. From sweet to savory, the possibilities are endless.
Time-Saving
With just 22 minutes of baking time and minimal prep, you can have multiple breakfasts ready simultaneously. No standing over a hot griddle, no flipping required – just mix, bake, and enjoy.
Ingredients Breakdown
| Ingredient | Amount | Purpose |
|---|---|---|
| Egg | 1 large | Provides structure and protein |
| Yogurt (vanilla or plain) | 50g | Adds moisture, tang, and protein |
| Milk | 70ml | Creates the right batter consistency |
| All-purpose flour | 35g | Provides structure and fluffiness |
| Protein powder | 25g | Boosts protein content and flavor |
| Sweetener | 5g (1 tsp) | Balances flavors without excess sugar |
| Baking powder | 1/2 tsp | Creates that fluffy rise |
Ingredient Tips and Substitutions
Protein Powder: Vanilla or white chocolate flavored protein works best for a neutral sweet base. This recipe was tested with vegan protein powder, but whey protein works perfectly – just reduce the liquid slightly as whey absorbs less moisture.
Milk: Any milk works here. Soy, almond, oat, dairy, or cashew milk all yield delicious results. Choose based on your dietary preferences.
Yogurt: Greek yogurt provides the most protein, but regular yogurt, skyr, or even cottage cheese (blended smooth) work beautifully.
Sweetener: Zero-calorie granulated sweetener keeps calories low, but regular sugar, honey, maple syrup, or even mashed banana can replace it.
Flour: All-purpose flour is standard, but whole wheat flour, oat flour, or almond flour can be substituted for different nutritional profiles.
Step-by-Step Instructions
Preparation (5 minutes)
- Preheat your oven to 180°C (356°F). This temperature ensures even cooking without burning the edges.
- Select your oven-safe bowls. Glass or ceramic bowls work best. Each bowl should hold approximately 1.5-2 cups of liquid.
- Gather all ingredients and measure them accurately for best results.
Mixing the Batter (2 minutes)
- Add ingredients directly to your oven-safe bowl in this order: egg first (break the yolk), then yogurt, milk, flour, protein powder, sweetener, and baking powder.
- Mix thoroughly using a fork or small whisk until no lumps remain and the batter is smooth. The consistency should resemble thick pancake batter – pourable but not runny.
Meal Prep Tip: If making multiple bowls, add ingredients to each bowl separately rather than making one large batch. This ensures even distribution and prevents the baking powder from activating prematurely.
Adding Toppings (1 minute)
- Choose your toppings and add them now if you want them baked into the pancake bowl:
- Fresh or frozen berries
- Sugar-free chocolate chips
- Sliced bananas
- Shredded carrots or zucchini for savory versions
- Chopped nuts or seeds
- Cinnamon and apple pieces
Alternatively, keep the batter plain and add toppings after baking for more variety.
Baking (20-22 minutes)
- Place bowls on a baking sheet for easy handling and to catch any overflow.
- Bake for 20-22 minutes until the center is set and springs back when lightly touched. The edges should be golden brown, and a toothpick inserted in the center should come out clean.
- Check for doneness at the 20-minute mark. Oven temperatures vary, so adjust accordingly.
Cooling and Serving (5-10 minutes)
- Remove from oven carefully – the bowls will be hot! Use oven mitts.
- Let cool for 5-10 minutes. This allows the pancake bowl to set properly and makes it easier to eat without burning your mouth.
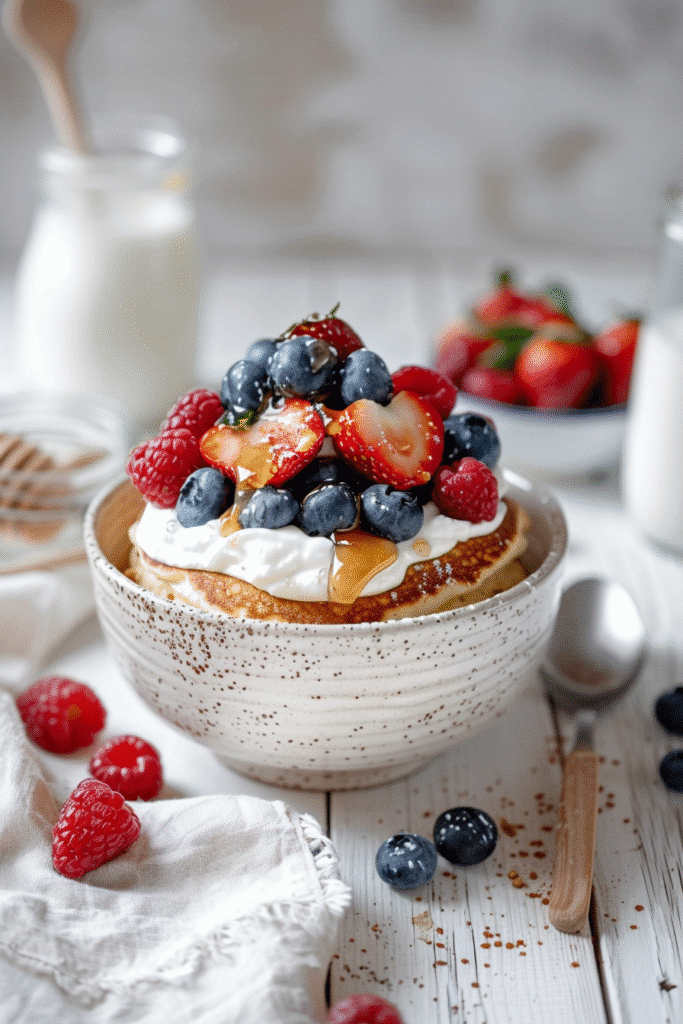
- Add final toppings: Extra yogurt, peanut butter drizzle, maple syrup, butter, fresh fruit, granola, or anything your heart desires.
Pro Tips for Perfect Pancake Bowls
Don’t Overmix: Stir until just combined. Overmixing develops gluten and creates tough, rubbery pancakes.
Room Temperature Ingredients: Cold ingredients don’t mix as smoothly. Let your egg and yogurt sit at room temperature for 10 minutes before mixing.
Adjust Consistency: If your batter seems too thick, add a splash more milk. Too thin? Add a teaspoon more flour or protein powder.
Prevent Sticking: Lightly grease your bowls with cooking spray or butter before adding batter, especially if not using glass.
Flavor Variations: Add vanilla extract, cinnamon, cocoa powder, or lemon zest to the batter for flavor variety.
Storage: Refrigerate cooled bowls in airtight containers for up to 5 days. Reheat in microwave for 45-60 seconds.
Creative Topping Ideas
Sweet Options
- Greek yogurt with honey and fresh berries
- Peanut butter, sliced banana, and dark chocolate chips
- Maple syrup with pecans and cinnamon
- Cream cheese frosting and strawberries
- Almond butter with blueberries and hemp seeds
- Nutella and raspberries
Savory Options
- Scrambled eggs, avocado, and hot sauce
- Cream cheese, smoked salmon, and capers
- Sautéed mushrooms and spinach
- Bacon bits, cheddar cheese, and green onions
Nutritional Benefits
Each Baked Protein Pancake Bowl (without toppings) provides approximately:
- Calories: 220-250
- Protein: 20-25g
- Carbohydrates: 25-30g
- Fat: 5-7g
- Fiber: 1-2g
This macronutrient profile makes these bowls ideal for weight management, muscle building, and sustained energy throughout your morning.
FAQ: Baked Protein Pancake Bowls
Can I make these without protein powder?
Yes, but you’ll lose the protein boost. Replace protein powder with equal parts flour and add an extra tablespoon of yogurt for moisture.
Can I freeze these pancake bowls?
Absolutely! Freeze in individual containers for up to 3 months. Thaw overnight in the fridge and reheat.
Why is my pancake bowl rubbery?
This usually happens from overmixing or overbaking. Mix gently and check for doneness at 20 minutes.
Can I make these dairy-free?
Yes! Use plant-based milk and yogurt alternatives, and choose a vegan protein powder.
What size bowls should I use?
Bowls that hold 1.5-2 cups work perfectly. Too small and they’ll overflow; too large and they’ll be flat.
Can I double the recipe in one large bowl?
Yes, but increase baking time to 30-35 minutes and check the center for doneness.
Final Thoughts
Baked Protein Pancake Bowls are more than just a trendy breakfast – they’re a practical solution for anyone seeking nutritious, delicious, and convenient morning meals. With minimal ingredients, simple preparation, and endless customization options, these bowls deserve a permanent spot in your breakfast rotation.
Whether you’re meal prepping for busy weekdays, looking for post-workout fuel, or simply want a cozy weekend breakfast that looks as good as it tastes, this recipe delivers. The combination of protein-packed nutrition and comforting pancake flavor makes it easy to stick to your health goals without feeling deprived.
Ready to transform your breakfast game? Grab your oven-safe bowls and give this recipe a try. Your taste buds (and your muscles) will thank you!
PrintBaked Protein Pancake Bowls: The Ultimate Healthy Breakfast Game-Changer
Fluffy, protein-packed pancake bowls baked in individual oven-safe dishes. Perfect for meal prep, these healthy breakfast bowls deliver over 20g of protein and take just 22 minutes to bake. Customize with your favorite sweet or savory toppings!
- Prep Time: 5
- Cook Time: 22
- Total Time: 27
- Yield: 1
- Category: Breakfast
- Method: Baking
- Cuisine: American
Ingredients
1 large egg
50g yogurt (vanilla or unflavored)
70ml milk (soy, almond, or any milk)
35g all-purpose flour
25g protein powder (vanilla or white chocolate flavor)
5g zero-calorie granulated sweetener (or sweetener of choice, 1 tsp)
1/2 tsp baking powder
Optional toppings: fresh fruit, sugar-free chocolate chips, peanut butter, maple syrup, yogurt
Instructions
1. Preheat oven to 180°C (356°F).
2. Add egg, yogurt, milk, flour, protein powder, sweetener, and baking powder directly to an oven-safe glass or ceramic bowl.
3. Mix all ingredients thoroughly until smooth and well combined with no lumps remaining.
4. If making multiple bowls for meal prep, add ingredients separately to each bowl rather than making one large batch.
5. Add toppings of choice directly to the batter if desired (fresh fruit, sugar-free chocolate chips, shredded carrots, etc.) or keep plain.
6. Place bowl(s) on a baking sheet and bake for 20-22 minutes until the center is set and edges are golden.
7. Remove from oven carefully using oven mitts and let cool for 5-10 minutes.
8. Serve with additional toppings such as extra yogurt, peanut butter, maple syrup, fresh fruit, or butter.
Notes
This recipe uses vegan protein powder. If using whey protein, use slightly less liquid as whey absorbs less moisture.
Any type of milk works: soy, almond, oat, dairy, or cashew milk.
Store cooled bowls in airtight containers in the refrigerator for up to 5 days.
To reheat, microwave for 45-60 seconds.
For freezing, store in individual containers for up to 3 months. Thaw overnight and reheat.
Don’t overmix the batter – stir until just combined for the fluffiest texture.