
Table of Contents
Table of Contents
Difficulty Level: ⭐ Very Easy
Introducing Your New Favorite Citrus Refresher
There’s something magical about the bright, zesty aroma that fills your kitchen when you squeeze fresh limes. That first whiff of citrus oils released from the rind signals the promise of something deliciously refreshing to come. Homemade lime juice delivers a punch of flavor that bottled versions simply can’t match – it’s vibrant, aromatic, and has that perfect balance of tartness that makes your taste buds dance.
Whether you’re mixing up a batch of margaritas for friends, creating a refreshing summer limeade, or adding a splash of brightness to your favorite recipes, fresh homemade lime juice elevates everything it touches. The difference between freshly squeezed and store-bought is immediately noticeable – no preservatives, no artificial flavors, just pure, unadulterated lime goodness.
What makes this homemade lime juice recipe special is its versatility. It serves as the foundation for countless drinks and dishes, from cocktails and mocktails to marinades and desserts. The process is remarkably simple, requiring just a few minutes of your time and some basic equipment you likely already have in your kitchen.
Beyond the incredible flavor, making your own lime juice gives you complete control over what goes into it. No hidden additives or mysterious ingredients – just pure lime juice that you’ve squeezed with your own hands. Plus, there’s something deeply satisfying about transforming a bag of fresh limes into liquid sunshine that can brighten up any recipe.
In this guide, I’ll walk you through everything you need to know about creating perfect homemade lime juice, from selecting the juiciest limes to maximizing your yield with a few simple tricks. I’ll also share storage tips to help your fresh juice last longer and creative ways to use your liquid citrus gold. Let’s dive into the world of homemade lime juice and discover why this simple ingredient deserves a permanent place in your culinary repertoire.
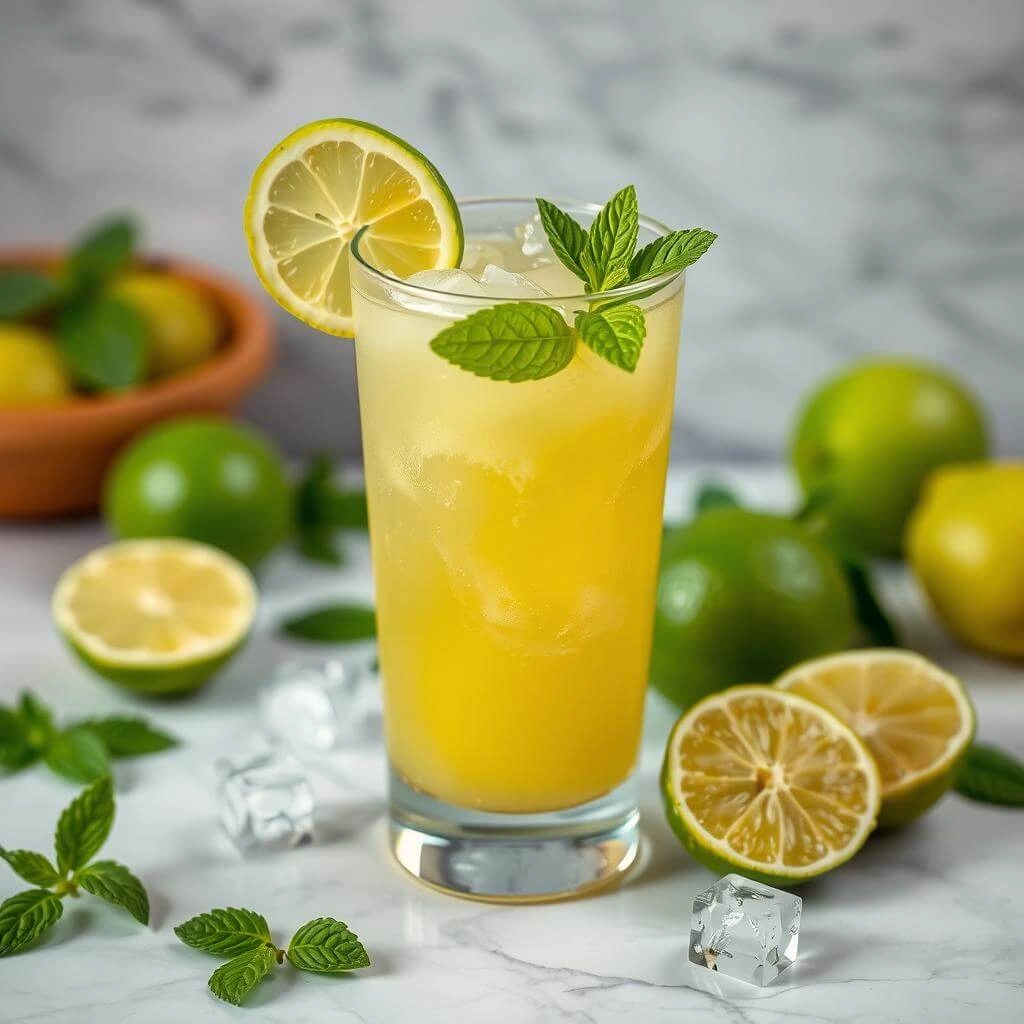
PrintFresh Lime Juice: 5 Amazing Benefits of This Delicious Elixir

Zesty, refreshing, and packed with health benefits—fresh lime juice is more than just a tangy drink. Discover five incredible reasons to make this simple elixir part of your daily routine. Great for hydration, digestion, immunity, and more!
- Prep Time: 10
- Total Time: 10
- Yield: 2 servings
- Category: Beverage
- Method: No-Cook
- Cuisine: International
Ingredients
● 4 fresh limes
● 2 cups cold water
● 1–2 tablespoons honey or agave syrup (optional, to taste)
● Ice cubes (optional)
● Mint leaves (optional, for garnish)
Instructions
● Cut the limes in half and squeeze the juice into a bowl or pitcher.
● Strain the juice to remove seeds and pulp, if preferred.
● Add the cold water and stir well.
● Mix in sweetener if desired.
● Serve over ice and garnish with mint leaves.
Notes
Adjust the sweetness to your taste—fresh lime juice is naturally tart.
For a fizzy twist, substitute water with sparkling water.
Best enjoyed fresh, but can be stored in the refrigerator for up to 2 days.
The Fascinating History of Lime Juice
The story of lime juice is intertwined with maritime history, colonial expansion, and the evolution of global cuisine. In the 18th century, the British Royal Navy made a groundbreaking discovery – consuming citrus fruits could prevent scurvy, a devastating disease caused by vitamin C deficiency that plagued sailors on long voyages. By 1795, lime juice became a mandatory ration for British sailors, earning them the nickname “limeys” that persists to this day.
While lemons were initially used, limes eventually became the preferred citrus fruit due to their availability in British colonies, particularly in the West Indies. The preservation of lime juice became a critical concern, leading to innovations in storage and preservation techniques. In 1867, Lauchlan Rose patented a method to preserve lime juice without alcohol, creating the world’s first commercially produced fruit concentrate – Rose’s Lime Juice. This sweetened lime cordial revolutionized both naval provisions and eventually cocktail culture.
In the tropical regions where limes grow abundantly, the fruit has been a culinary staple for centuries. From the Key limes of Florida to the Persian limes that dominate today’s markets, different varieties have shaped regional cuisines and beverages. In Mexico and throughout Latin America, lime juice is essential in dishes like ceviche, where its acidity “cooks” raw seafood, and in countless beverages from agua fresca to margaritas.
The commercial lime juice industry expanded significantly in the 20th century. Brands like Nellie & Joe’s Famous Key West Lime Juice, founded in 1968, began as a family operation bottling juice in their Key West kitchen using long-necked beer bottles. Today, lime juice is a global commodity, though many bartenders and chefs insist that nothing compares to the brightness and complexity of freshly squeezed juice.
The evolution of lime juice from a scurvy preventative to a culinary essential reflects our enduring appreciation for this versatile citrus. Whether you’re making a classic gimlet with lime cordial or squeezing fresh limes for your homemade guacamole, you’re participating in a rich tradition that spans centuries and cultures.
Full Ingredient List
Creating the perfect homemade lime juice requires quality ingredients that work together to deliver that bright, zesty flavor we all love. Here’s everything you’ll need to make this refreshing citrus elixir:
Primary Ingredients:
- 10-12 medium Persian limes (yields approximately 1 cup of juice)
- Filtered water (optional, for diluting if desired)
For Sweetened Variations:
- 1½ cups granulated sugar (can substitute with 1 cup honey or ¾ cup agave nectar)
- Zest from 6 limes (preferably organic for best flavor and to avoid pesticides)
- ¼ teaspoon citric acid (optional, for preservation and enhanced tanginess)
Quality Specifications:
- Limes: Choose fruits that feel heavy for their size with thin, smooth skin. Persian limes are most common, but Key limes offer a more complex flavor profile if available.
- Water: Filtered water is recommended if diluting, as chlorine can affect the delicate lime flavor.
- Sweeteners: Pure cane sugar works best for traditional cordial, but raw honey provides a more complex flavor with floral notes.
- Citric Acid: Food-grade only, available in most grocery stores in the canning section.
Optional Flavor Enhancers:
- Pinch of sea salt (enhances flavor and reduces bitterness)
- Fresh mint leaves (for infused variations)
- Kaffir lime leaves (for authentic Southeast Asian flavor)
- Ginger (fresh, grated for a warming kick)
The quality of your limes is paramount – always select the freshest, most aromatic fruit available. Organic limes are worth the extra cost if you’ll be using the zest, as conventional limes may have wax coatings or pesticide residues that can affect flavor.
Time Breakdown
Understanding the time commitment helps you plan your lime juice making session efficiently. Here’s a comprehensive breakdown of what to expect:
Total Time: 30-35 minutes (basic recipe) or 12-24 hours (for infused cordial)
Preparation Breakdown:
- Selection & Washing: 5 minutes
- Lime Preparation: 5-10 minutes (rolling, microwaving, bringing to room temperature)
- Juicing Process: 10-15 minutes (depending on quantity and method)
- Straining (if desired): 5 minutes
- Bottling: 5 minutes
Additional Timing Notes:
- If making sweetened cordial, add 5-10 minutes for creating simple syrup
- For zest-infused versions, allow 12-24 hours of refrigeration for optimal flavor development
- Freezing in ice cube trays requires approximately 4 hours until solid
The hands-on time is relatively brief, making this an accessible project even for busy weeknights. Most of the extended time for cordial variations is passive infusion time, requiring no attention from you. For maximum efficiency, prepare your limes while waiting for water to heat if making sweetened variations.
Required Kitchen Equipment
Having the right tools on hand makes the lime juicing process efficient and enjoyable. Here’s what you’ll need to create perfect homemade lime juice:
Essential Equipment:
- Citrus Juicer: The most important tool for this recipe. Options include:
- Hand-held citrus squeezer (recommended for small batches)
- Glass juicer with reamer
- Electric citrus juicer (ideal for large batches)
- Sharp Knife: A good quality chef’s knife or paring knife for cutting limes
- Cutting Board: Preferably with a groove to catch any juice
- Microplane or Zester: Essential if making cordial or using zest
- Fine Mesh Strainer: For removing pulp and seeds if desired
- Glass Storage Containers: Mason jars or flip-top glass bottles work perfectly
Additional Helpful Tools:
- Measuring Cups and Spoons: For precise ingredient measurements
- Funnel: For transferring juice to storage bottles without spills
- Wooden Spoon or Silicone Spatula: For stirring cordial mixtures
- Ice Cube Trays: For freezing excess juice in convenient portions
- Cheesecloth: For ultra-clear strained juice if desired
Budget-Friendly Alternatives:
- No dedicated juicer? Use a fork to help extract juice by hand
- A regular box grater can substitute for a microplane (use the smallest holes)
- Plastic containers can replace glass for short-term storage
- A clean kitchen towel can substitute for cheesecloth
While specialized equipment like electric juicers can make the process faster, they’re not essential. The most important tool is a good quality hand juicer, which is inexpensive and versatile. This single tool will dramatically improve your juice yield compared to squeezing by hand.
For those who make lime juice frequently, investing in a dedicated electric citrus juicer will save significant time and effort, especially when processing larger quantities.
Step-by-Step Preparation
Creating perfect homemade lime juice is a straightforward process that yields bright, zesty results when done correctly. Follow these detailed steps to ensure your lime juice turns out perfectly every time.
1. Prepare Your Limes
Begin by selecting fresh, firm limes with thin, smooth skin. Bring them to room temperature if they’ve been refrigerated, as cold limes yield significantly less juice. Wash them thoroughly under cool running water to remove any dirt, wax, or residue.
2. Maximize Juice Extraction
Roll each lime firmly on your countertop using the palm of your hand. Apply gentle pressure as you roll back and forth several times. This crucial step breaks down the internal membranes of the lime, making it much easier to extract the juice. You’ll feel the lime becoming slightly softer as you work.
3. Heat for Additional Juice
Place your rolled limes in the microwave for 20-30 seconds. This brief heating further loosens the cell walls inside the fruit, allowing for maximum juice extraction. Let the limes cool slightly before handling them to avoid burns.
4. Slice Properly
Using a sharp knife, cut each lime in half crosswise (through the equator) rather than lengthwise. This cutting method exposes more juice cells and makes the squeezing process more effective. You should see the juice already beginning to pool on the cut surface.
5. Extract the Juice
Position each lime half cut-side down in your chosen juicing tool. If using a handheld squeezer, place the cut side facing the holes. Apply firm, even pressure to extract the juice, collecting it in a bowl or measuring cup. For manual juicers, twist the lime against the reamer while pressing down.
6. Apply Proper Technique
For maximum yield, don’t just squeeze once and discard. Instead, rotate the lime slightly and squeeze again, working your way around the fruit. The skin should begin to invert as you extract more juice. A medium lime should yield approximately 2 tablespoons of juice.
7. Strain if Desired
If your recipe requires pulp-free juice, pour the extracted juice through a fine-mesh strainer. Use the back of a spoon to press gently on any pulp to extract additional liquid. For cocktails and clear beverages, straining produces a more refined result.
8. Measure and Use
Measure your freshly squeezed juice according to your recipe requirements. Fresh lime juice is at its flavor peak immediately after juicing, so it’s best to use it right away for the brightest flavor.
9. Store Properly
If not using immediately, transfer your juice to a clean glass container with a tight-fitting lid. Glass is preferred as it won’t absorb the lime flavor or react with the acidic juice. Label with the date if storing for later use.
10. Refrigerate or Freeze
For short-term storage, refrigerate your lime juice at 40°F or below. For longer storage, freeze the juice in ice cube trays (each cube equals approximately 1 tablespoon) and transfer the frozen cubes to freezer bags once solid.
When done correctly, your homemade lime juice will have a vibrant green-yellow color, a bright aroma, and a perfect balance of acidity and sweetness that no store-bought version can match.
Nutritional Information
Understanding the nutritional profile of your homemade lime juice helps you make informed dietary choices. This zesty elixir is surprisingly low in calories while offering significant nutritional benefits.
| Nutrient | Per 1 fl oz (30ml) | Per 1 cup (240ml) |
|---|---|---|
| Calories | 10 | 80 |
| Total Carbohydrates | 2g | 16g |
| Sugars | 1g | 8g |
| Fiber | 0g | 0g |
| Protein | 0g | 0.5g |
| Fat | 0g | 0g |
| Vitamin C | 22% DV | 176% DV |
| Calcium | 2% DV | 16% DV |
| Iron | 2% DV | 16% DV |
| Potassium | 1% DV | 8% DV |
| Vitamin B6 | 2% DV | 16% DV |
| Thiamin | 2% DV | 16% DV |
Fresh lime juice is particularly rich in vitamin C, providing over 20% of your daily needs in just one ounce. This essential nutrient supports immune function, collagen production, and acts as a powerful antioxidant. Lime juice also contains small but beneficial amounts of calcium, potassium, and B vitamins, all while being virtually fat-free and low in calories.
The nutritional content may vary slightly depending on the ripeness and size of the limes used, but homemade juice consistently offers superior nutritional value compared to commercial varieties that may contain preservatives or added sugars.
Allergen Information
While lime juice is generally well-tolerated by most people, it’s important to be aware of potential allergic reactions. Citrus allergies, though relatively uncommon, do exist and can range from mild to severe.
Individuals with known allergies to other citrus fruits such as lemons, oranges, or grapefruits may experience cross-reactivity with limes due to similar protein structures. Those with grass pollen allergies may also experience reactions to lime due to similar proteins.
Common symptoms of lime allergy include itching or tingling in the mouth, hives, rash on skin that has contacted lime juice, swelling of the lips or tongue, and digestive issues. In rare cases, severe reactions like difficulty breathing may occur.
The oils in lime peels contain limonene, which can cause skin irritation in sensitive individuals, especially when exposed to sunlight (phytophotodermatitis). If you experience any unusual symptoms after consuming or handling limes, consult with a healthcare provider for proper diagnosis and guidance.
Safety Precautions
While homemade lime juice offers numerous health benefits, certain safety considerations should be kept in mind during preparation and consumption.
Handling Precautions:
- Always wash limes thoroughly before juicing to remove any pesticides, wax coatings, or contaminants
- Use organic limes when possible, especially if incorporating zest
- Wash hands before and after handling limes to prevent cross-contamination
- Use clean equipment and storage containers to prevent bacterial growth
Consumption Guidelines:
- Limit consumption to juice from no more than three limes daily to avoid potential side effects
- Dilute lime juice with water if you have a sensitive stomach or acid reflux
- Use a straw when drinking lime juice to minimize contact with tooth enamel
- Rinse your mouth with water after consuming lime juice to protect dental health
Special Considerations:
- Those with GERD, acid reflux, or stomach ulcers should consume lime juice in moderation
- Individuals taking certain medications should consult healthcare providers, as lime juice may interact with some drugs
- Avoid applying lime juice directly to skin before sun exposure, as it can cause photosensitivity reactions
- Never use lime juice as a vaginal douche, as it can damage sensitive tissues
By following these safety precautions, you can enjoy the refreshing taste and health benefits of homemade lime juice while minimizing any potential risks.
Pro Tips & Tricks
After years of working with limes, I’ve discovered several professional techniques that can elevate your homemade lime juice from good to exceptional. These insider tips will help you maximize flavor, yield, and versatility.
Select for Weight, Not Color: Professional bartenders know that the best limes feel heavy for their size, indicating high juice content. The perfect lime should feel dense and slightly soft when gently squeezed. Color can be misleading—some yellowish limes are actually perfectly ripe and juicy.
Room Temperature is Non-Negotiable: Never juice cold limes straight from the refrigerator. For maximum yield, allow limes to reach room temperature or place them in warm (not hot) water for 10 minutes before juicing. This simple step can increase your juice yield by up to 30%.
The Microwave Technique: For stubborn limes, microwave them for exactly 20 seconds before juicing. This breaks down the internal cell walls and releases significantly more juice with less effort. Just be careful not to overheat, which can alter the flavor.
Cut Across, Not Lengthwise: Always cut limes across the equator (crosswise) rather than from end to end. This exposes more juice cells and makes extraction more efficient. It’s a small detail that makes a big difference in yield.
Capture the Oils: When zesting limes for cordial, press gently on the outer skin with your thumb before zesting. This releases the aromatic oils, which contain intense flavor compounds that will enhance your juice. Just be careful to avoid the bitter white pith.
Freeze in Ice Cube Trays: Professional kitchens freeze lime juice in measured portions. Standard ice cube trays hold approximately 1 tablespoon per cube, making it easy to thaw exactly what you need for recipes without waste.
Serving & Pairing Guide
Homemade lime juice is incredibly versatile, complementing a wide range of dishes and beverages. Understanding how to serve and pair it will help you make the most of this zesty elixir.
Complementary Dishes:
- Seafood: The bright acidity of lime juice cuts through richness in fish tacos, ceviche, and grilled shrimp. For a simple yet elegant preparation, drizzle fresh lime juice over salmon just before serving.
- Mexican Cuisine: From guacamole to pozole, lime juice is essential in authentic Mexican dishes. Add a splash to finished enchiladas or tacos for a burst of brightness.
- Thai and Vietnamese Food: Lime juice balances the heat in curries and adds dimension to pho and pad thai. Combine with fish sauce, sugar, and chili for a classic dipping sauce.
- Grilled Meats: A squeeze of lime juice over grilled chicken or steak cuts through fattiness and enhances flavor. Try a lime-based marinade with garlic, olive oil, and herbs for poultry.
Presentation Tips:
- Garnish with Zest: Add visual appeal by floating thin strips of lime zest in drinks or sprinkling it over dishes. The vibrant green color provides beautiful contrast.
- Serve in Glass: When offering lime juice as a beverage, use clear glassware to showcase its beautiful color. For cocktails, consider rimming glasses with a mixture of salt and lime zest.
- Ice Spheres: For an elegant touch, freeze lime juice with mint leaves or thin lime slices in large ice molds. These decorative ice spheres add both flavor and visual interest as they melt.
- Mist vs. Pour: For delicate dishes, use a small spray bottle to mist lime juice evenly instead of pouring. This provides consistent flavor without overwhelming the dish.
Recipe Variations
The basic homemade lime juice recipe serves as an excellent foundation for creative variations to suit different dietary needs, flavor preferences, and seasonal availability.
Dietary Adaptations:
- Low-Sugar Version: For those monitoring sugar intake, replace traditional sweeteners with monk fruit extract or stevia. Start with a small amount (equivalent to ¼ cup of sugar) and adjust to taste. This creates a refreshing lime juice with minimal glycemic impact.
- Keto-Friendly Lime Cordial: Substitute the sugar with allulose or erythritol in a 1:1 ratio. These sugar alcohols provide sweetness without the carbs, making it perfect for keto cocktails and beverages.
- AIP/Paleo Option: Sweeten your lime juice with raw honey or pure maple syrup instead of refined sugar. Use approximately ¾ cup of honey to replace 1 cup of sugar, adjusting to taste.
Seasonal Variations:
- Summer Herb Infusion: During summer, add 1 cup of fresh basil, mint, or lemongrass to your lime juice. Allow to steep for 2-4 hours before straining for a refreshing aromatic twist.
- Fall Spiced Lime Cordial: In autumn, add warming spices like 2 cinnamon sticks, 4 cloves, and 1 star anise to your lime cordial while it’s still warm. Let steep for 30 minutes before straining for a cozy seasonal adaptation.
- Winter Citrus Blend: When limes are less available in winter, create a mixed citrus juice by combining 1 part lime juice with 1 part grapefruit, blood orange, or Meyer lemon juice. This provides complexity while stretching your lime supply.
- Spring Floral Notes: In springtime, add 2 tablespoons of food-grade dried lavender or rose petals to your lime cordial. Steep for 20 minutes before straining for a delicate floral undertone that pairs beautifully with spring desserts.
These variations maintain the bright, zesty character of lime juice while offering flexibility for different dietary needs and seasonal availability. Experiment with these adaptations to discover your perfect version of this versatile citrus elixir.
Storage & Reheating Guide
Proper storage is crucial for maintaining the vibrant flavor and nutritional benefits of your homemade lime juice. Follow these guidelines to preserve its quality and extend its usable life.
Refrigeration (Short-Term Storage):
- Transfer fresh lime juice to a clean glass container with an airtight lid
- Store in the refrigerator at 40°F (4°C) or below
- Consume within 3-4 days for optimal flavor
- Shake well before using as natural separation will occur
- Keep away from strong-smelling foods as lime juice can absorb odors
Freezing (Long-Term Storage):
- Pour fresh lime juice into ice cube trays (each cube equals approximately 1 tablespoon)
- Freeze until solid (about 4 hours)
- Transfer frozen cubes to airtight freezer bags or containers
- Label with the date and contents
- Store in freezer for up to 3 months
- Thaw only what you need for each recipe
For Sweetened Variations:
- Cordials and sweetened lime juice can be refrigerated for up to 2 weeks
- Store in sterilized glass bottles with tight-fitting lids
- The sugar content acts as a natural preservative, extending shelf life
Reheating Considerations:
- Lime juice is typically served cold or at room temperature
- If a recipe calls for warm lime juice, heat gently over low heat to no more than 118°F (48°C)
- Avoid boiling as high heat destroys vitamin C and alters the flavor profile
- For frozen juice, thaw in the refrigerator overnight rather than using heat
Troubleshooting Guide
Even experienced cooks occasionally encounter challenges when making homemade lime juice. Here are solutions to common problems to ensure perfect results every time.
Problem: Bitter Taste
- Cause: Excessive pith (white part) included when zesting, or overripe limes
- Solution: When zesting, use light pressure to avoid the bitter pith. Add a tiny pinch of salt (1/16 teaspoon per cup) to balance bitterness, or incorporate a small amount of sweetener.
Problem: Low Juice Yield
- Cause: Cold limes, improper preparation, or dry limes
- Solution: Ensure limes are at room temperature. Microwave for 20 seconds before juicing. Roll firmly on the countertop to break internal membranes. Select heavier limes with thin, smooth skin.
Problem: Cloudy Appearance
- Cause: Natural pulp and oils in suspension
- Solution: For clear juice, strain through a fine-mesh sieve lined with cheesecloth. For ultra-clear juice, allow to settle in refrigerator, then carefully pour off the clear liquid from the top.
Problem: Rapid Spoilage
- Cause: Bacterial contamination or improper storage
- Solution: Use extremely clean equipment and storage containers. Store properly sealed in the refrigerator. Consider adding ¼ teaspoon citric acid per cup of juice as a natural preservative.
Problem: Inconsistent Flavor
- Cause: Natural variation in limes, different ripeness levels
- Solution: Taste test and adjust each batch. For consistent results in recipes, measure juice by volume rather than by “juice of X limes.” Blend juice from multiple limes to average out variations.
Problem: Separation in Storage
- Cause: Natural settling of pulp and oils
- Solution: Simply shake well before using. For recipes requiring uniform consistency, strain juice thoroughly before storage.
Common Mistakes
Avoiding these frequent errors will help you create perfect homemade lime juice every time.
Using Cold Limes: Juicing refrigerated limes significantly reduces yield. Always allow limes to reach room temperature or use the microwave method to warm them before juicing.
Improper Cutting: Slicing limes lengthwise rather than across the equator makes juice extraction less efficient. Always cut crosswise for maximum yield.
Over-Relying on Color: Selecting limes based solely on color can lead to disappointment. Deep green doesn’t always mean juicy—weight and skin texture are better indicators of juice content.
Applying Too Much Pressure: Squeezing too hard at once can cause the juicer to slip or juice to spray. Apply firm, gradual pressure for best results.
Neglecting to Zest First: If making recipes requiring both juice and zest, many cooks juice first, making zesting difficult or impossible. Always zest before juicing.
Using Metal Containers: Storing lime juice in metal containers can cause a metallic taste due to reaction with the acid. Always use glass or food-grade plastic containers.
Discarding Too Soon: Many cooks discard limes after the first squeeze. Rotating and re-squeezing can yield significantly more juice from each fruit.
Fun Facts & Trivia
Did you know that limes have a fascinating history and unique properties that set them apart from other citrus fruits? Here are some intriguing facts about this versatile fruit:
Limes were originally native to India and were likely introduced to the New World by Christopher Columbus during his second voyage in the late 15th century. These small green fruits quickly became an important crop in tropical regions around the world.
The British Royal Navy made lime juice famous when they discovered its ability to prevent scurvy among sailors on long voyages. British sailors were given a daily ration of lime juice, earning them the nickname “limeys” – a term sometimes still used to refer to British people today.
Unlike lemons which float in water, limes actually sink! This simple physics demonstration highlights the difference in density between these two similar citrus fruits.
A single lime tree can be incredibly productive, yielding over 1,000 fruits annually when mature and properly maintained. That’s a lot of margaritas from just one tree!
There’s an inverse relationship between leaf size and fruit size in lime trees – the bigger the leaves, the smaller the limes tend to be. This botanical curiosity helps farmers predict their crop characteristics.
Lime juice was used as an invisible ink during the American Revolution. When heated, the acidic juice would turn brown, revealing hidden messages that couldn’t be detected by the enemy.
Final Summary and Call to Action
Homemade lime juice represents the perfect blend of simplicity and versatility in the kitchen. With just a few fresh limes and some basic equipment, you can create a bright, zesty elixir that elevates everything from cocktails and beverages to marinades and desserts. The difference between freshly squeezed lime juice and store-bought versions is immediately noticeable – no preservatives, no artificial flavors, just pure, vibrant citrus goodness.
Throughout this guide, we’ve explored everything from selecting the juiciest limes to maximizing your yield with professional techniques. We’ve discovered the nutritional benefits of this vitamin C-rich juice and learned how to properly store it to maintain its bright flavor. Whether you’re making a basic lime juice for cooking or creating sweetened variations like cordial for beverages, the fundamental techniques remain the same.
Now it’s your turn to bring this refreshing citrus magic into your kitchen. Next time you’re at the market, pick up a bag of fresh, heavy limes and try making your own homemade lime juice. Start with the basic recipe, then experiment with different variations to find your perfect blend. Share your creations with friends and family, or use your homemade lime juice to elevate your next cocktail hour or dinner party.
Remember that the best lime juice comes from quality fruit and proper technique. Take the time to select good limes, prepare them correctly, and extract every last drop of that liquid sunshine. Your taste buds will thank you, and you’ll never want to go back to the bottled version again. Happy juicing!
For more recipes, visit my Facebook page.
Frequently Asked Questions
Q: Can I use bottled lime juice instead of fresh limes?
A: While you can use bottled lime juice in a pinch, fresh lime juice offers significantly better flavor and nutritional benefits. Bottled versions often contain preservatives and lack the bright, zesty character of freshly squeezed juice. For the best results in both cooking and beverages, fresh lime juice is always recommended.
Q: How many limes do I need to make one cup of juice?
A: You’ll need approximately 10-12 medium-sized Persian limes to yield one cup (8 ounces) of juice. The exact number may vary depending on the size, ripeness, and juiciness of your limes. Smaller Key limes will require more fruits per cup.
Q: Can I add lemon juice to my lime juice?
A: Absolutely! Combining lime and lemon juice creates a balanced citrus flavor that works beautifully in many recipes. Try a 1:1 ratio of lime to lemon juice for a refreshing lemon-limeade, or experiment with different proportions to suit your taste preferences.
Q: How long does homemade lime juice last?
A: Fresh lime juice will maintain its optimal flavor for 3-4 days when stored in an airtight glass container in the refrigerator. For longer storage, freeze the juice in ice cube trays, then transfer the frozen cubes to freezer bags where they’ll keep for up to 3 months.
Q: Why is my lime juice bitter?
A: Bitterness usually comes from including too much of the white pith when zesting, or from using overripe limes. To reduce bitterness, be careful when zesting to avoid the pith, select fresh limes, and add a tiny pinch of salt to balance the flavor if needed.
Q: Is homemade lime cordial the same as lime juice?
A: No, they’re different products. Lime juice is simply the liquid extracted from limes, while lime cordial is a sweetened lime juice concentrate that typically includes sugar, water, and sometimes citric acid. Cordial is designed to be diluted before drinking and has a longer shelf life due to its sugar content.
Q: How can I make my limes yield more juice?
A: To maximize juice yield, bring limes to room temperature, roll them firmly on the countertop to break down internal membranes, and microwave them for 20-30 seconds before cutting and juicing. Always cut limes across the equator rather than lengthwise for better juice extraction.