
Table of Contents
Table of Contents
Difficulty Level: ⭐ Very Easy
Introduction
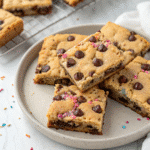
Imagine biting into a dessert that perfectly balances the chewy texture of a cookie with the soft, moist crumb of a cake. That’s exactly what you’ll experience with these irresistible cake mix cookie bars! These delightful treats combine the convenience of boxed cake mix with the homey comfort of freshly baked bars, creating a dessert that’s greater than the sum of its parts. Whether you’re a seasoned baker looking for a quick fix or a novice seeking a foolproof recipe, these cake bars deliver impressive results with minimal effort.
What makes these cake bars truly special is their versatility. With just four base ingredients and endless possibilities for customization, you can create a different variation every time you bake them. The beauty lies in their simplicity – a box of cake mix transforms into something that tastes completely homemade, with a texture that’s uniquely satisfying. The edges develop a slight crispness while the center remains perfectly soft and chewy, creating that coveted textural contrast that makes them impossible to resist.
These bars are perfect for any occasion, from casual family gatherings to holiday celebrations. They travel well, making them ideal for potlucks, bake sales, or as homemade gifts. And because they’re so quick to prepare – taking less than 30 minutes from start to finish – they’re my go-to recipe when I need a last-minute dessert that still feels special. The fact that they only dirty one bowl is just another reason to love them!
What I particularly appreciate about these cake mix cookie bars is how they appeal to everyone. Children love their sweet, familiar flavor and fun appearance (especially when you add colorful mix-ins), while adults appreciate the nostalgic taste with a sophisticated twist. The recipe is endlessly adaptable to suit different dietary needs and flavor preferences, making it a reliable standby in my dessert repertoire.
PrintIrresistible 5-Min Cake Mix Cookie Bars: Easy Treats!
These cake mix cookie bars are the ultimate quick and easy treat—soft, chewy, and packed with flavor. Perfect for busy days or last-minute gatherings.
- Prep Time: PT5M
- Cook Time: PT25M
- Total Time: PT30M
- Yield: 12 bars
- Category: Dessert
- Method: Bake
- Cuisine: American
Ingredients
1 box yellow cake mix
2 large eggs
1/2 cup melted butter
1 cup chocolate chips
Instructions
Preheat oven to 350°F (175°C). Grease a 9×13-inch baking pan.
In a large bowl, combine cake mix, eggs, and melted butter. Stir until well mixed.
Fold in chocolate chips.
Spread the dough evenly in the prepared pan.
Bake for 20-25 minutes or until golden brown. Let cool before cutting into bars.
Notes
Feel free to swap chocolate chips for your favorite mix-ins like nuts or candies.
Recipe History
The humble cake bar has a fascinating history that spans centuries and continents. While the exact origin of bar cookies is difficult to pinpoint, they emerged as a practical innovation in baking that combined functionality with deliciousness. Bar cookies as we know them today began gaining popularity during the feudal era, when bakers discovered that the rectangular shape was not only economical but also allowed for more experimentation with ingredients and textures.
The transformation of cake into bar form was a benchmark of both functionality and style. Medieval bakers found that the rectangular shape facilitated easy packaging, storage, and serving, making these treats accessible to people across social classes. By the Victorian era, bar cakes had become a teatime standard, with variations like the Marble Cake, Swiss Roll, and Walnut Cake gracing tables throughout Europe and beyond.
The concept of using cake mix as a shortcut ingredient has more recent origins, dating back to the mid-20th century when convenience foods became increasingly popular in American households. The post-World War II era saw a boom in packaged cake mixes, which were initially marketed as time-saving solutions for busy homemakers. Clever home cooks soon discovered that these mixes could be used for more than just traditional cakes, giving birth to recipes like our beloved cake mix cookie bars.
The innovation of transforming cake mix into cookie bars represents the American spirit of culinary ingenuity and practicality. During challenging times like the Great Depression and World Wars, resourceful bakers created “make-do” recipes that maximized flavor while minimizing ingredients and effort. The cake mix cookie bar is a modern extension of this tradition, offering delicious results with minimal investment of time and resources.
Today, cake mix cookie bars have evolved into countless variations, from the classic chocolate chip to more elaborate creations featuring multiple layers and exotic flavors. They’ve become staples in community cookbooks, family recipe collections, and increasingly, food blogs and social media platforms where their photogenic appearance and crowd-pleasing nature make them perennial favorites.
Full Ingredient List
Creating perfect cake bars starts with gathering the right ingredients. Here’s everything you’ll need to make these delicious treats:
Base Ingredients:
- 1 box (15.25 oz) cake mix (yellow, chocolate, or any flavor you prefer)
- 2 large eggs, at room temperature
- ½ cup unsalted butter, melted (1 stick)
- 1 teaspoon pure vanilla extract (or flavor of choice)
Optional Enhancers:
- 1 box (3.4 oz) instant pudding mix (adds extra moisture and flavor)
- ¼ cup water or milk (milk adds richer flavor)
- ½ teaspoon ground cinnamon (especially good with yellow cake mix)
Mix-ins (1½ cups total):
- Chocolate chips (semi-sweet, milk, dark, or white)
- M&Ms or Reese’s Pieces
- Sprinkles for festive occasions
- Chopped nuts (walnuts, pecans)
- Butterscotch or peanut butter chips
- Chopped candy bars
The beauty of this recipe lies in its flexibility. If you’re dairy-sensitive, you can substitute the butter with coconut oil for equally delicious results. For those watching cholesterol, egg substitutes work well in this recipe. When selecting your cake mix, opt for high-quality brands for the best flavor, though any brand will work in a pinch.
For chocolate lovers, I recommend using a combination of chocolate chips and chunks for varied texture. If you’re making these for a special occasion, consider seasonal mix-ins like crushed candy canes for Christmas or pastel-colored candies for Easter. The possibilities are truly endless!
Time Breakdown
One of the greatest advantages of cake mix cookie bars is how quickly they come together. Here’s a detailed breakdown of the time investment:
Total Time: 35 minutes
Prep Time: 10-15 minutes
Bake Time: 20-25 minutes
Cooling Time: At least 30 minutes (recommended)
The prep work is minimal – just mixing ingredients and spreading the batter in your pan. The actual hands-on time is less than 15 minutes, making this a perfect recipe for busy weeknights or last-minute dessert needs.
For best results, allow the bars to cool completely before cutting. While it’s tempting to dig in while they’re warm, patience yields cleaner cuts and better texture. If you’re in a hurry, you can speed up cooling by placing the pan (after about 10 minutes of rest) in the refrigerator for 15-20 minutes.
Required Kitchen Equipment
You don’t need fancy equipment to make perfect cake bars. Here’s what you’ll need to gather before starting:
Essential Tools:
- 9×13-inch baking pan (metal or glass both work well)
- Large mixing bowl
- Mixing spoon or rubber spatula
- Measuring cups and spoons
- Optional but helpful: parchment paper or cooking spray
Mixing Options:
- Hand mixer or stand mixer (convenient but not necessary)
- Whisk (for thoroughly combining ingredients)
- Wooden spoon (perfect for folding in mix-ins)
Additional Helpful Items:
- Cooling rack (allows air to circulate for proper cooling)
- Offset spatula (for evenly spreading thick batter)
- Bench scraper or sharp knife (for clean cuts)
- Digital food scale (for precise measurements)
Don’t worry if you don’t have specialized baking equipment. These bars are forgiving and can be made with basic kitchen tools. If you don’t have a 9×13 pan, you can use two 8×8 square pans (adjust baking time down slightly) or even a round cake pan (though this will create thicker bars that may need additional baking time).
For lining your pan, parchment paper creates the easiest release, but a good coating of cooking spray works well too. If using glass bakeware instead of metal, you might need to extend the baking time by 2-3 minutes, as glass heats more slowly but retains heat longer.
The most important tool is actually your eyes – watch for the edges to turn golden brown and the center to look set but not overly firm. A toothpick inserted in the center should come out mostly clean with a few moist crumbs.
Step-by-Step Preparation
Creating these irresistible cake mix cookie bars is a straightforward process that even novice bakers can master with ease. Follow these detailed steps for perfect results every time:
- Preheat your oven to 350°F (175°C). This temperature creates the perfect environment for your bars to rise evenly while developing that golden exterior.
- Prepare your baking dish by lining a 9×13-inch pan with parchment paper, leaving some overhang on the sides for easy removal. Alternatively, coat the pan thoroughly with non-stick cooking spray.
- Melt the butter in a large microwave-safe bowl until completely liquefied but not hot. The butter should be warm but not sizzling to prevent cooking the eggs when added.
- Combine the wet ingredients by adding the eggs and vanilla extract to the melted butter. Whisk until the mixture is smooth and well incorporated, about 30 seconds.
- Add the dry ingredients by pouring in the entire box of cake mix (and pudding mix if using). Stir with a wooden spoon or rubber spatula until no dry pockets remain. The batter will become very thick and sticky, resembling cookie dough more than cake batter.
- Fold in your mix-ins gently using a spatula. Be careful not to overmix at this stage – just a few turns until the chocolate chips or other additions are evenly distributed throughout the dough.
- Transfer the batter to your prepared baking pan. Since the mixture is thick, use a spatula sprayed with non-stick cooking spray to help spread it evenly. For particularly sticky batters, you can slightly dampen your hands with water and press the dough into an even layer.
- Add toppings if desired by sprinkling additional chocolate chips, M&Ms, or other decorative elements over the surface of the batter. Press them in slightly so they adhere during baking.
- Bake the bars for 20-25 minutes, or until the edges turn golden brown and begin to pull away from the sides of the pan. The center should appear set but still slightly soft to the touch.
- Check for doneness by inserting a toothpick into the center – it should come out with a few moist crumbs but no wet batter. Remember that the bars will continue to firm up as they cool.
- Cool completely by allowing the pan to rest on a wire rack for at least 30 minutes before attempting to cut. For the cleanest cuts, allow the bars to cool fully to room temperature.
- Remove from the pan by lifting the parchment paper overhang. Transfer to a cutting board for slicing.
- Slice into squares using a sharp knife. For extra neat cuts, wipe the knife clean between slices. Cut into 12-16 bars depending on your preferred serving size.
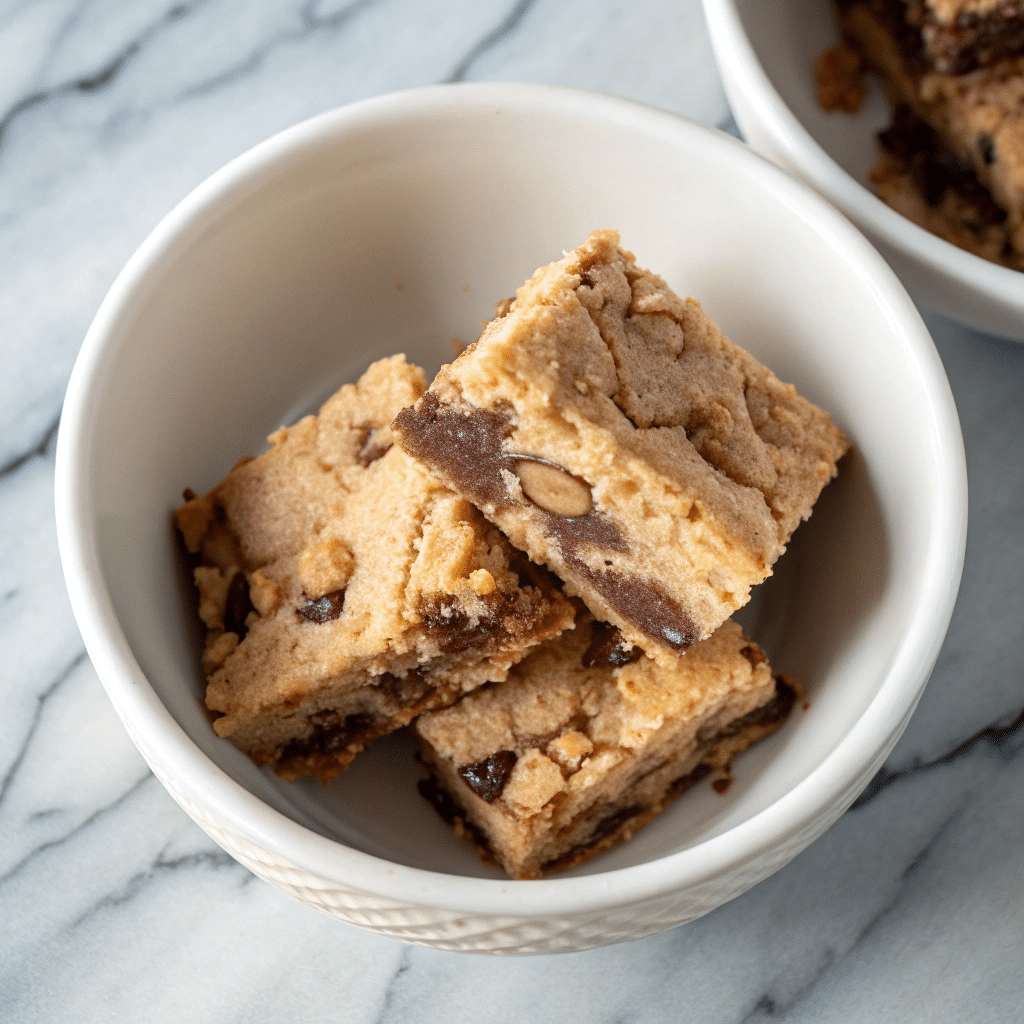
The finished bars should have a slightly crisp exterior with a soft, chewy center – similar to the perfect cookie but in a convenient bar form. The top will be lightly golden with visible mix-ins peeking through the surface.
Nutritional Information
Understanding the nutritional content of these cake mix cookie bars is essential for those monitoring their dietary intake. Here’s a breakdown of the nutritional information per serving, based on a recipe using a standard yellow cake mix and common add-ins:
| Nutrient | Amount per Serving |
|---|---|
| Calories | 152 |
| Total Fat | 7g |
| Saturated Fat | 3g |
| Cholesterol | 19mg |
| Sodium | 122mg |
| Total Carbohydrates | 20g |
| Sugars | 15g |
| Dietary Fiber | 0g |
| Protein | 2g |
This nutritional breakdown is based on a serving size of one bar, with the recipe typically yielding 12-16 bars. Keep in mind that the exact values may vary depending on the specific cake mix brand and any additional mix-ins used.
Allergen Information
It’s crucial to be aware of potential allergens when preparing and serving these cake mix cookie bars. Most cake mixes contain wheat and may be processed in facilities that handle nuts, soy, and milk products. Common allergens present in this recipe include:
- Wheat (from the cake mix)
- Eggs
- Milk (if using milk chocolate chips)
- Soy (often found in chocolate chips)
Additionally, depending on your choice of mix-ins, the bars may contain nuts or peanuts. Always check the packaging of all ingredients for allergen information and potential cross-contamination warnings. If serving to guests, it’s advisable to disclose all potential allergens.
Safety Precautions
When preparing these cake mix cookie bars, it’s important to follow proper food safety practices to ensure a delicious and safe treat. Here are some key safety precautions to keep in mind:
- Always wash your hands thoroughly before handling ingredients and after touching raw eggs.
- Use clean utensils and work surfaces to prevent cross-contamination.
- Avoid consuming raw batter, as it contains uncooked eggs which may pose a risk of salmonella.
- Ensure your oven is preheated to the correct temperature (typically 350°F or 175°C) before baking.
- Use a food thermometer to check that the internal temperature of the bars reaches at least 160°F (71°C) to ensure eggs are fully cooked.
- Allow the bars to cool completely before cutting to prevent burns and ensure proper texture.
- Store leftovers in an airtight container at room temperature for up to 3 days, or in the refrigerator for up to 5 days.
By following these safety guidelines, you can enjoy your cake mix cookie bars with peace of mind, knowing they’ve been prepared with food safety in mind.
Pro Tips & Tricks
To elevate your cake mix cookie bars from good to great, consider these expert insights and technical advice:
Perfect Texture: For the ideal chewy texture, slightly underbake the bars. Remove them from the oven when the edges are set but the center still looks slightly underdone. They’ll continue to cook as they cool.
Even Baking: Rotate the pan halfway through baking to ensure even browning and prevent hot spots in your oven from affecting the final result.
Mix-In Distribution: To prevent mix-ins from sinking to the bottom, toss them in a tablespoon of the dry cake mix before adding to the batter. This light coating helps them stay suspended throughout the bars.
Flavor Boost: Enhance the flavor by adding a teaspoon of instant espresso powder to chocolate-based bars or a teaspoon of citrus zest to fruit-flavored variations.
Clean Cuts: For picture-perfect squares, chill the bars completely before cutting. Use a sharp knife dipped in hot water and wiped clean between cuts for the cleanest edges.
Storage Hack: To keep bars fresh, store them in an airtight container with a slice of bread. The bread will help maintain moisture and prevent the bars from drying out.
Freezer-Friendly: These bars freeze exceptionally well. Wrap individual pieces in plastic wrap, then store in a freezer bag for up to 3 months. Thaw at room temperature when ready to enjoy.
Serving & Pairing Guide
Elevate your cake mix cookie bars with these serving suggestions and pairing ideas:
Presentation:
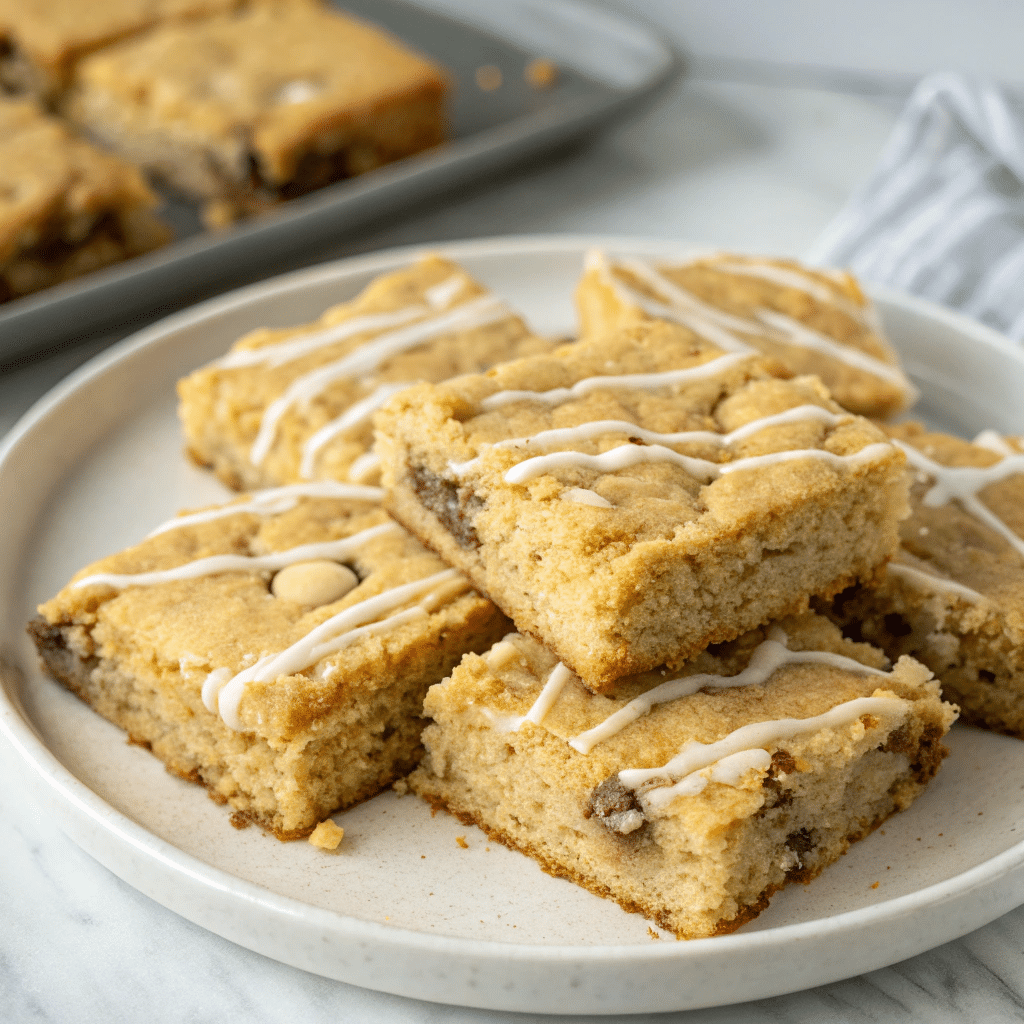
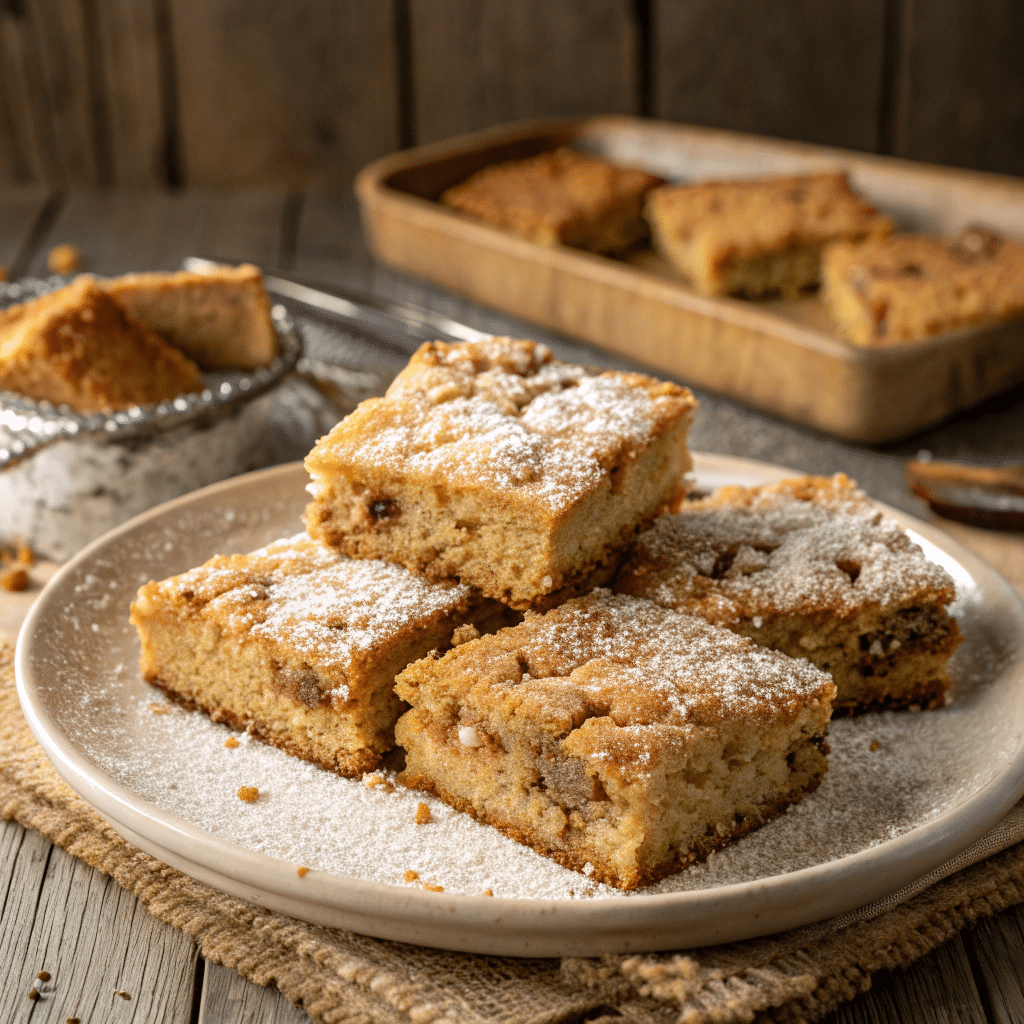
- Dust bars with powdered sugar for an elegant touch
- Drizzle with melted chocolate or caramel for added decadence
- Serve on a rustic wooden board for a homey feel
- Stack bars in a pyramid shape for an impressive dessert display
Complementary Dishes:
- Pair with a scoop of vanilla ice cream for a classic combination
- Serve alongside fresh berries to balance the sweetness
- Offer with a dollop of whipped cream for added luxury
- Accompany with a glass of cold milk for the ultimate comfort treat
Beverage Pairings:
- Coffee or espresso to complement chocolate-based bars
- Hot chocolate for a cozy winter treat
- Fruit smoothies for a refreshing summer pairing
- Red wine, particularly port, for an adult dessert experience
Occasion-Specific Serving:
- Cut into bite-sized pieces for cocktail parties
- Package in clear gift bags for party favors or bake sales
- Arrange on tiered stands for afternoon tea
- Serve warm with ice cream for an elevated family dessert night
Remember, presentation can transform these simple bars into an impressive dessert. Consider garnishing with fresh mint leaves, a sprinkle of sea salt, or a dusting of cocoa powder to add visual appeal and enhance flavors.
Recipe Variations
Adapt your cake mix cookie bars to suit various dietary needs and seasonal flavors:
Dietary Adaptations:
- Gluten-Free: Use gluten-free cake mix and ensure all add-ins are certified gluten-free.
- Vegan: Replace eggs with a flax egg (1 tablespoon ground flaxseed mixed with 3 tablespoons water) and use plant-based butter.
- Low-Sugar: Opt for sugar-free cake mix and use sugar-free chocolate chips or nuts as mix-ins.
- Nut-Free: Omit nuts and replace with seeds like sunflower or pumpkin for crunch.
Seasonal Variations:
- Spring: Lemon cake mix with white chocolate chips and fresh blueberries
- Summer: Strawberry cake mix with diced fresh strawberries and a cream cheese swirl
- Fall: Spice cake mix with diced apples and a caramel drizzle
- Winter: Gingerbread cake mix with white chocolate chips and crystallized ginger pieces
Creative Flavor Combinations:
- S’mores Bars: Graham cracker crust, chocolate cake mix, and marshmallow topping
- Cookies and Cream: White cake mix with crushed Oreos mixed in and on top
- Salted Caramel Chocolate: Chocolate cake mix with caramel bits and a sprinkle of sea salt
- Tropical Delight: Coconut cake mix with macadamia nuts and dried pineapple pieces
Texture Variations:
- Add a cream cheese swirl for a cheesecake-like twist
- Incorporate a layer of fruit preserves for a jam-filled bar
- Sprinkle granola on top before baking for added crunch
- Swirl in peanut butter for a rich, nutty flavor
Remember to adjust baking times slightly when adding wet ingredients like fresh fruit. Start checking for doneness a few minutes earlier than the recipe suggests to ensure perfect results with your variations.
Storage & Reheating Guide
Properly storing your cake mix cookie bars ensures they remain fresh and delicious for days after baking. Here’s how to keep them at their best:
Room Temperature Storage: Place completely cooled bars in an airtight container and store at room temperature for up to 3-5 days. This is the ideal method for maintaining their soft, chewy texture.
Refrigerator Storage: For longer freshness, store bars in an airtight container in the refrigerator for up to 5 days. The cool temperature will help preserve their texture and flavor.
Freezer Storage: These bars freeze exceptionally well! Wrap individual pieces in plastic wrap, then place them in a freezer-safe bag or container. They’ll stay fresh for up to 3 months in the freezer.
Storage Tip: Add a slice of bread to your storage container to help maintain moisture and prevent the bars from drying out.
Reheating Instructions:
- Microwave: For a quick refresh, warm individual bars for 10-15 seconds.
- Oven: For that fresh-baked taste, preheat your oven to 325°F and warm bars for 5-10 minutes.
- Toaster Oven: Place bars on a small tray and heat at 325°F for 3-5 minutes until just warm.
Remember, when reheating, you’re simply warming the bars, not baking them again. This ensures they remain soft and chewy rather than becoming overcooked.
Troubleshooting Guide
Even with a simple recipe like cake mix cookie bars, occasional issues can arise. Here are solutions to common problems:
Bars Too Cakey:
- Your batter may have been overmixed, creating too much air in the mixture.
- Next time, mix just until ingredients are combined and no dry spots remain.
- Reduce baking time by 2-3 minutes for a chewier texture.
Bars Too Dry:
- Likely overbaked. Remove from the oven as soon as edges are set but center still looks slightly underdone.
- Add 1-2 tablespoons of milk to the batter next time for extra moisture.
- Consider using oil instead of butter for a moister result.
Bars Too Gooey:
- Underbaking is usually the culprit. Extend baking time by 2-3 minutes.
- Allow bars to cool completely before cutting to help them set properly.
- Refrigerate for 30 minutes before cutting if they’re still too soft.
Uneven Baking:
- Rotate the pan halfway through baking time.
- Check your oven temperature with an oven thermometer.
- Use light-colored metal pans for more even heat distribution.
Mix-ins Sinking to Bottom:
- Toss mix-ins with a tablespoon of the dry cake mix before adding to the batter.
- Make sure your batter isn’t too thin – it should be thick and sticky.
Common Mistakes
Avoid these frequent errors when making cake mix cookie bars:
Overmixing the Batter: This creates a cakey texture rather than chewy bars. Mix just until ingredients are combined to maintain the perfect consistency.
Skipping the Cooling Time: Cutting bars before they’re completely cooled results in messy, falling-apart pieces. Allow at least 30 minutes of cooling time, or ideally, cool to room temperature.
Inaccurate Oven Temperature: Ovens often run hot or cold. Use an oven thermometer to ensure you’re baking at the correct temperature.
Using the Wrong Pan Size: A pan that’s too small creates thick, undercooked bars; too large makes thin, overcooked bars. Stick with the recommended 9×13-inch pan for perfect results.
Adding Too Many Mix-ins: While customization is fun, too many additions can prevent the bars from holding together properly. Limit mix-ins to 1½-2 cups total.
Measuring Flour Incorrectly: If adding flour to the cake mix, measure by spooning into measuring cups and leveling off rather than scooping directly from the bag, which compacts flour.
Fun Facts & Trivia
Did you know that cake mixes were first introduced in the 1930s but didn’t gain popularity until the 1950s? Initially, they were too simple—just add water—and housewives felt guilty using them! Manufacturers actually added steps (like requiring eggs to be added) to make women feel more involved in the baking process.
The concept of bar cookies dates back centuries, with some of the earliest versions appearing in medieval European cookbooks. They were practical for feeding large groups and traveling, as they could be easily cut and transported.
The average American consumes approximately 18,928 cookies in their lifetime! Cookie bars like these contribute to that impressive statistic, offering a quicker way to satisfy cookie cravings.
The world’s largest cookie bar was created in 2018 and weighed over 2,000 pounds! While our recipe creates more modest portions, it’s certainly more practical for home bakers.
Cake mix isn’t just for cookies and cakes—it’s used in everything from pancakes to bread pudding. This versatile pantry staple has become a secret weapon for busy bakers everywhere.
March 23, which happens to be today in 2025, falls during National Baking Week—making it the perfect time to whip up a batch of these delicious cake mix cookie bars!
Final Summary and Call to Action
Cake mix cookie bars represent the perfect marriage of convenience and deliciousness. With just a handful of ingredients and minimal effort, you can create a dessert that tastes completely homemade while saving valuable time in the kitchen. The versatility of this recipe means you can adapt it to any occasion, preference, or dietary need—truly making it a recipe you’ll return to again and again.
What makes these bars truly special is how they bring people together. Whether you’re baking with children, preparing for a potluck, or simply treating yourself after a long day, these bars create moments of joy and connection. The simplicity of the recipe invites creativity, allowing you to express yourself through different flavors and mix-ins.
I encourage you to make these cake mix cookie bars your own. Experiment with different cake mix flavors, try unique mix-in combinations, or create seasonal variations that celebrate holidays and special occasions. Don’t forget to share your creations with friends and family—these bars are meant to be enjoyed together!
Ready to get started? Grab that box of cake mix sitting in your pantry and transform it into something extraordinary. In less than 30 minutes, you’ll have a pan of warm, chewy, irresistible bars that will make everyone ask for your secret recipe. Happy baking, and remember—sometimes the simplest recipes create the most memorable treats!
For more recipes, visit my Facebook page.
Frequently Asked Questions
Q: Can I use any flavor of cake mix for these cookie bars?
A: Absolutely! You can use any boxed cake mix flavor you love—chocolate, vanilla, yellow, spice cake, funfetti, red velvet, strawberry, or even pistachio. Each flavor creates a unique variation of these versatile bars.
Q: Why do my bars taste more like cake than cookies?
A: If your bars have a cakey texture rather than a chewy cookie-like consistency, it might be because you’re using a smaller pan. For thinner, chewier bars, use a 9×13-inch pan. Also, be careful not to overmix the batter, as this can incorporate too much air and create a cakier texture.
Q: Do I need to chill the dough before baking?
A: No chilling is required! This is one of the advantages of this recipe. Simply mix, press the dough into the pan, and bake right away, saving you valuable time.
Q: Can I make these bars gluten-free?
A: Yes! Simply use a gluten-free cake mix and ensure all your add-ins are certified gluten-free. The bars will maintain their delicious texture and flavor.
Q: How do I know when the bars are done baking?
A: The bars are done when the edges are golden brown and beginning to pull away from the sides of the pan. The center should appear set but still slightly soft to the touch. A toothpick inserted in the center should come out with a few moist crumbs but no wet batter.
Q: Can I freeze these cake mix cookie bars?
A: Yes, these bars freeze exceptionally well! Once completely cooled, cut them into squares, wrap individual pieces in plastic wrap, and store in a freezer-safe container or bag. They’ll keep for up to 3 months. Thaw at room temperature when ready to enjoy.
Q: Can I add pudding mix to make the bars more moist?
A: Absolutely! Adding a 3.4-ounce box of instant pudding mix (just the powder) gives the bars a more homemade, buttery taste and creates an extra soft and chewy texture. It’s a great way to enhance the basic recipe.