
Table of Contents
Table of Contents
Difficulty Level: ⭐⭐ Easy
A Warm Embrace in Every Bite
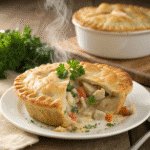
There’s something undeniably magical about breaking through a golden, flaky crust to reveal a steaming, savory filling of tender chicken and vegetables swimming in rich, velvety gravy. Pillsbury chicken pot pie isn’t just a meal—it’s a warm hug on a plate, a nostalgic journey back to simpler times, and the epitome of American comfort food that has graced dinner tables for generations.
The beauty of this Pillsbury chicken pot pie lies in its perfect balance of convenience and homemade taste. Using Pillsbury’s refrigerated pie crusts as your foundation, you can create a dish that tastes like you spent hours in the kitchen when in reality, it comes together with minimal effort. The crusts bake to a perfect golden-brown finish, creating that signature flaky texture that perfectly complements the creamy filling inside.
What makes this chicken pot pie recipe truly special is its versatility. Whether you’re looking to use up leftover roasted chicken from Sunday dinner, seeking a hearty chicken pot pie to warm up a cold winter evening, or simply craving something comforting after a long day, this chicken pot pie delivers on all fronts. The combination of tender chicken chunks, colorful mixed vegetables, and savory gravy creates a harmonious blend of flavors and textures that satisfies in a way few other dishes can.
This isn’t just any chicken pot pie—it’s a time-honored tradition made accessible through Pillsbury’s trusted products. The refrigerated pie crusts eliminate the most intimidating part of pie-making, giving home cooks of all skill levels the confidence to create a chicken pot pie that’s truly delicious. The result is a chicken pot pie that looks impressive enough for Sunday dinner but is simple enough for a weeknight meal.
As the aroma of herbs and buttery crust fills your kitchen, you’ll understand why this classic chicken pot pie has endured through generations. Each spoonful delivers that perfect bite—a little crust, a bit of chicken, some vegetables, and just enough sauce to bring it all together. It’s the kind of chicken pot pie that makes everyone at the table fall silent for a moment as they savor that first delicious taste.
With every bite, this chicken pot pie proves why it remains a beloved favorite. Whether you’re new to making chicken pot pie or it’s a staple in your kitchen, this recipe is sure to bring warmth, comfort, and plenty of smiles to your table.
PrintPillsbury Chicken Pot Pie: 5 Amazing Secrets You’ll Love
This Pillsbury Chicken Pot Pie is the ultimate comfort food, packed with tender chicken and hearty vegetables in a creamy sauce, all tucked beneath a golden, flaky crust. Discover five amazing secrets for making this classic dish even better—perfect for family dinners or cozy nights in.
- Prep Time: PT15M
- Cook Time: PT30M
- Total Time: PT45M
- Yield: 6 servings
- Category: Main Course
- Method: Bake
- Cuisine: American
Ingredients
Crust
- 1 box (14.1 oz) refrigerated Pillsbury™ Pie Crusts (2 Count), softened as directed on box
Filling
- 1/3 cup butter or margarine
- 1/3 cup chopped onion
- 1/3 cup all-purpose flour
- 1/2 teaspoon salt
- 1/4 teaspoon pepper
- 1 3/4 cups from 1 carton Progresso™ Classic Chicken Broth
- 1/2 cup milk
- 2 1/2 cups shredded cooked chicken or turkey
- 2 cups frozen mixed vegetables, thawed
Instructions
Let the pie crusts sit at room temperature for 15 minutes after removing them from their packaging. Preheat your oven to 425°F (220°C).
Place one pie crust in an ungreased 9-inch glass pie plate. Press it firmly against the sides and bottom, leaving any excess hanging over the edge.
In a 2-quart saucepan, melt the butter over medium heat. Add the chopped onion and cook for about 2 minutes, stirring frequently, until the onion is tender.
Stir in the flour, salt, and pepper until everything is well combined.
Gradually add the broth and milk, stirring constantly. Continue cooking until the mixture becomes bubbly and thickened.
Add the cooked chicken and mixed vegetables, stirring until everything is evenly combined. Remove from heat.
Spoon the chicken mixture into the prepared pie crust.
Place the second pie crust over the filling. Fold any extra top crust under the edge of the bottom crust, pressing the edges together to seal and create a thick rim.
Flute the edges by placing your thumb and index finger about an inch apart on the outside edge, then use your other thumb to push the pastry outward, forming a scalloped pattern.
Use a small knife to cut several slits or decorative shapes in the top crust to allow steam to escape during baking.
Bake for 15 minutes. Then, cover the edge of the crust with foil to prevent over-browning.
Continue baking for another 15 to 25 minutes, or until the top is golden brown and the filling reaches at least 165°F (74°C). Let the pie stand for 5 minutes before serving.
Notes
For extra flavor, add a splash of cream to the sauce or sprinkle fresh herbs on top before baking. Leftovers reheat beautifully for lunch the next day.
From Royal Tables to American Kitchens: The Journey of Chicken Pot Pie
The humble chicken pot pie we know and love today has a surprisingly regal history. While the exact origins remain somewhat unclear, food historians believe the concept of meat pies dates back to medieval England in the 16th century. These early versions were served at elaborate banquets and feasts among the wealthy elite, featuring thick, ornate pastry crusts that showcased the skill and artistry of royal cooks. The pastry shell wasn’t just a delicious container—it served as a practical preservation method in times before refrigeration.
As European settlers made their way to America, they brought their culinary traditions with them, including meat pies. The dish evolved over time, adapting to available ingredients and regional preferences. By the 19th century, chicken pot pie had become firmly established in American cuisine, particularly in Pennsylvania Dutch country, where it was often made with a noodle topping instead of pastry.
Chicken pot pie saw its true transformation from a labor-intensive homemade dish to an accessible family meal during the 20th century with the rise of convenience foods. This is where Pillsbury enters the story. Founded in 1869, Pillsbury revolutionized home baking with its ready-to-use products. When Pillsbury introduced refrigerated pie crusts in the mid-20th century, they fundamentally changed how Americans approached pie-making, including savory pies like chicken pot pie, making chicken pot pie more accessible to families everywhere.
By 1999, Pillsbury’s Test Kitchens had developed what would become their classic chicken pot pie recipe, which was featured in a pie booklet and eventually on their refrigerated pie crust boxes. This recipe struck the perfect balance between convenience and homemade taste, allowing busy families to enjoy this traditional comfort food without spending hours in the kitchen.
Over the decades, Pillsbury has continued to refine the recipe, making subtle improvements like adjusting the ratio of chicken broth to milk for a more flavorful sauce. What began as a dish for nobility has evolved into an accessible comfort food classic that represents the heart of American home cooking—simple, satisfying, and bringing families together around the dinner table.
Full Ingredient List
Creating the perfect Pillsbury chicken pot pie requires quality ingredients that work together to deliver that classic comfort food experience. Here’s everything you’ll need to make this delicious dish:
For the Crust
- 1 box (14.1 oz) refrigerated Pillsbury™ Pie Crusts (2 Count), brought to room temperature
For the Filling
- 1/3 cup butter or margarine
- 1/3 cup chopped yellow onion (about 1 small onion)
- 1/3 cup all-purpose flour
- 1/2 teaspoon salt
- 1/4 teaspoon black pepper
- 1 3/4 cups chicken broth (from a 32-oz carton)
- 1/2 cup milk (2% works well, but whole milk creates a richer sauce)
- 2 1/2 cups shredded cooked chicken or turkey (rotisserie chicken works perfectly)
- 2 cups frozen mixed vegetables, thawed (typically containing peas, carrots, corn, and green beans)
- 1/4 teaspoon dried thyme leaves (optional for enhanced flavor)
- 1 beaten egg for brushing the crust (optional but creates a beautiful golden finish)
Possible Substitutions:
- Chicken: Use leftover turkey, especially after holidays, or rotisserie chicken from the grocery store to save time.
- Vegetables: While the classic mix works beautifully, you can customize with additional vegetables like diced potatoes, mushrooms, or fresh asparagus in spring.
- Milk: Heavy cream can replace milk for a richer, more decadent sauce.
- Herbs: Add 1/2 teaspoon of rosemary or sage for a different flavor profile.
- Broth: Vegetable broth works in a pinch, though it will slightly alter the classic chicken flavor.
For best results, use high-quality ingredients, especially when it comes to the chicken. The fresher and more flavorful your chicken, the better your pot pie will taste.
Time Breakdown
Understanding the timing for this Pillsbury chicken pot pie helps you plan your meal preparation efficiently:
Total Time: 1 hour 5 minutes
Prep Time: 25 minutes
- 5 minutes to bring pie crusts to room temperature
- 10 minutes to prepare vegetables and chicken
- 10 minutes to make the sauce
Cook Time: 40 minutes
- 10 minutes to cook onions and prepare the filling
- 30 minutes baking time (15 minutes at full heat + 15-25 minutes with foil-protected edges)
Additional Timing Notes:
- Allow 5 minutes of resting time after baking before serving
- If using frozen chicken that needs to be cooked first, add 20 minutes to your prep time
- Thawing frozen vegetables can be done quickly by running them under cool water in a strainer
- The pie crusts need 15 minutes at room temperature before they’re pliable enough to work with
Required Kitchen Equipment
Having the right tools on hand makes assembling your Pillsbury chicken pot pie a breeze. Here’s what you’ll need to create this comforting classic:
Essential Tools
- 9-inch glass pie plate – The transparent bottom allows you to check that the bottom crust is properly cooked
- 2-quart saucepan – For preparing the creamy filling
- Wooden spoon or silicone spatula – For stirring the filling without scratching your cookware
- Measuring cups and spoons – For accurate ingredient measurements
- Sharp knife – For cutting slits in the top crust to vent steam
- Cutting board – For preparing chicken and vegetables
- Pastry brush – If applying egg wash to the crust
- Rolling pin – To adjust the size of the pie crusts if needed
- Kitchen scissors or knife – For trimming excess crust
- Aluminum foil strips – To protect the crust edges from over-browning
- Timer – To ensure perfect baking time
- Cooling rack – To allow the pie to rest after baking
Equipment Alternatives
- No pie plate? A 2-quart casserole dish or 8×8-inch square baking dish works well
- No pastry brush? Use a folded paper towel to gently apply egg wash
- No rolling pin? A clean wine bottle works in a pinch
- No saucepan? A deep skillet can be used to prepare the filling
- No glass bakeware? Metal pie pans work but may require adjusting baking time (usually 5 minutes less)
- No kitchen scissors? A sharp paring knife can trim excess dough
- No cooling rack? Set the pie on a heat-resistant trivet or wooden cutting board
The beauty of this recipe is its flexibility—while having the proper equipment makes the process smoother, you can adapt with what you have available in your kitchen.
Step-by-Step Preparation
Creating the perfect Pillsbury chicken pot pie is a straightforward process that yields impressive results. Follow these detailed steps to ensure your pot pie turns out golden, flaky, and filled with delicious savory goodness every time.
Preparing the Crust and Oven
- Remove the Pillsbury refrigerated pie crusts from the refrigerator and let them stand at room temperature for 15 minutes. This softening period is crucial as it prevents the dough from cracking when unrolled.
- Preheat your oven to 425°F to ensure it reaches the proper temperature by the time your pot pie is assembled.
- Lightly spray a 9-inch glass pie plate with cooking spray to prevent sticking.
- Carefully unroll one softened pie crust and gently press it into the bottom and up the sides of your pie plate. The dough should be pliable but not sticky at this point.
- Allow any excess crust to hang over the edge temporarily—you’ll trim and seal this later.
Creating the Filling
- In a 2-quart saucepan, melt 1/3 cup butter over medium heat until it begins to bubble slightly.
- Add 1/3 cup chopped onion to the melted butter and cook for approximately 2 minutes, stirring frequently, until the onions become translucent and slightly soft.
- Sprinkle 1/3 cup all-purpose flour, 1/2 teaspoon salt, and 1/4 teaspoon pepper over the onion mixture, stirring continuously until well blended. The mixture should look paste-like and slightly golden.
- Gradually add 1 3/4 cups chicken broth while whisking constantly to prevent lumps from forming. The sauce will begin to thicken almost immediately.
- Pour in 1/2 cup milk while continuing to whisk. Keep stirring until the mixture becomes bubbly and thickened to a gravy-like consistency that coats the back of a spoon.
- Fold in 2 1/2 cups shredded cooked chicken and 2 cups thawed mixed vegetables, stirring gently until everything is evenly coated with the sauce. The filling should be thick but still slightly movable, not stiff.
- Remove the saucepan from heat and allow the mixture to cool slightly for about 5 minutes.
Assembling and Baking
- Spoon the chicken mixture into your crust-lined pie plate, creating a slight mound in the center.
- Unroll the second pie crust and carefully place it over the filling.
- Fold the excess top crust under the edge of the bottom crust, pressing the edges together to seal and create a thickened rim around the pie.
- Create a decorative edge by pinching the crust between your thumb and index finger at regular intervals around the perimeter.
- Using a sharp knife, cut 4-5 small slits or decorative shapes in the center of the top crust to allow steam to escape during baking.
- Place the pie on the middle rack of your preheated oven and bake uncovered for exactly 15 minutes until the crust begins to turn light golden.
- Without removing the pie from the oven, carefully shield the edge with strips of aluminum foil to prevent over-browning.
- Continue baking for an additional 15-25 minutes until the crust is deep golden brown and the filling is bubbling through the slits.
- The pot pie is done when the internal temperature reaches at least 165°F and the bottom crust appears cooked through when checked with a fork.
- Remove from the oven and allow to stand for 5 minutes before serving to let the filling set slightly.
When properly executed, your Pillsbury chicken pot pie will have a beautifully browned, flaky crust and a rich, creamy filling that holds together when sliced. The perfect bite should include tender chicken, colorful vegetables, and savory gravy encased in buttery pastry.
Nutritional Information
Understanding the nutritional profile of your Pillsbury chicken pot pie helps you make informed dietary choices. Each generous serving delivers a satisfying combination of protein, carbohydrates, and fats that make this dish a complete meal.
Serving Size and Caloric Content
| Nutrient | Amount per Serving |
|---|---|
| Serving Size | 1 Serving (approximately 1/6 of pie) |
| Calories | 560 |
| Calories from Fat | 280 |
Complete Nutrient Breakdown
| Nutrient | Amount | % Daily Value* |
|---|---|---|
| Total Fat | 31g | 48% |
| Saturated Fat | 10g | 49% |
| Trans Fat | 2.5g | – |
| Cholesterol | 50mg | 17% |
| Sodium | 1210mg | 50% |
| Potassium | 400mg | 11% |
| Total Carbohydrate | 44g | 15% |
| Dietary Fiber | 4g | 17% |
| Sugars | 4g | – |
| Protein | 25g | – |
| Vitamin A | – | 60% |
| Vitamin C | – | 2% |
| Calcium | – | 6% |
| Iron | – | 20% |
*Percent Daily Values are based on a 2,000 calorie diet.
For those seeking a lighter option, Pillsbury also offers a “Healthified Chicken Pot Pie” recipe with 300 calories per serving, 10g of fat, and 25g of protein, representing a 52% reduction in calories and 76% less fat than the classic version.
Allergen Information
This Pillsbury chicken pot pie contains several common allergens that consumers should be aware of before preparation and consumption. The refrigerated pie crusts contain wheat and may contain traces of soy, making this recipe unsuitable for those with celiac disease or gluten sensitivities.
The filling contains milk products, which affects those with dairy allergies or lactose intolerance. The chicken broth may contain soy and wheat derivatives as flavor enhancers or thickeners.
Cross-contamination is possible during manufacturing of the pre-packaged ingredients. Pillsbury products are produced in facilities that process tree nuts, peanuts, and eggs, so trace amounts may be present even if not listed in the ingredients.
If preparing this dish for someone with food allergies, carefully check all packaged ingredient labels, as formulations can change without notice. Consider appropriate substitutions where possible, such as gluten-free pie crusts or dairy-free milk alternatives for those with specific dietary restrictions.
Safety Precautions
Ensuring food safety is crucial when preparing your Pillsbury chicken pot pie to prevent foodborne illness and guarantee the best possible dining experience.
Temperature Guidelines
- Always cook chicken to an internal temperature of 165°F (74°C) before adding it to your pot pie filling
- The completed pot pie must reach an internal temperature of at least 165°F (74°C) at its center before serving
- Use a food thermometer inserted through one of the vents in the top crust to verify temperature
- Allow the pie to rest for 5 minutes after removing from the oven, as internal temperature will continue to rise slightly
Handling Raw Ingredients
- Wash hands thoroughly with soap and warm water for at least 20 seconds before and after handling raw chicken
- Use separate cutting boards and utensils for raw chicken and other ingredients
- Sanitize all surfaces that come into contact with raw chicken using a kitchen sanitizer or a solution of 1 tablespoon bleach per gallon of water
- Never reuse marinades or containers that have held raw chicken without proper cleaning

Storage Safety
- Refrigerate or freeze the pot pie promptly if not serving immediately
- Keep refrigerated at 40°F (4°C) or below
- Discard any pot pie left at room temperature for more than 2 hours
- When reheating leftovers, ensure the internal temperature reaches 165°F (74°C) throughout
Following these safety precautions ensures your Pillsbury chicken pot pie is not only delicious but also safe for everyone at your table.
Pro Tips & Tricks
Elevate your Pillsbury chicken pot pie from good to extraordinary with these expert insights that make all the difference in texture, flavor, and presentation.
Perfecting the Crust
For that picture-perfect golden crust that’s both flaky and sturdy, brush the top with egg wash (one beaten egg mixed with 1-2 tablespoons of water) before baking. This creates a beautiful shine and enhances browning. To prevent a soggy bottom crust, consider using a metal pie plate which conducts heat better than glass.
Mastering the Filling
The key to a perfect filling consistency lies in the roux (butter and flour mixture). Cook it for a full 2 minutes before adding liquids to eliminate any raw flour taste. For extra richness, substitute half-and-half or cream for milk in your recipe. Adding a splash of white wine while cooking the vegetables adds complexity to the flavor profile.
Temperature Control
Allow refrigerated pie crusts to come to room temperature for exactly 15 minutes—any longer and they become too soft; any shorter and they may crack. When baking, start at 425°F for the first 15 minutes to set the crust structure, then protect the edges with foil to prevent over-browning while the filling cooks through.
Time-Saving Techniques
Use rotisserie chicken to save preparation time without sacrificing flavor. Chop all vegetables to uniform size (about 1/4 inch dice) to ensure even cooking. For busy weeknights, prepare the filling up to two days ahead and refrigerate, then assemble and bake when ready to serve.
Testing for Doneness
Your pot pie is perfectly done when the internal temperature reaches 165°F and the crust is deep golden brown. Look for bubbling around the vents as a visual indicator that the filling is hot throughout. Allow the pie to rest for 10-15 minutes before serving to let the filling set properly.
Serving & Pairing Guide
Transform your Pillsbury chicken pot pie from a simple comfort food to the centerpiece of a memorable meal with these serving suggestions and presentation ideas.
Complementary Side Dishes
The rich, savory nature of chicken pot pie pairs beautifully with lighter sides that provide contrast in texture and flavor:
Fresh Vegetable Options:
- Cucumber tomato salad with a light vinaigrette
- Roasted Brussels sprouts with a touch of balsamic glaze
- Garlic butter sautéed mushrooms for an earthy complement
- Simple green salad with a lemon vinaigrette to cut through the richness
Starchy Accompaniments:
- Garlic smashed potatoes for a double dose of comfort
- Whole grain rice pilaf for a nutritious addition
- Sweet potatoes roasted with herbs for a seasonal touch
Bread Options:
- Warm biscuits for those who can never have enough bread
- Garlic bread for a flavor-packed side
- Cornbread for a Southern-inspired meal
Presentation Techniques
Elevate the visual appeal of your pot pie with these simple presentation tips:
- Serve individual portions on warmed plates with a sprig of fresh thyme
- For family-style serving, place the entire pie on a wooden board surrounded by fresh herbs
- Use a sharp knife and pie server to create clean slices that showcase the layers
- Drizzle a small amount of extra gravy around each serving for restaurant-quality plating
- For special occasions, create a decorative pattern or initial on the top crust with extra dough before baking
Beverage Pairings
Complete your meal with the perfect beverage:
- A crisp Chardonnay or light Pinot Noir complements the savory flavors
- Sparkling apple cider offers a family-friendly option
- Iced tea with lemon provides refreshing contrast to the rich dish
Recipe Variations
Adapt this classic Pillsbury chicken pot pie to suit different dietary needs, seasonal ingredients, or simply to explore new flavor profiles while maintaining its comforting essence.
Dietary Adaptations
Gluten-Free Version:
Substitute the Pillsbury refrigerated pie crusts with gluten-free pie crusts available in most grocery stores. Replace all-purpose flour in the filling with a gluten-free flour blend or cornstarch (use 3 tablespoons instead of 1/3 cup). Ensure your chicken broth is certified gluten-free.
Dairy-Free Option:
Replace butter with olive oil or plant-based butter. Substitute milk with unsweetened almond milk, oat milk, or coconut milk (the latter will add a subtle coconut flavor). For extra creaminess without dairy, add 1/4 cup of pureed white beans or cauliflower to the sauce.
Lower-Calorie Alternative:
Create a “healthified” version by using just a top crust and eliminating the bottom crust. Increase the vegetable-to-chicken ratio and use reduced-fat milk instead of whole milk or cream. This simple modification can reduce calories by up to 50% and fat by 76%.
Seasonal Variations
Spring Chicken Pot Pie:
Lighten up your spring version with fresh asparagus tips, baby peas, and tender young carrots. Add 2 tablespoons of fresh chopped herbs like dill, chives, and parsley to brighten the flavor profile.
Summer Garden Pot Pie:
Incorporate summer produce like fresh corn kernels, zucchini, and cherry tomatoes. Add a tablespoon of lemon zest to the filling for a refreshing citrus note that complements warm weather dining.
Autumn Harvest Pot Pie:
Create a heartier fall version with diced butternut squash, mushrooms, and a tablespoon of fresh sage. Add a pinch of nutmeg and cinnamon to the filling for subtle warmth.
Winter Comfort Pot Pie:
Develop deeper flavors for winter with caramelized onions, roasted garlic, and root vegetables like parsnips and turnips. Add a tablespoon of tomato paste to the roux for richness and color.
Creative Twists
Transform your pot pie into different formats for variety:
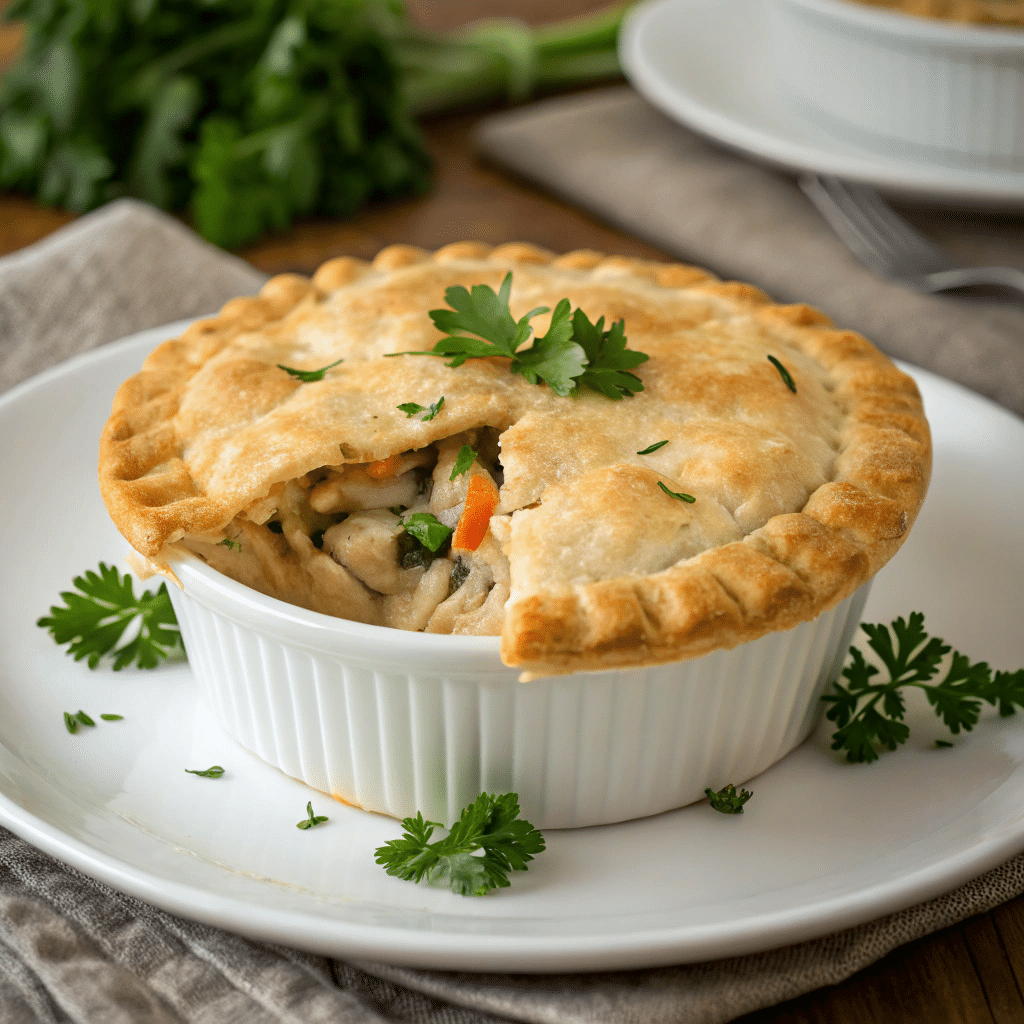
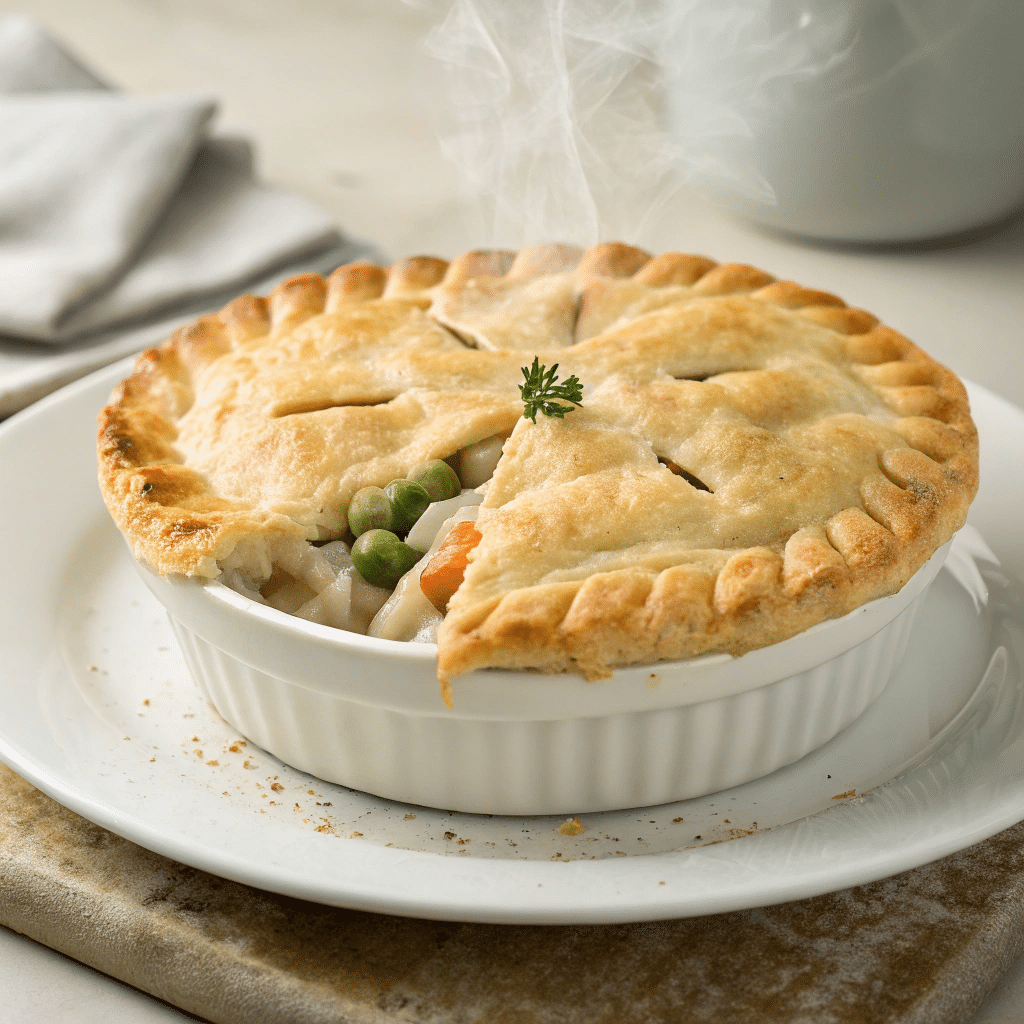
- Create individual pot pies using ramekins for elegant single servings
- Turn the filling into a pot pie soup by adding extra broth
- Use the filling to stuff poblano peppers for a Mexican-inspired variation
- Mix with pasta for a comforting pot pie pasta bake topped with cheese
Storage & Reheating Guide
Proper storage and reheating techniques are essential to maintain the quality and safety of your Pillsbury chicken pot pie. Follow these guidelines to enjoy leftovers that taste almost as good as when freshly baked.
Refrigerating Leftovers
For optimal food safety and quality, allow your chicken pot pie to cool to room temperature (but no longer than 2 hours after baking) before refrigerating. Wrap the remaining pot pie in its original baking dish with plastic wrap or aluminum foil, ensuring it’s tightly sealed to prevent it from absorbing other flavors in your refrigerator. Properly stored leftovers will remain safe and delicious for 3-4 days.
Freezing Considerations
While convenient, freezing a Pillsbury chicken pot pie is generally not recommended. The crust tends to absorb moisture from the filling during the freezing process, resulting in a soggy texture when thawed and reheated. If you’re looking to prepare meals in advance, consider making just the filling ahead of time and freezing it separately, then adding fresh crusts when you’re ready to bake.
Reheating Methods
Oven Method (Recommended):
- Preheat your oven to 350°F
- Cover the pie or individual portions with aluminum foil to prevent further browning
- Heat for 15-20 minutes for individual portions or 25-30 minutes for larger portions
- Check that the internal temperature reaches 165°F before serving
Microwave Method (Quick Option):
- Place a single serving on a microwave-safe plate
- Cover loosely with a microwave-safe cover
- Heat on medium-high (70% power) for 2-3 minutes
- Check temperature and heat in additional 30-second intervals if needed
The oven method is strongly preferred as it helps maintain the crust’s texture, while microwaving may result in a softer crust but is convenient for single servings when time is limited.
Troubleshooting Guide
Even experienced bakers occasionally encounter challenges when making chicken pot pies. Here are solutions to common issues that might arise during preparation.
Soggy Bottom Crust
If your bottom crust turns out soggy rather than flaky, try these fixes:
- Pre-bake the bottom crust for 7-8 minutes at 425°F before adding filling
- Use a metal or dark-colored pie plate which conducts heat better than glass
- Place the pie on the lowest oven rack for the first 15-20 minutes of baking
- Ensure filling isn’t too wet by letting it cool slightly before adding to the crust
Filling Too Runny
When your pot pie filling spills out like soup rather than holding its shape:
- Cook the roux longer before adding liquids to develop more thickening power
- Simmer the filling an extra 3-5 minutes to reduce excess moisture
- Add 1-2 teaspoons of cornstarch mixed with cold water if the filling needs last-minute thickening
- Allow the baked pie to rest 15 minutes before cutting to let filling set up properly
Unevenly Baked Crust
If parts of your crust are perfectly golden while others remain pale or raw:
- Rotate the pie halfway through baking to account for oven hot spots
- Position the pie in the center of the oven for most even heat distribution
- Cut proper vents in the top crust to allow steam to escape evenly
- Use an oven thermometer to verify your oven temperature is accurate
Crust Shrinkage
When your beautiful decorative edge disappears during baking:
- Chill the assembled pie for 15 minutes before baking
- Don’t stretch the dough when placing it in the pie plate
- Ensure the edge is properly sealed and crimped firmly
Common Mistakes
Avoiding these frequent errors will help ensure your Pillsbury chicken pot pie turns out perfectly every time.
Crust Preparation Errors
Using butter that’s too warm is a critical mistake that prevents the development of those desirable flaky layers. Always use cold butter straight from the refrigerator. Over-kneading the dough is equally problematic, as it develops too much gluten, resulting in a tough rather than tender crust. Mix just until the ingredients come together, then stop.
Filling Missteps
Overfilling the pie is tempting but leads to bubbling over and soggy crusts. Leave about half an inch of space below the top crust to allow for expansion during baking. Another common error is using hot filling, which melts the butter in the crust before baking even begins, compromising the flaky texture.
Baking Blunders
Forgetting to cut vents in the top crust prevents steam from escaping, leading to soggy, undercooked results. Always create several slits or decorative cuts. Many bakers also make the mistake of skipping the foil shield for crust edges, resulting in burnt edges before the filling is properly heated through.
Fun Facts & Trivia
Did you know that the classic Pillsbury chicken pot pie recipe was originally developed in the Pillsbury Test Kitchens back in 1999? This beloved recipe first appeared in a pie booklet and was later featured on the refrigerated Pillsbury pie crust box, becoming one of the most viewed and top-rated recipes on Pillsbury.com.
The concept of meat pies dates back centuries, with early versions appearing in medieval England during the 16th century. These pies were originally created as a practical way to preserve meat before refrigeration existed, with the pastry shell serving as both container and preservation method.
Pillsbury has been helping home cooks create delicious meals since 1869, when Charles Alfred Pillsbury founded the company. The iconic Pillsbury Doughboy (Poppin’ Fresh) wasn’t introduced until 1965, but has since become one of the most recognized brand mascots in American advertising history.
The term “pot pie” specifically refers to a pie that’s baked in a pot—originally a deep, straight-sided dish. This distinguishes it from traditional pies that were baked on flat surfaces or in shallow pie tins.
Over the years, Pillsbury has refined their chicken pot pie recipe, making subtle but significant improvements. They’ve adjusted the ratio of chicken broth to milk (adding 1/4 cup more broth and using 3 tablespoons less milk) to create the perfect sauce consistency and flavor profile.
A single serving of classic Pillsbury chicken pot pie contains approximately 25 grams of protein, making it not just comfort food, but a substantial source of this essential nutrient.
Final Summary and Call to Action
There’s something truly special about the moment when a golden-brown Pillsbury chicken pot pie emerges from your oven, filling your kitchen with an irresistible aroma that signals comfort and satisfaction. This classic dish represents the perfect marriage of convenience and homemade taste—a culinary achievement that’s accessible to cooks of all skill levels.
From its flaky, buttery crust to its rich, creamy filling packed with tender chicken and colorful vegetables, every element of this pot pie has been thoughtfully crafted and refined over decades to deliver the ultimate comfort food experience. Whether you’re preparing a weeknight family dinner, looking for a crowd-pleasing meal to share with friends, or simply craving something warm and satisfying, this Pillsbury chicken pot pie recipe delivers consistently delicious results.
The beauty of this recipe lies not just in its taste, but in its versatility. Feel free to experiment with seasonal variations, dietary adaptations, or creative twists to make it uniquely yours. Add your favorite herbs, swap in seasonal vegetables, or try different crust techniques—this foundational recipe provides the perfect canvas for culinary creativity.
Now it’s your turn to experience the joy of creating this beloved classic in your own kitchen. Gather your ingredients, preheat your oven, and prepare to delight in the simple pleasure of homemade chicken pot pie. As you share this meal with family and friends, you’ll be continuing a cherished culinary tradition that spans generations.
Don’t wait for a special occasion—sometimes the most ordinary Tuesday deserves to be transformed by the extraordinary comfort of a perfectly baked chicken pot pie. Your kitchen will fill with mouthwatering aromas, your table will welcome satisfied smiles, and you’ll rediscover why some recipes truly stand the test of time.
For more recipes, visit my Facebook page.
Frequently Asked Questions
Q: What is chicken pot pie filling made of?
A: Traditional Pillsbury chicken pot pie filling consists of tender shredded or diced cooked chicken, frozen mixed vegetables (typically peas, carrots, corn, and green beans), and a rich, creamy sauce made from butter, flour, chicken broth, and milk. This combination creates the perfect savory filling that’s both hearty and comforting.
Q: Why is my pot pie casserole runny?
A: A runny pot pie typically results from not cooking the flour-based roux long enough before adding liquids. To fix this, cook the butter and flour mixture for at least 2 minutes before adding broth and milk. Also, make sure to simmer the filling until it thickens properly and allow the baked pie to rest for 5-10 minutes before serving to let the filling set.
Q: Can I make chicken pot pie ahead of time?
A: Yes! You can prepare the filling up to 2 days ahead and store it in the refrigerator. When ready to bake, bring the filling to room temperature, assemble with the Pillsbury pie crusts, and bake as directed. This is a great time-saving strategy for busy weeknights.
Q: How do I prevent a soggy bottom crust?
A: To prevent a soggy bottom crust, try baking your pot pie on the lowest rack of your oven for the first 15-20 minutes. Using a metal pie plate instead of glass can also help conduct heat better. Another effective technique is to pre-bake (blind bake) the bottom crust for about 7-8 minutes at 425°F before adding the filling.
Q: Can I use Pillsbury biscuits instead of pie crust?
A: Absolutely! Pillsbury offers a delicious variation called Chicken Pot Pie Bake with Biscuits. Simply prepare your chicken filling, pour it into a baking dish, then top with quartered Pillsbury Grands! Flaky Layers Butter Tastin’ Biscuits that have been tossed in melted butter. Bake at 375°F for 20-22 minutes for a unique twist on the classic.
Q: How do I know when my chicken pot pie is done?
A: Your Pillsbury chicken pot pie is done when the crust is golden brown and the filling is bubbling through the vents. For food safety, the internal temperature should reach at least 165°F. If you notice the edges browning too quickly, cover them with foil strips for the remainder of the baking time.
Q: Can I freeze leftover chicken pot pie?
A: While it’s possible to freeze leftover chicken pot pie, the texture of the crust may change upon thawing and reheating. If you do freeze it, wrap individual portions tightly in plastic wrap and then aluminum foil. Thaw in the refrigerator overnight before reheating in a 350°F oven until heated through.
Comments are closed.