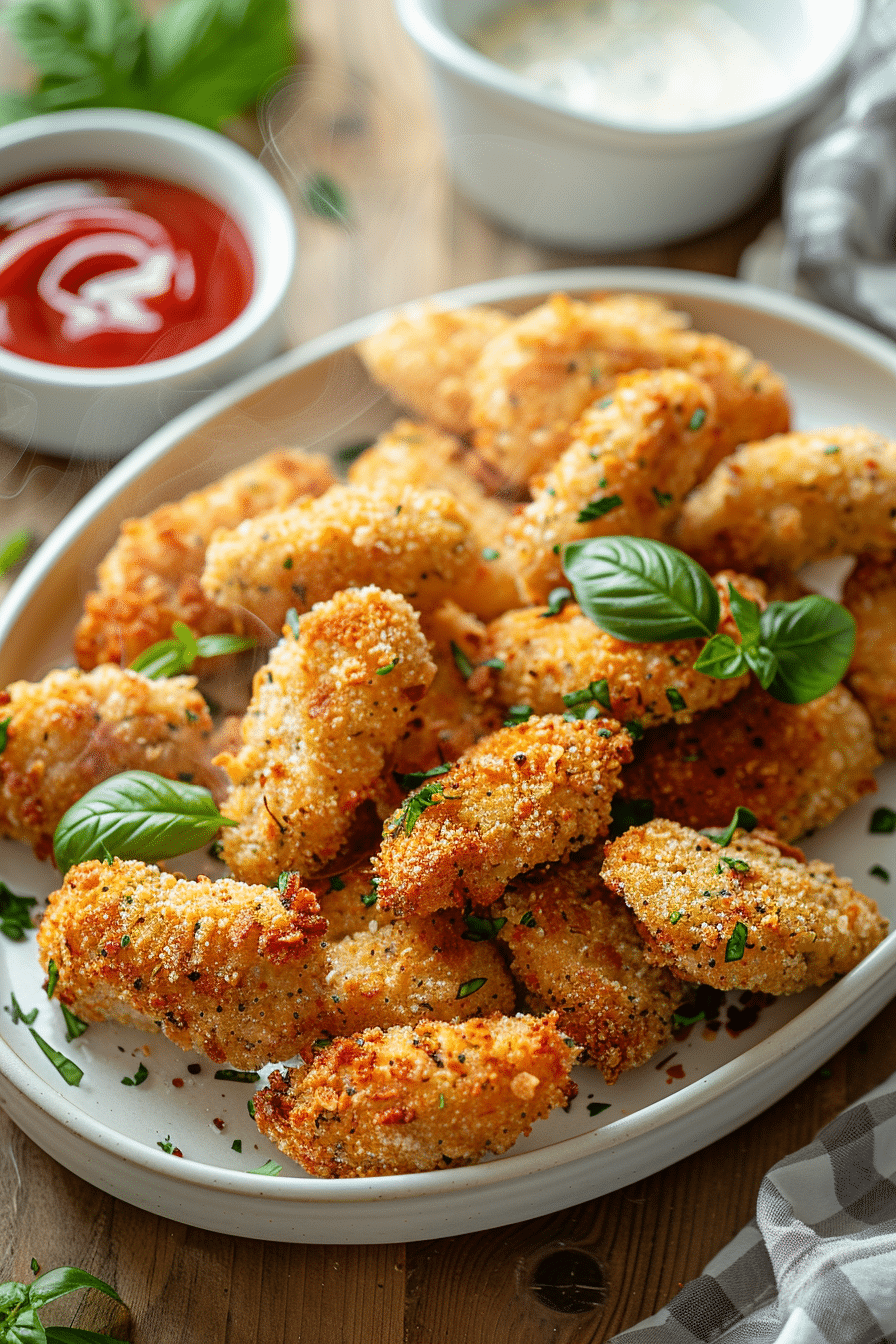
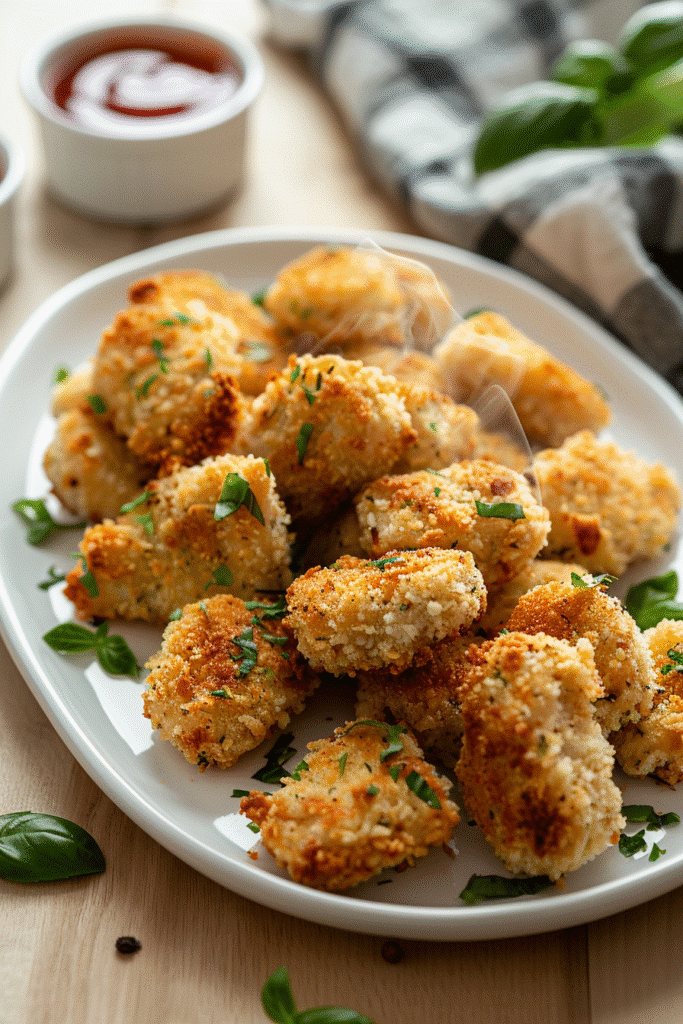
Are you tired of greasy, processed chicken nuggets but still crave that satisfying crunch? Say hello to your new favorite dinner solution – homemade Baked Chicken Nuggets that are crispy, flavorful, and surprisingly easy to make! This recipe transforms simple chicken breasts into golden, restaurant-quality nuggets that both kids and adults will absolutely love. With just seven ingredients and 30 minutes of your time, you’ll have a wholesome meal that’s far superior to anything from the freezer aisle.
Whether you’re meal prepping for the week, looking for quick dinner ideas, or simply want to serve your family healthier comfort food, these baked chicken nuggets deliver on every level. The secret lies in the perfectly seasoned bread crumb coating infused with Parmesan cheese, basil, and thyme, creating layers of flavor that rival any fried version – without the guilt or mess!
Table of Contents
Why You’ll Love These Baked Chicken Nuggets
Healthier Alternative: By baking instead of frying, you’ll cut down significantly on calories and unhealthy fats while still achieving that coveted crispy exterior. The butter provides just enough richness without overwhelming the dish.
Kid-Friendly: Getting picky eaters to enjoy chicken has never been easier. The familiar nugget shape and delicious coating make this an instant hit with children of all ages.
Customizable: You can easily adapt the seasonings to match your family’s preferences or dietary needs. Add some cayenne for heat, swap the Parmesan for nutritional yeast for dairy-free options, or experiment with different herb combinations.
Budget-Friendly: Using simple pantry staples and affordable chicken breasts, this recipe won’t break the bank while still providing high-quality protein for your family.
Versatile Meal Option: Serve these nuggets as a main course with your favorite sides, pack them in lunchboxes, use them in salads, or set them out as party appetizers with various dipping sauces.
Ingredients You’ll Need
| Ingredient | Quantity | Notes |
|---|---|---|
| Skinless, boneless chicken breasts | 3 breasts | About 1.5-2 lbs total |
| Italian seasoned bread crumbs | 1 cup | Store-bought or homemade |
| Grated Parmesan cheese | ½ cup | Freshly grated works best |
| Dried basil | 1 tablespoon | Can substitute with Italian seasoning |
| Dried thyme | 1 teaspoon | Adds earthy, aromatic flavor |
| Salt | 1 teaspoon | Adjust to taste |
| Butter, melted | ½ cup | Use unsalted if preferred |
Ingredient Tips and Substitutions
Chicken: While this recipe calls for chicken breasts, you can also use chicken tenderloins for even quicker prep. Just adjust the cutting accordingly.
Bread Crumbs: Italian seasoned bread crumbs add extra flavor, but plain bread crumbs work too if you increase the herbs slightly. For a gluten-free version, use gluten-free bread crumbs or crushed cornflakes.
Parmesan Cheese: The Parmesan adds a savory, umami depth and helps create that golden-brown crust. Don’t skip it! Pre-grated works, but freshly grated Parmesan melts and browns more evenly.
Butter: While butter adds rich flavor, you can substitute with olive oil or melted coconut oil for a different nutritional profile.
Step-by-Step Instructions
Step 1: Prepare Your Workspace
Start by gathering all your ingredients and preheating your oven to 400°F (200°C). This high temperature is crucial for achieving that crispy exterior while keeping the chicken juicy inside. Lightly grease a large cookie sheet or baking pan with cooking spray or a thin layer of oil.
Step 2: Cut the Chicken
Pat your chicken breasts dry with paper towels, then cut them into uniform 1½-inch pieces. Consistent sizing ensures even cooking – you don’t want some pieces overcooked while others remain undercooked. Aim for bite-sized chunks that are easy for kids (and adults!) to eat.
Step 3: Create the Coating Station
Set up your breading station with two separate bowls. In a medium bowl, combine the Italian bread crumbs, grated Parmesan cheese, dried basil, dried thyme, and salt. Mix thoroughly until all the ingredients are evenly distributed. In a second shallow bowl or dish, place your melted butter.
Step 4: Coat the Chicken
This is where the magic happens! Take each chicken piece and dip it first into the melted butter, ensuring it’s completely coated. The butter acts as the “glue” that helps the bread crumb mixture adhere to the chicken. Next, transfer the butter-coated piece to the bread crumb mixture and coat generously on all sides. Press the coating gently onto the chicken to ensure it sticks well.
Step 5: Arrange on Baking Sheet
Place each coated nugget on your prepared baking sheet in a single layer, making sure they’re not touching. Overcrowding the pan will cause steam and prevent that crispy exterior from forming. If needed, use two baking sheets.
Step 6: Bake to Perfection
Bake the nuggets in your preheated oven for about 20 minutes, or until they’re golden brown and the internal temperature reaches 165°F. The coating should be crispy and the chicken cooked through but still juicy. For extra crispiness, you can flip the nuggets halfway through baking, though this is optional.
Step 7: Serve and Enjoy
Remove from the oven and let the nuggets rest for 2-3 minutes before serving. This brief resting period allows the juices to redistribute throughout the meat, ensuring maximum tenderness.
Pro Tips for Perfect Baked Chicken Nuggets
1. Don’t Skip Patting the Chicken Dry: Excess moisture will prevent the coating from adhering properly and can result in soggy nuggets.
2. Use a Wire Rack: For even crispier results, place a wire cooling rack on your baking sheet and arrange the nuggets on the rack. This allows hot air to circulate around all sides.
3. Make Them Ahead: These nuggets freeze beautifully! Prepare and bake as directed, then cool completely and freeze in airtight containers for up to 3 months. Reheat in a 375°F oven for 15-20 minutes.
4. Try Different Dipping Sauces: While ketchup is classic, experiment with honey mustard, ranch dressing, BBQ sauce, buffalo sauce, or garlic aioli to keep things interesting.
5. Add Extra Crunch: For an even crunchier coating, add ¼ cup of panko bread crumbs to your bread crumb mixture.
6. Season the Butter: Mix a bit of garlic powder or paprika into your melted butter for an extra flavor boost.
Serving Suggestions
These baked chicken nuggets are incredibly versatile and pair wonderfully with numerous side dishes:
- Classic Combo: Serve with french fries or sweet potato fries and coleslaw
- Healthy Plate: Pair with roasted vegetables and quinoa
- Salad Topper: Slice and add to Caesar salad or garden salad
- Wrap It Up: Use as protein in wraps with lettuce, tomatoes, and ranch
- Mac and Cheese: Serve alongside creamy mac and cheese for ultimate comfort food
- Veggie Sticks: Accompany with carrot sticks, celery, and cucumber slices
Storage and Reheating
Refrigerator: Store leftover nuggets in an airtight container in the refrigerator for up to 4 days.
Freezer: Freeze cooked nuggets in freezer-safe bags or containers for up to 3 months.
Reheating: For best results, reheat in a 375°F oven for 10-15 minutes until heated through and crispy. You can also use an air fryer at 375°F for 5-7 minutes. Avoid the microwave if possible, as it will make the coating soggy.
Frequently Asked Questions
Q: Can I use chicken thighs instead of breasts?
A: Absolutely! Boneless, skinless chicken thighs work wonderfully and actually tend to be more flavorful and juicy. The cooking time remains the same.
Q: How do I know when the nuggets are fully cooked?
A: The internal temperature should reach 165°F when measured with a meat thermometer. Visually, the coating should be golden brown and the chicken should no longer be pink inside.
Q: Can I make these gluten-free?
A: Yes! Simply substitute the Italian bread crumbs with gluten-free bread crumbs or finely crushed gluten-free cornflakes. The rest of the recipe remains the same.
Q: Why are my nuggets not crispy?
A: Common reasons include overcrowding the pan, not preheating the oven adequately, or too much moisture on the chicken. Make sure to pat the chicken completely dry and give each nugget enough space on the baking sheet.
Q: Can I prepare these ahead of time?
A: You can bread the nuggets up to 4 hours ahead and keep them covered in the refrigerator until you’re ready to bake. This actually helps the coating adhere better!
Q: What’s the best way to cut uniform chicken pieces?
A: Partially freeze the chicken breasts for about 30 minutes before cutting. This firms them up and makes slicing into uniform pieces much easier.
Nutritional Benefits
While these nuggets are a healthier alternative to fried versions, they still pack impressive nutritional value:
- High Protein: Chicken breast is an excellent source of lean protein, essential for muscle building and repair
- Lower Fat: Baking instead of deep-frying significantly reduces the fat content
- Calcium: Parmesan cheese provides calcium for strong bones
- Herbs: Basil and thyme offer antioxidants and anti-inflammatory properties
- Customizable: You can easily adjust the recipe to meet specific dietary needs
Make It Your Own
The beauty of homemade chicken nuggets is the endless customization options:
Spicy Version: Add 1 teaspoon of cayenne pepper or smoked paprika to the bread crumb mixture
Garlic Lover’s: Mix 2 teaspoons of garlic powder into the coating
Ranch Style: Replace some of the herbs with ranch seasoning mix
Lemon Herb: Add lemon zest and increase the thyme for a bright, fresh flavor
Tex-Mex: Use crushed tortilla chips instead of bread crumbs and add cumin and chili powder
Final Thoughts
These Baked Chicken Nuggets prove that healthy eating doesn’t mean sacrificing flavor or texture. With a crispy, golden exterior and tender, juicy interior, they rival any restaurant version while being far better for you and your family. The simple preparation makes this recipe perfect for busy weeknights, while the delicious results make it worthy of serving to guests.
Whether you’re feeding picky eaters, meal prepping for the week, or just craving comfort food without the guilt, this recipe delivers on every front. The best part? Once you master this basic technique, you can customize it endlessly to suit your tastes and dietary needs.
So preheat that oven, gather your ingredients, and get ready to enjoy the best homemade chicken nuggets you’ve ever tasted. Your family will be asking for these on repeat – and you’ll be happy to oblige knowing you’re serving them wholesome, delicious food made with love!
Ready to make these irresistible Baked Chicken Nuggets tonight? Pin this recipe for later and let us know how yours turn out in the comments below!
PrintCrispy Baked Chicken Nuggets: The Ultimate Healthy Family Dinner
Crispy and flavorful baked chicken nuggets made with Italian seasoned bread crumbs, Parmesan cheese, and aromatic herbs. A healthier alternative to fried nuggets that’s perfect for family dinners and meal prep.
- Prep Time: 10
- Cook Time: 20
- Total Time: 30
- Yield: 4
- Category: Main Course
- Method: Baking
- Cuisine: American
Ingredients
3 skinless, boneless chicken breasts
1 cup Italian seasoned bread crumbs
½ cup grated Parmesan cheese
1 tablespoon dried basil
1 teaspoon dried thyme
1 teaspoon salt
½ cup butter, melted
Instructions
1. Gather all ingredients. Preheat the oven to 400 degrees F (200 degrees C).
2. Cut chicken breasts into 1 1/2-inch pieces.
3. Mix the bread crumbs, Parmesan, basil, thyme, and salt together well in a medium bowl. Put melted butter in a bowl or dish for dipping.
4. Dip chicken pieces into the melted butter first, then coat with the bread crumb mixture.
5. Place the well-coated chicken nuggets on a lightly greased cookie sheet in a single layer.
6. Bake nuggets in the preheated oven until browned and chicken is cooked through, about 20 minutes.
Notes
For extra crispy nuggets, place them on a wire rack set on the baking sheet.
Store leftovers in an airtight container in the refrigerator for up to 4 days.
These nuggets freeze well – freeze cooked nuggets for up to 3 months and reheat in a 375°F oven.
You can substitute olive oil for butter if preferred.
For gluten-free version, use gluten-free bread crumbs.