
Table of Contents
A Spooky, Sweet Treat for Your Halloween Party
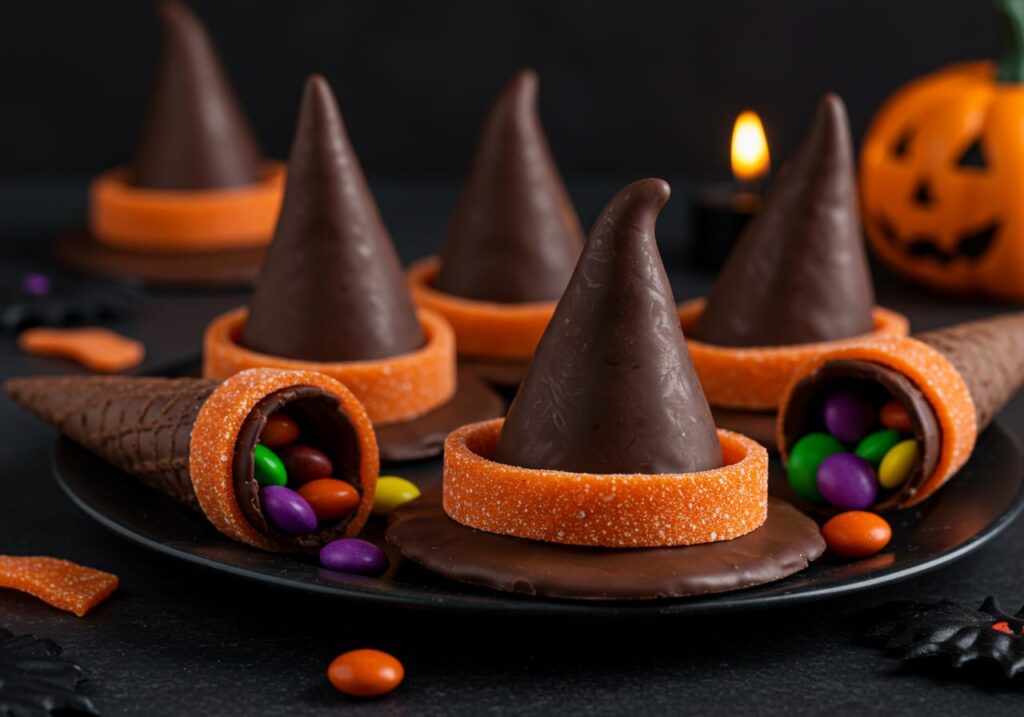
Halloween Witches Hats made with ice cream cones and chocolate cookies are a delightful and festive treat to wow your guests. These cute cones painted with melted chocolate and filled with candy bring a whimsical charm alongside rich chocolaty flavor. Perfect for Halloween party snacks or a fun baking project with family, this recipe combines simple ingredients to make an enchanting creation that is as delicious as it is fun.
PrintQuick and Easy Halloween Witches Hat Recipe

Halloween Witches Hats with Ice Cream Cones are a fun and festive treat perfect for Halloween parties. These hats combine sugar cones coated in rich dark cocoa candy melts, soft cocoa cookies, and colorful candy fillings to delight kids and adults alike.
- Prep Time: 20 mins
- Cook Time: 15 mins
- Total Time: 35 mins
- Yield: 12 hats
- Category: Dessert, Snack
- Method: No Bake, Baking
- Cuisine: American
- Diet: Vegetarian
Ingredients
- 12 sugar cones
- 12 ounces Wilton Dark Cocoa Candy Melts
- 12 Soft Cocoa Cookies
- 4 orange-colored fruit roll-ups Candies of your choice to fill hats: fruit gummies, candy corn, Mellowcreme pumpkins, M&M’s, fun-size candy bars, etc.
Instructions
- Melt the Wilton Dark Cocoa Candy Melts in 30-second bursts until smooth.
- Coat each sugar cone completely with the melted candy melts; set on wax paper to harden.
- Fill each coated cone with your choice of candies, to just below the cone edge.
- Paint melted candy around the cone rim and place a Soft Cocoa Cookie on top.
- Invert carefully to form the witch’s hat shape; stabilize with melted candy if needed.
- Unroll fruit roll-ups; cut into strips and roll into ropes.
- Wrap each rope around the cone where it meets the cookie as the hat band.
- Pinch the ends of the rope at the back to secure.
- Allow assembled hats to set until chocolate hardens.
- Serve immediately or store in a cool place up to two days.
Notes
Use natural cocoa powder cookies for the best flavor. Chill melted candy melts slightly for easier coating. Freeze fruit roll-ups for 5 minutes to prevent tearing. Use leftover melted candy to secure cookie and cone. Experiment with different candies for fillings.
Ingredients for Halloween Witches Hats
| Ingredient | Quantity |
|---|---|
| Sugar cones | 12 |
| Wilton Dark Cocoa Candy Melts | 12 ounces |
| Soft Cocoa Cookies | 12 |
| Orange-colored fruit roll-ups | 4 |
| Candies (fruit gummies, candy corn, M&M’s, fun-size bars, etc.) | As desired |
Step-by-Step Instructions
Melt the Coating
- Place the Wilton Dark Cocoa Candy Melts in a large microwave-safe bowl.
- Microwave in 30-second bursts, stirring in between until melted smooth.
Coat the Cones
- Lay a piece of wax paper on your workspace large enough to hold all cones.
- Hold a sugar cone by the tip and coat it gently with melted candy melts using a pastry brush or spoon.
- Cover all but the tip first, then stand the cone on wax paper to coat the tip as well.
- Repeat with all cones, then allow to harden until the coating is firm to touch.
- Reserve leftover melted candy for assembly.
Assemble the Witches Hats
- Have ready the coated sugar cones, soft cocoa cookies, leftover melted candy, and candies for filling.
- Fill each cone with candies, stopping just below the cone’s edge.
- Paint melted candy on the rim of the cone.
- Place a Soft Cocoa Cookie on top, with the cone inside the cookie center.
- Carefully invert and set on the workspace the shape of a witch’s hat!
- If wobbly, secure with a dab of melted candy where the cone meets the cookie.
- Repeat for all cones and cookies, letting the chocolate set fully.
Make the Hat Bands
- Unroll fruit roll-ups; if sticky, chill in freezer for 5 minutes for easy unrolling.
- Cut each roll-up lengthwise into 3 strips then roll each into a thin rope.
- Twist and stretch each rope and wrap around the cone where it meets the cookie.
- Pinch ends together at the back for a perfect hat band effect.
Serve or Store
- Arrange witch hats on a platter for immediate serving or store in a covered container in a cool place.
- Best enjoyed within two days of assembly.
Helpful Tips
- Use a pastry brush for smooth cone coating.
- Let the melted candy cool slightly to avoid drips but ensure it’s still brushable.
- Get creative with candy fillings for colorful surprises inside the hats.
- Chilling fruit roll-ups makes them easier to handle without tearing.
- Use the leftover melted candy as ‘glue’ to firmly affix parts.
- Soft Cocoa Cookies provide the perfect base with their rich chocolate flavor and tender texture.
This Halloween Witches Hats recipe is a magical blend of texture, flavor, and whimsy ready to enchant your family and friends at any spooky celebration!