Table of Contents
Table of Contents
Grinder Sandwich: The Bold Classic You Need to Try
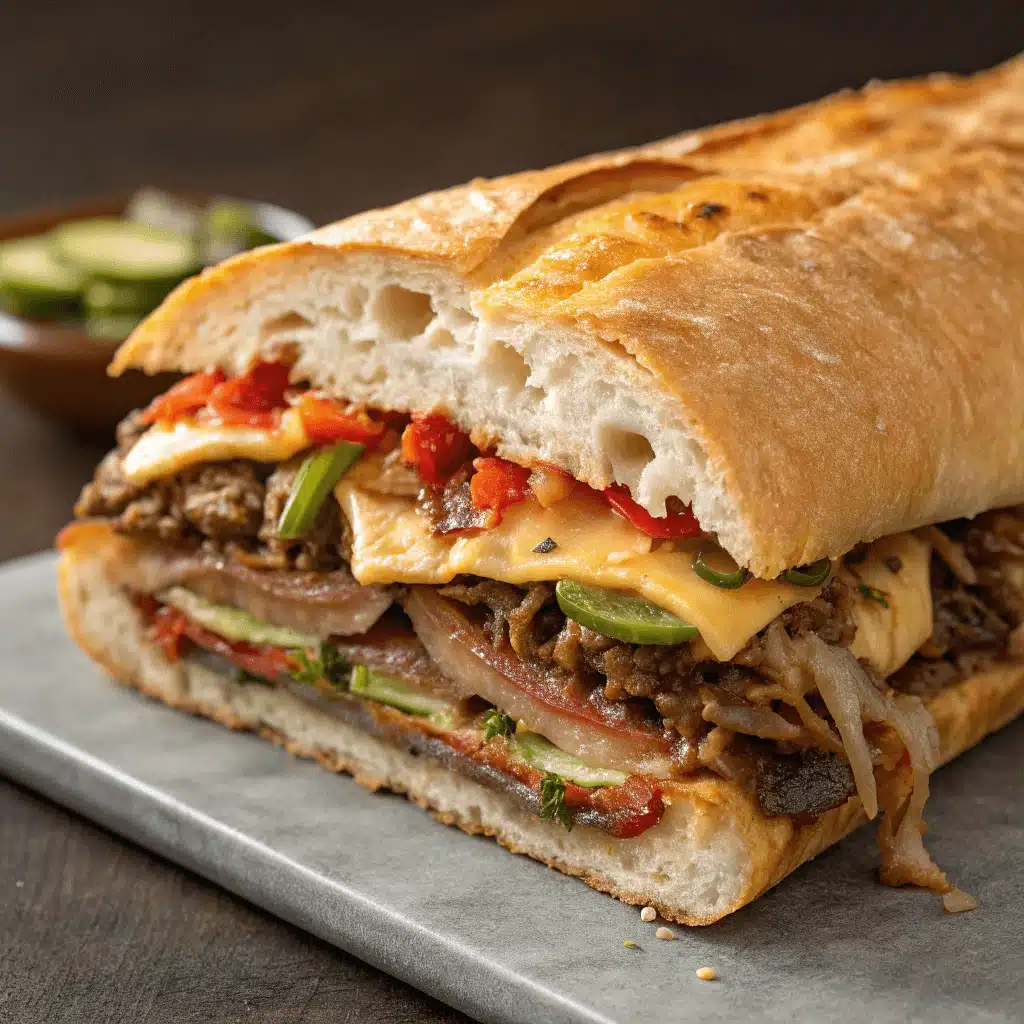
A grinder sandwich is the kind of meal that makes you pause after the first bite. It is hearty, savory, and stuffed with flavor. Whether you grew up in a Northeast deli or just discovered this East Coast icon on your social feed, you are in for a sandwich that delivers bold taste with every layer.
This guide breaks down exactly what makes a sandwich a grinder, what goes into it, and how to recreate that deli-quality flavor at home. We’ll also look at the differences between grinders, hoagies, and subs, so you’re never confused at the counter again. By the end, you’ll have all the tips to build your best sandwich yet.
The Story & Intro: Where My Grinder Obsession Began
Discovering the Sandwich That’s Not Just a Sub
The first time I tried a grinder sandwich was on a trip through Connecticut. We stopped at a no-frills deli on the corner of a quiet town square. The guy behind the counter handed me a toasted sandwich oozing with provolone, crisp lettuce, cured meats, and the most unforgettable grinder sauce. That sandwich was a game-changer. I had never tasted anything quite like it.
Back home in Georgia, I wanted to recreate it, so I experimented. I played with different rolls, meats, sauces, and toasting levels. After a dozen versions, I finally cracked the code. That’s how this grinder sandwich recipe found its place among my weeknight favorites, right next to buffalo chicken wraps and funeral potatoes for the ultimate cozy combo.
What Makes a Sandwich a Grinder?
A grinder sandwich stands out for its toasted bread and bold fillings. Unlike a hoagie, which is typically served cold, grinders are warmed or toasted, giving the bread a crisp bite that contrasts perfectly with melty cheese and juicy meats. The star of the show is the grinder sauce, a creamy, tangy mixture that ties it all together.
PrintGrinder Sandwich: 5 Irresistible Reasons to Love It!

This grinder sandwich recipe is packed with layers of cured meats, melty provolone cheese, crisp lettuce, tomato, and a creamy, zesty grinder sauce on a toasted Italian roll. A bold and satisfying meal perfect for lunch or dinner.
- Prep Time: PT10M
- Cook Time: PT8M
- Total Time: PT18M
- Yield: 2 sandwiches
- Category: Lunch
- Method: Toasting
- Cuisine: American
Ingredients
2 Italian sub rolls
6 slices provolone cheese
6 slices salami
4 slices ham
4 slices pepperoni
1 cup shredded iceberg lettuce
1 small tomato, thinly sliced
¼ red onion, thinly sliced
¼ cup pickled banana peppers
For the Grinder Sauce:
½ cup mayonnaise
1 tablespoon red wine vinegar
½ teaspoon garlic powder
½ teaspoon dried oregano
¼ teaspoon red pepper flakes
1 tablespoon grated parmesan (optional)
Instructions
Step 1: Preheat oven to 400°F and slice rolls lengthwise, keeping one side attached.
Step 2: In a small bowl, mix mayonnaise, vinegar, garlic powder, oregano, red pepper flakes, and parmesan to create grinder sauce.
Step 3: Spread sauce generously on both sides of the open roll.
Step 4: Layer meats on the bottom half and cheese on top of the meats.
Step 5: Place sandwiches on a baking sheet and toast for 6 to 8 minutes until cheese melts and edges are golden.
Step 6: Remove from oven and layer with lettuce, tomato, onions, and banana peppers.
Step 7: Close sandwiches, press gently, slice in half, and serve immediately.

Notes
Customize meats based on your taste or use deli turkey or roast beef.
You can add chopped pickles or extra mustard to the grinder sauce.
For extra crunch, toast the bread with garlic butter before assembling.
What Goes on a Grinder Sandwich?
A true grinder sandwich is more than a pile of meat and bread. Every layer has purpose, from the crusty roll to the zesty sauce. Building one right is all about flavor, texture, and balance. Let’s take a look at what goes inside and how to do it justice.
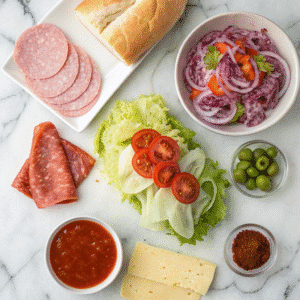
The Essential Ingredients of a Grinder Sandwich
The foundation is the bread. A grinder uses a long, sturdy Italian roll or hoagie bun that can hold up to heat and heavy fillings. It must be toasted until crisp on the outside but still tender enough to bite through easily.
Next come the meats. Classic grinders feature a mix of Italian cold cuts like salami, ham, and pepperoni. Some versions use turkey, roast beef, or chicken, depending on the region and personal taste. The cheese is typically provolone or mozzarella, melted just enough to bind everything together.
The veggies are just as important. Shredded iceberg lettuce, sliced tomatoes, and thin onion strips bring crunch and freshness. Pickled peppers or banana peppers add brightness and tang.
Then there’s the grinder sauce, which elevates everything. It’s a creamy, garlicky blend often made with mayo, red wine vinegar, seasoning, and sometimes grated parmesan. You can mix it to your liking, making it spicier or tangier as you go.
If you love the textures in a breakfast burrito or want something as layered as garlic parmesan chicken pasta, this sandwich hits all the right notes.
Tips for Layering Like a Pro
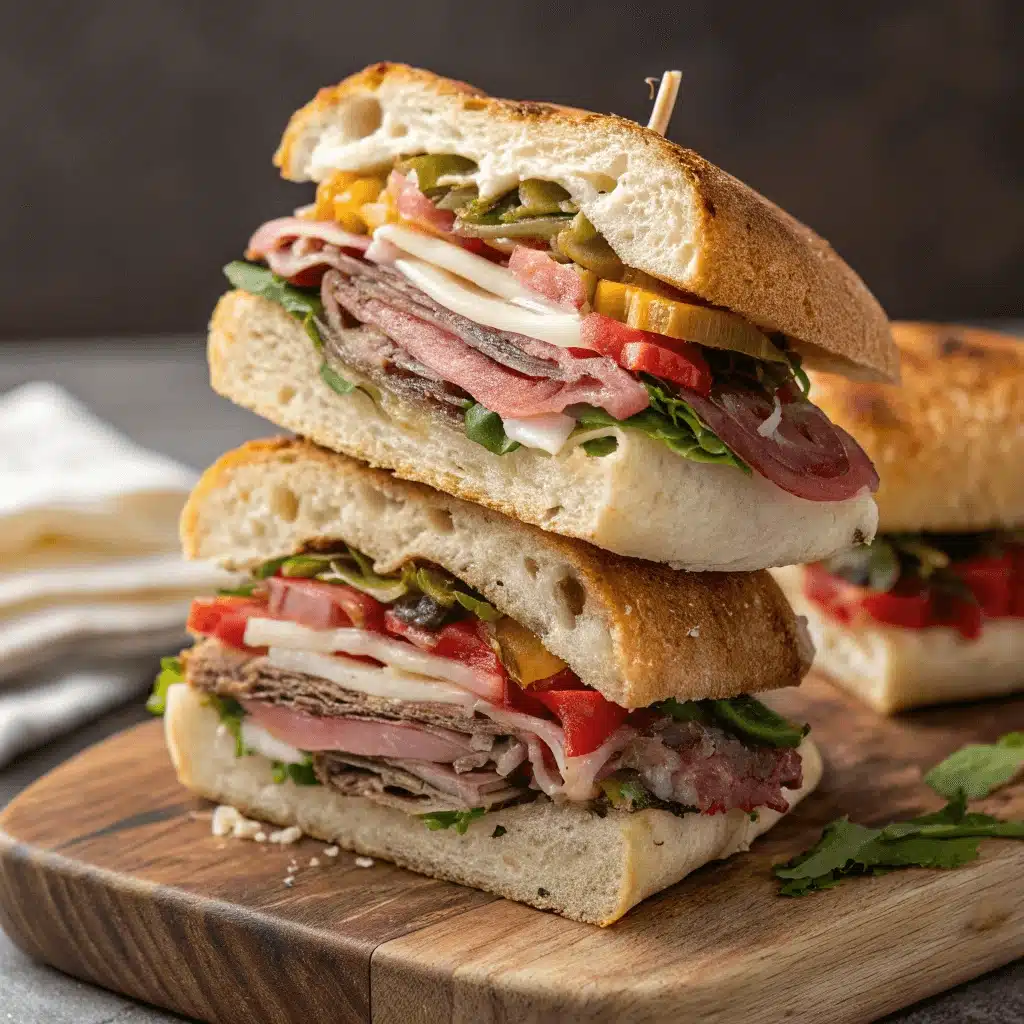
Start with toasted bread, then spread the grinder sauce directly on both sides. Layer cheese on one side and meats on the other. Toast again until the cheese is melted and edges are golden. Pile on lettuce, tomatoes, onions, and peppers, then close it up and press slightly.

Grinder vs. Hoagie vs. Sub: What’s the Difference?
If you’ve ever stood at a sandwich shop menu wondering whether to order a grinder, hoagie, or sub, you’re not alone. The terms are often used interchangeably, but they carry unique regional and preparation differences. Understanding them helps you know what to expect and how to customize your sandwich exactly the way you want it.
What Is the Difference Between a Grinder and a Hoagie?
A grinder is traditionally a hot, toasted sandwich filled with cured meats, melted cheese, and crisp vegetables. It is common in parts of New England, where delis typically heat the sandwich so the bread becomes golden and crunchy.
A hoagie, on the other hand, is a cold sandwich, popular in Philadelphia and surrounding areas. It usually includes deli meats, cheese, lettuce, tomato, and onion, served on a soft Italian roll. The defining trait is that it is not toasted unless requested.
The term sub is more generic and used nationwide. It refers to any sandwich served on a long roll, regardless of whether it’s hot or cold. Think of it as the umbrella category, with hoagies and grinders being more specific versions.
So, while all grinders are technically subs, not all subs are grinders. That toasted finish, along with the signature grinder sauce, sets it apart.
Regional Traditions Add Flavor
Different areas give the grinder its own twist. Some add spicy capicola or prosciutto. Others use garlic butter on the bread before toasting. In many homes, grinder night means customizing each sandwich to personal taste, just like you would with marry me chicken pasta or a layered hot dish like chicken and gravy.
Grinder Sauce: The Secret That Makes It Shine
If the bread holds the sandwich and the meats bring the heft, the grinder sauce is what pulls it all together. This creamy, tangy spread isn’t just a detail, it is the flavor base that makes the grinder stand apart from other subs. Once you try it, you’ll want to spread it on everything.
What Is Grinder Sauce Made Of?
Grinder sauce usually starts with mayonnaise. It brings the rich, creamy texture that anchors the sandwich. From there, red wine vinegar is added to give it that bright, acidic bite. Garlic powder, onion powder, oregano, and chili flakes round out the base flavor profile.
Some versions also include grated parmesan cheese for depth or a squeeze of Dijon mustard for sharpness. The goal is balance. You want the sauce to be bold enough to hold its own against the meats, but not overpowering. It should coat the bread, soak lightly into the lettuce, and deliver flavor in every bite.
A simple ratio to try:
- ½ cup mayo
- 1 tablespoon red wine vinegar
- ½ teaspoon garlic powder
- ½ teaspoon dried oregano
- Pinch of red pepper flakes
- Optional: 1 tablespoon grated parmesan
Mix everything in a bowl, taste, and adjust to your liking. You can add chopped banana peppers or pickle juice if you want extra tang.
Tips to Get It Just Right
Always spread the sauce on both sides of the bread before assembling. If you’re toasting the sandwich again after layering meat and cheese, apply a second light smear of sauce just before adding lettuce and tomato.
Make a double batch and use it as a dip or salad dressing. It pairs beautifully with crab brûlée and even works as a bold side with funeral potatoes.
Frequently Asked Questions About Grinder Sandwiches
Q: What makes a sandwich a grinder?
A: A grinder is defined by its toasted bread, layered meats, melted cheese, and creamy grinder sauce. Unlike a cold sandwich, grinders are heated, which gives the roll a crisp texture and blends the flavors together.
Q: What goes on a grinder sandwich?
A: Classic grinders include Italian meats like salami, ham, and pepperoni, provolone or mozzarella cheese, shredded lettuce, tomato, onions, pickled peppers, and a creamy grinder sauce made with mayo, vinegar, and seasonings.
Q: What is the difference between hoagies and grinders?
A: Hoagies are usually served cold with deli meats and soft rolls, common in Philadelphia. Grinders are toasted and served hot, with melted cheese and a warm, crispy roll. The sauce and texture set grinders apart.
Q: What is grinder sauce made of?
A: Grinder sauce is typically a blend of mayonnaise, red wine vinegar, garlic powder, oregano, red pepper flakes, and sometimes parmesan cheese. It adds a creamy, tangy flavor that ties the sandwich together.
Conclusion
The grinder sandwich is a true East Coast icon for a reason. It is bold, satisfying, and layered with flavor in every bite. From its crispy toasted bread to its melty cheese, savory meats, and creamy sauce, every detail works together to make something special. Whether you’re making it for a quick lunch, a weekend game day meal, or a party tray, the grinder always delivers.
Once you master the grinder sauce and get the layering right, you’ll have a sandwich that rivals your favorite deli. It’s a meal that feels indulgent but is easy to make at home with simple ingredients. And the best part is you can make it your own. Swap meats, add heat, go extra crisp on the toast. There’s no wrong way to do it as long as it’s built with care.
This sandwich deserves a spot in your recipe rotation. Pair it with chips, a salad, or even a warm side like funeral potatoes and you’ve got comfort food at its best.
Article updated 23 June 2025.
For more recipes, visit my Facebook page.