Table of Contents
Table of Contents
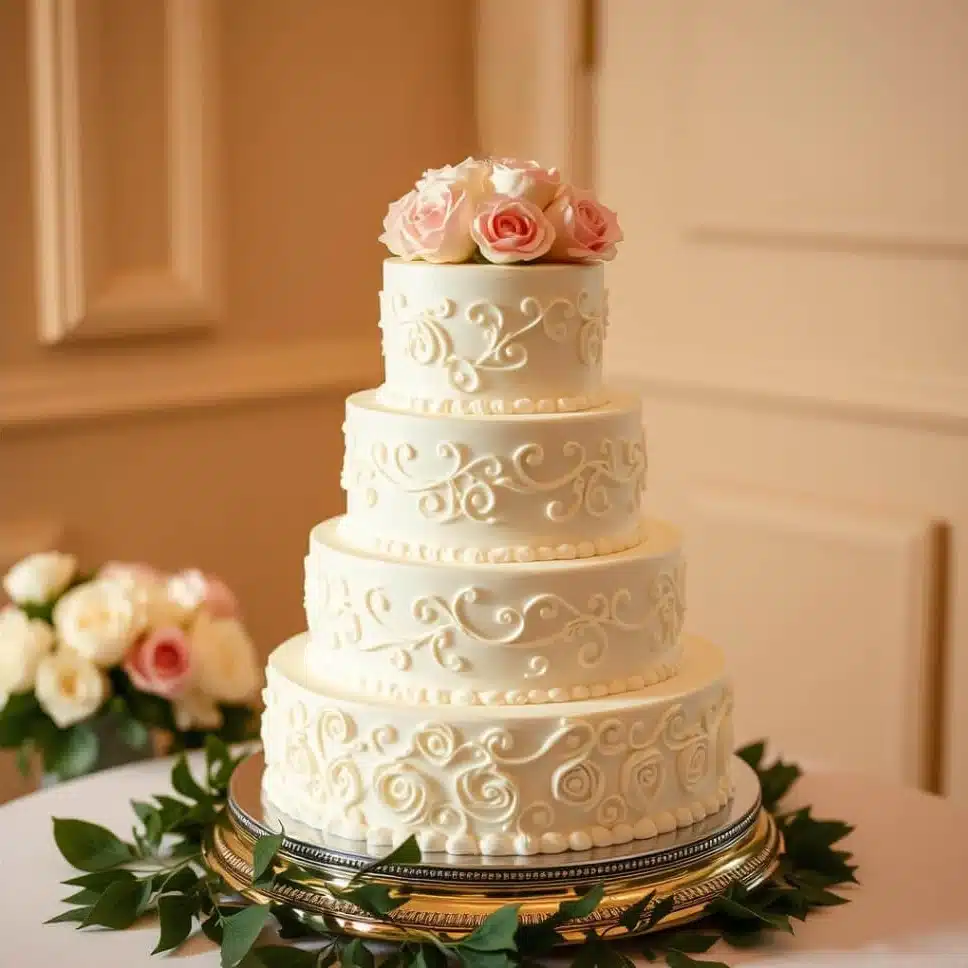
Wedding Cakes: The Complete Guide to Planning Your Perfect Celebration Centerpiece
Hi, I’m Alice Thompson from Madison, Georgia, where I learned that the best celebrations happen when families gather around good food. My experience helping neighbors plan their special occasions taught me that wedding cakes aren’t just about the recipe they’re about creating moments that bind us together. Whether you’re planning an intimate ceremony or grand celebration, I hope this guide helps you find the perfect sweet centerpiece for your love story.
I’ll never forget helping my neighbor Susan plan her daughter’s wedding cake three years ago. We spent an entire afternoon in my kitchen, flour dusting every surface, as she practiced making her signature vanilla layers. “Alice,” she said, tears welling up as she watched her practice wedding cake rise in the oven, “I want this to be perfect for Emma’s big day.” That moment reminded me why wedding cakes hold such a special place in our hearts they’re not just desserts, they’re edible symbols of love, commitment, and celebration that bring families together.
Wedding cakes represent far more than a sweet ending to your reception dinner. These towering confections serve as the visual centerpiece of your celebration, capturing your personal style while honoring traditions that span centuries. From budget-friendly alternatives that save thousands to elaborate custom designs that cost more than some cars, understanding your options helps you make the perfect choice for your special day. Whether you’re considering a simple sheet cake from Costco or commissioning a five-tier masterpiece from a renowned bakery, the key lies in balancing your vision with practical considerations like guest count, venue requirements, and budget constraints.
This guide will walk you through everything you need to know about wedding cakes, from understanding pricing structures and sizing guidelines to exploring creative alternatives and money-saving strategies. You’ll discover how to calculate exactly how much cake you need for your guest list, learn about the pros and cons of popular budget options, and get insider tips for making your wedding cake dreams come alive without breaking the bank.
PrintWedding Cakes: 10 Stunning Ideas for a Joyful Celebration
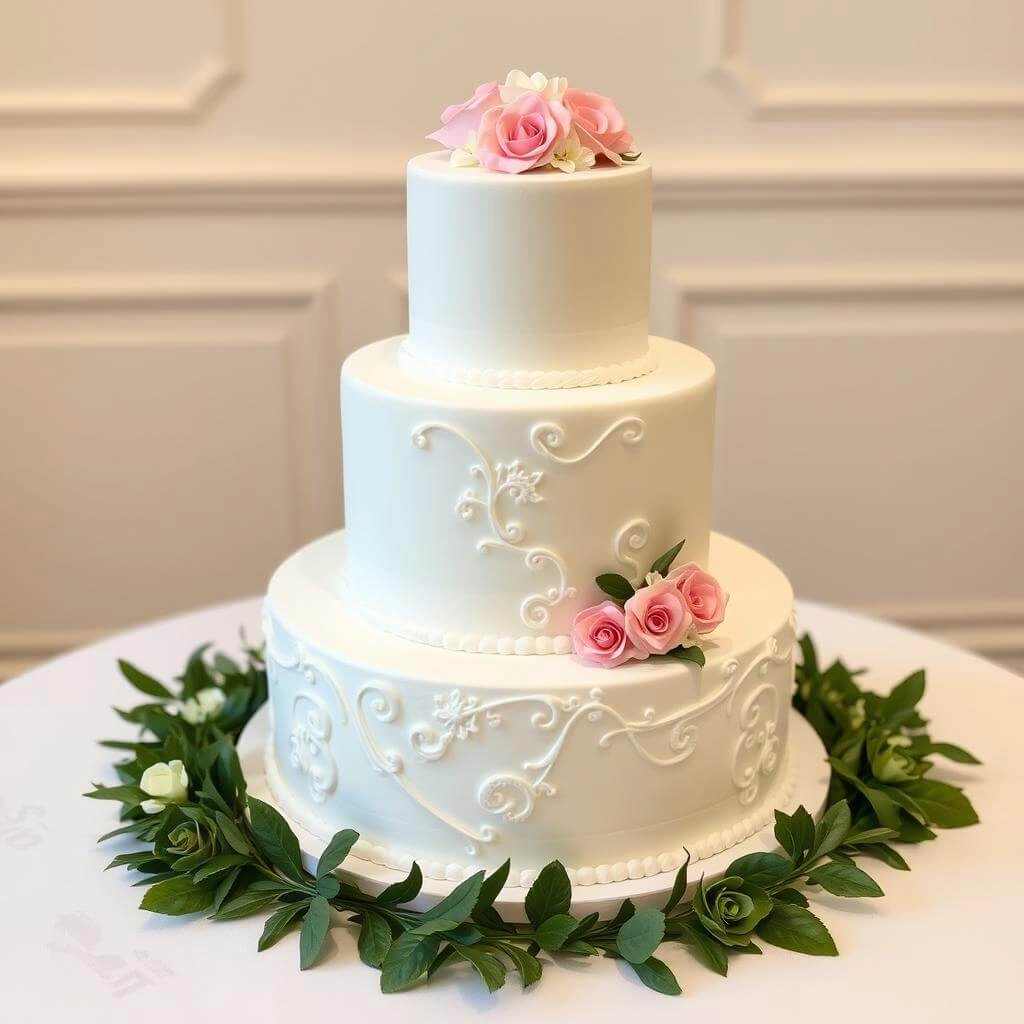
Classic vanilla wedding cake with buttercream frosting and elegant decoration options for your special celebration
- Prep Time: PT2H30M
- Cook Time: PT0H45M
- Total Time: PT3H15M
- Yield: 12 servings
- Category: Dessert
- Method: Baking
- Cuisine: American
- Diet: Vegetarian
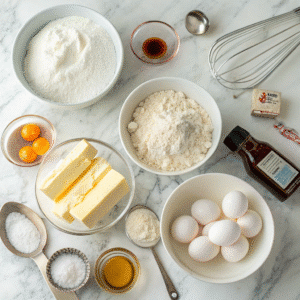
Ingredients
3 cups cake flour
2 cups granulated sugar
1 cup unsalted butter room temperature
4 large eggs
2 egg whites
1 tablespoon vanilla extract
3/4 cup sour cream
3/4 cup whole milk
2 teaspoons baking powder
1/2 teaspoon baking soda
1/2 teaspoon salt
4 cups buttercream frosting
Fresh flowers for decoration
Instructions
Step 1: Preheat oven to 350°F and prepare cake pans with parchment paper
Step 2: Cream butter and sugar until light and fluffy, about 5 minutes
Step 3: Add eggs one at a time, then egg whites and vanilla extract
Step 4: Mix in sour cream until well combined
Step 5: Alternate adding dry ingredients and milk, beginning and ending with flour
Step 6: Divide batter between prepared pans and bake 25-30 minutes
Step 7: Cool completely before removing from pans
Step 8: Level cake layers with serrated knife
Step 9: Apply crumb coat of frosting and refrigerate 30 minutes
Step 10: Frost with remaining buttercream and decorate as desired
Notes
Use room temperature ingredients for best results
Cakes can be made 1 day ahead and wrapped
Decorate close to serving time for freshest appearance
Save top tier by wrapping and freezing for anniversary
Planning Your Dream Wedding Cake on Any Budget
Understanding Wedding Cake Pricing in 2024
Wedding cake costs can feel overwhelming when you first start planning, but understanding the pricing structure helps you budget wisely. In 2024, the average wedding cake costs between $300 and $800 for a three-tier cake serving 100 to 150 guests. However, prices vary dramatically based on location, with urban areas like New York commanding significantly higher rates than rural regions.
Wedding cake pricing typically follows a per-person model, ranging from $3 to $8 per slice for standard designs. Basic cakes with simple decorations start around $250 to $400, while mid-tier cakes with custom elements range from $400 to $800. Luxury designer cakes can easily exceed $1,000, especially when they feature intricate handwork, premium ingredients, or elaborate architectural elements.
The complexity of your design significantly impacts the final price. Simple buttercream finishes cost considerably less than fondant work, which requires specialized skills and more time to execute. Similarly, fresh flower decorations might seem budget-friendly compared to sugar flowers, but they require careful sourcing of pesticide-free blooms and often need last-minute application to maintain freshness.
Exploring Budget-Friendly Alternatives
Smart couples have discovered numerous ways to achieve stunning wedding cake presentations without the traditional price tag. Sheet cakes from wholesale retailers like Costco offer exceptional value, with full-sheet cakes costing approximately $25 for 48 servings. These cakes feature two layers with mousse filling and can be customized with simple decorations, making them perfect for serving guests while maintaining a small display cake for photos.
Cupcake towers present another cost-effective alternative that actually offers advantages over traditional cakes. Individual cupcakes eliminate the need for cutting and serving, allow for multiple flavor options, and create an impressive visual display when properly arranged. A tower of 100 cupcakes typically costs between $200 and $400, significantly less than a comparable traditional cake.
Dessert tables have gained popularity as couples seek to offer variety while controlling costs. Instead of one large cake, you can create an interactive spread featuring brownies, cookies, mini pastries, and small cakes. This approach allows guests to sample different treats while often reducing overall dessert costs compared to traditional wedding cake pricing.

Calculating the Perfect Size for Your Wedding Celebration
Determining Cake Size by Guest Count
Calculating the right amount of cake requires more thought than simply matching your guest count to servings. Not every guest will eat cake, particularly if you’re serving other desserts or if your reception timing affects appetites. Professional bakers recommend planning for approximately 75% of your guests to have cake, adjusting upward if dessert is particularly important to your celebration.
Standard wedding cake servings measure 1 inch by 2 inches, though you can opt for slightly larger 1.5 by 2-inch portions if you prefer generous slices. A round 8-inch cake serves approximately 24 people, while a 12-inch round cake provides about 56 servings. Square cakes offer more servings per inch, with an 8-inch square serving 32 people compared to 24 for the same size round cake.
| Cake Size | Round Servings | Square Servings |
|---|---|---|
| 6-inch | 12 servings | 18 servings |
| 8-inch | 24 servings | 32 servings |
| 10-inch | 38 servings | 50 servings |
| 12-inch | 56 servings | 72 servings |
Factoring in Reception Timing and Additional Desserts
Your reception timeline significantly affects cake consumption patterns. If you’re planning to cut the cake immediately after dinner, expect higher consumption rates than if you save the ceremony for later in the evening when guests might be focused on dancing. Additionally, consider whether you’re offering other desserts, as guests may sample multiple options rather than having full cake servings.
Many couples choose to save their top tier for their first anniversary, a tradition that requires planning the bottom tiers to serve all your guests. When calculating sizes, exclude the top tier from your serving count and plan the remaining tiers to accommodate your full guest list. Professional bakers can help you design a cake that looks proportionally balanced while meeting your practical serving needs.
Designing Your Wedding Cake Style and Decorations
Choosing Between Classic and Contemporary Styles
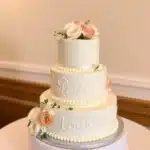
Wedding cake design trends in 2024 blend traditional elegance with modern flair, offering couples unprecedented creative freedom. Classic white or ivory cakes remain timeless choices, particularly when adorned with fresh flowers that complement your bridal bouquet. However, contemporary couples increasingly embrace bold colors, geometric designs, and mixed textures that reflect their personal style.
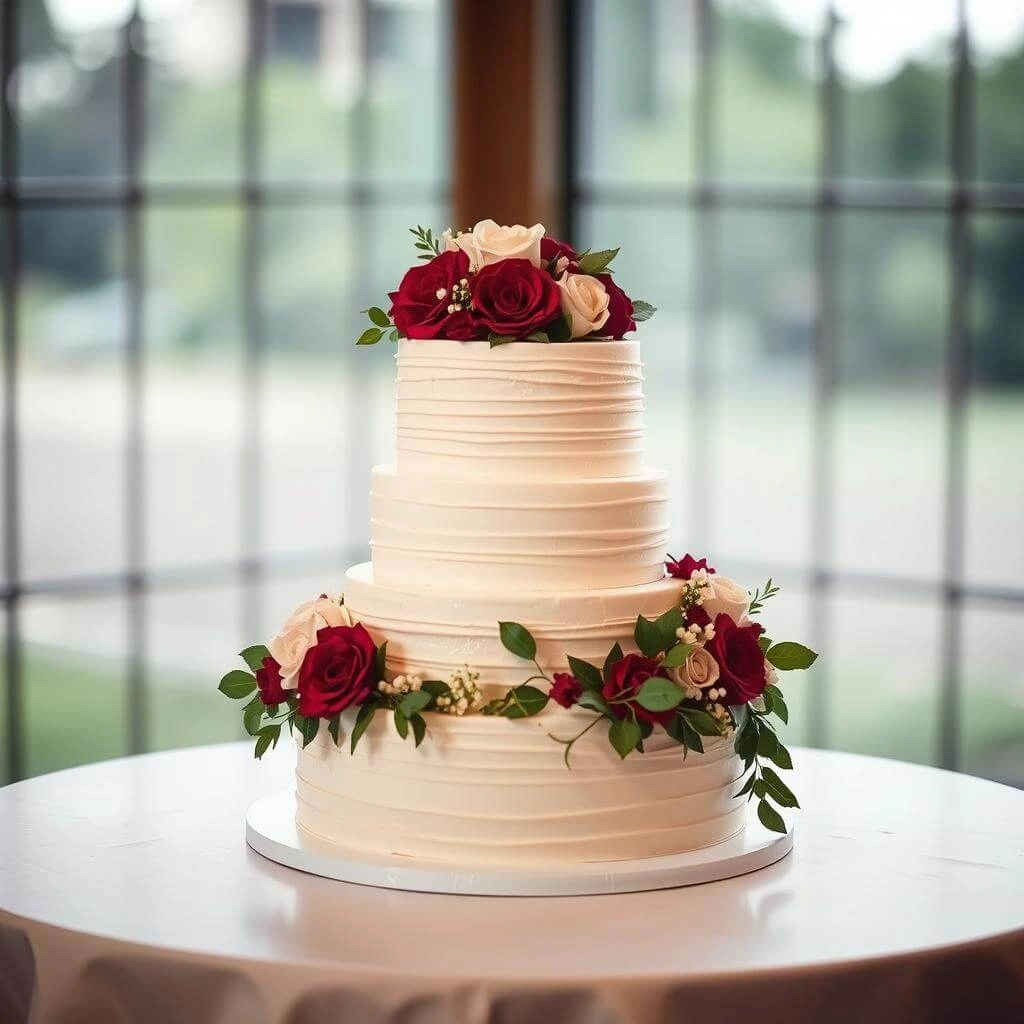
Buttercream finishes have experienced a resurgence, appreciated for their natural appearance and superior taste compared to fondant alternatives. This trend works particularly well for outdoor or rustic weddings where a more relaxed aesthetic suits the venue. Naked cakes, which showcase visible layers and filling, create beautiful rustic charm while often reducing decoration costs.
For couples seeking dramatic impact, metallic accents using edible gold or silver leaf create luxurious visual effects. These elements work exceptionally well for black-tie events or venues with glamorous décor. Geometric shapes and watercolor effects offer modern alternatives that photograph beautifully and create conversation-worthy centerpieces.
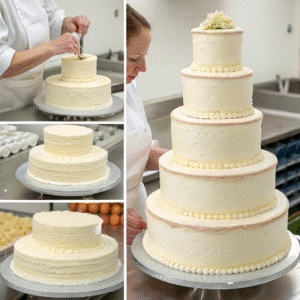
Working with Professional Decorators vs. DIY Options
Deciding between professional decoration and DIY approaches depends on your skill level, available time, and budget constraints. Professional cake decorators bring expertise in structural engineering, ensuring your multi-tier cake remains stable throughout your reception. They also handle complex techniques like sugar flower creation, intricate piping work, and fondant application that require specialized tools and experience.
DIY decoration can significantly reduce costs while adding personal meaning to your celebration. Simple techniques like fresh flower placement, basic buttercream piping, and ribbon accents are achievable for confident home bakers. However, attempting complex designs without proper experience can result in disasters that no amount of money can fix on your wedding day.
If you choose the DIY route, practice your decoration techniques multiple times before the actual event. Create a detailed timeline that allows for decoration closer to your reception time, particularly if using fresh flowers that might wilt. Consider hiring a professional for structural elements while handling simpler decorative touches yourself, creating a hybrid approach that balances cost savings with professional expertise.
Making Smart Financial Decisions About Wedding Cakes
Evaluating Costco and Warehouse Store Options
Costco wedding cakes have gained recognition among budget-conscious couples who prioritize value without sacrificing taste. These cakes offer significant cost savings, with sheet cakes starting around $25 for 48 servings compared to hundreds for equivalent bakery options. The quality often surprises guests, as Costco uses high-quality ingredients and maintains consistent standards across their bakery departments.
However, customization options remain limited compared to traditional bakeries. While you can choose between vanilla and chocolate flavors and add basic decorations, complex designs or specialized dietary accommodations aren’t available. Many couples solve this limitation by ordering a small display cake from a professional baker for photos while serving Costco sheet cakes to guests, creating the visual impact they want while managing costs effectively.
The logistics of warehouse store cakes require planning, as most locations don’t offer delivery services. You’ll need reliable transportation and helpers to pick up and transport multiple sheet cakes on your wedding day. Additionally, these cakes lack the personal consultation and customization process that many couples value when working with traditional wedding cake specialists.
Understanding Hidden Costs and Delivery Fees
Wedding cake pricing often includes hidden costs that can significantly impact your final bill. Delivery fees typically range from $50 to $200, depending on distance and setup complexity. Some bakers charge additional fees for venue setup, particularly if your location requires stairs, long carries, or specific timing constraints.
Cutting and serving fees represent another potential expense if your venue requires professional cake service. Many reception venues charge $2 to $5 per person for cake cutting and plating services. While this might seem reasonable, it adds $200 to $500 to your total cake costs for a 100-person wedding.
Design changes and last-minute modifications also carry premium pricing. Most professional bakers require final approval two weeks before your wedding, with changes after that deadline incurring rush fees. Understanding these policies upfront helps you make informed decisions about your cake design and avoid unexpected expenses that can strain your wedding budget.
Frequently Asked Questions
Q: What is a reasonable price for a wedding cake?
A: A reasonable wedding cake price ranges from $300 to $800 for most couples, translating to approximately $3 to $8 per person. This price range covers basic to mid-tier designs with standard decorations and flavors. Budget-conscious couples can achieve significant savings by choosing simpler designs, fewer tiers, or alternative options like sheet cakes, while those seeking luxury designer cakes should expect costs exceeding $1,000.
Q: How much cake for a 100 person wedding?
A: For a 100-person wedding, plan for a three-tier cake with 12-inch, 8-inch, and 6-inch rounds, which provides approximately 100 servings. However, since not all guests will eat cake, you might comfortably serve 100 people with slightly smaller tiers. Consider your reception timing, other dessert options, and whether you’re saving the top tier when calculating your exact needs.
Q: How much is a cake for 100 guests?
A: A wedding cake for 100 guests typically costs between $300 and $800, depending on design complexity and your location. Simple buttercream designs fall on the lower end, while elaborate fondant work with custom decorations reaches the higher range. Budget alternatives like Costco sheet cakes can serve 100 guests for under $100, while luxury designer cakes may cost $1,000 or more.
Q: Are Costco cakes good for weddings?
A: Costco cakes can work well for weddings, particularly for couples prioritizing budget savings. These cakes offer good quality ingredients, competitive pricing at about $25 for 48 servings, and reliable taste that guests appreciate. However, customization options are limited, and you’ll need to handle transportation yourself. Many couples successfully use Costco sheet cakes for serving while having a small display cake for photos, achieving both visual impact and cost savings.
conclusion
Wedding cakes continue to evolve as couples seek creative ways to celebrate their special day while managing costs effectively. Whether you choose a traditional multi-tier masterpiece, embrace budget-friendly alternatives, or create a hybrid approach combining professional and DIY elements, the perfect wedding cake reflects your personal style while creating sweet memories that last a lifetime. Remember that the most important aspect isn’t the price tag or elaborate decorations, but the joy and love you share with family and friends as you begin your married life together.
Article updated 27 June 2025.
For more recipes, visit my Facebook page.