
Table of Contents
Table of Contents
Difficulty Level: ⭐⭐ Easy
Introduction to Juicing
There’s something magical about transforming whole fruits and vegetables into vibrant, nutrient packed juices that can energize your body and tantalize your taste buds. Juicing recipes have become increasingly popular among health enthusiasts looking for creative ways to increase their daily intake of fruits and vegetables. The beauty of juicing lies in its simplicity with just a few fresh ingredients and a juicer, you can create an endless variety of flavorful concoctions that not only taste delicious but also provide numerous health benefits.
When you take that first sip of freshly made juice, you’ll experience an explosion of flavors that simply can’t be matched by store-bought alternatives. The sweet tanginess of apples mingles with the earthy notes of carrots, while the zesty kick of ginger adds a warming sensation that lingers pleasantly on your palate. Each glass of homemade juice is a symphony of tastes, colors, and aromas that awakens your senses and nourishes your body from within.
What makes juicing recipes particularly appealing is their versatility. Whether you’re a beginner just starting your juicing journey or a seasoned enthusiast looking to expand your repertoire, there’s always a new combination to discover. From green juices packed with leafy vegetables to fruit-forward blends bursting with natural sweetness, the possibilities are virtually limitless. You can customize your juices based on seasonal availability, personal preferences, or specific health goals, making juicing a highly adaptable practice that can evolve with your needs.
Beyond their delicious taste, fresh juices offer a concentrated source of vitamins, minerals, and antioxidants that can support overall health and wellbeing. By extracting the liquid from fruits and vegetables, juicing allows your body to absorb nutrients more efficiently, providing an immediate boost of energy and vitality. Whether you’re looking to enhance your immune system, improve digestion, or simply incorporate more plant-based foods into your diet, juicing recipes offer a convenient and enjoyable way to nourish your body with nature’s goodness.
Print3 Energizing Juices to Unleash Your Ultimate Health Boost
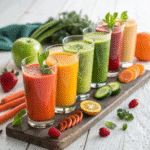
Refresh your body and mind with these three energizing juice recipes! Packed with vitamins, antioxidants, and natural flavor, each juice is designed to give you a healthy boost and keep you feeling vibrant all day long.
- Prep Time: PT10M
- Cook Time: PT0M
- Total Time: PT10M
- Yield: 2 servings per juice
- Category: Drinks
- Method: Juiced
- Cuisine: International
Ingredients
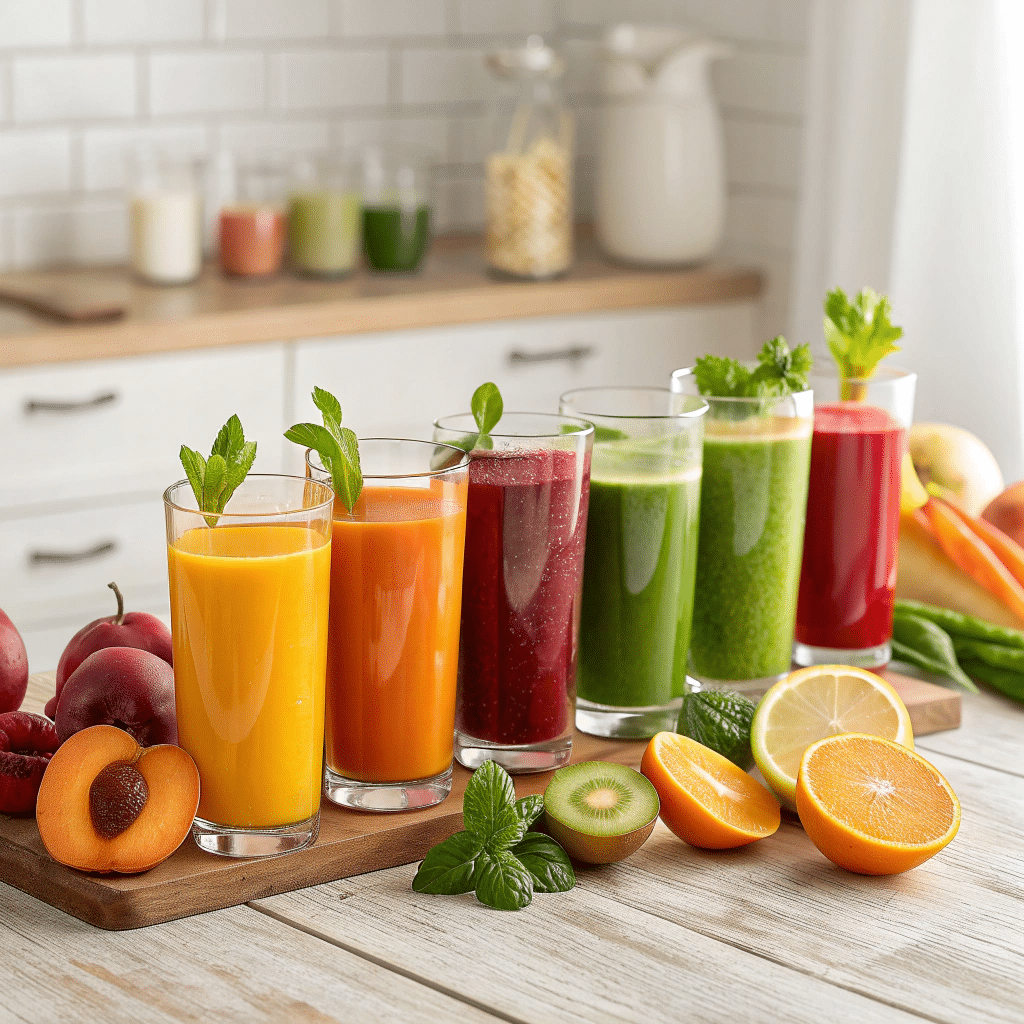
Green Vitality Juice
- 1/2 bunch kale (approximately 4-5 large leaves), thoroughly washed
- 2 large celery stalks, ends trimmed
- 1 large cucumber, washed
- 1/2 cup fresh pineapple chunks
- 1/4 cup fresh parsley, stems included
- 1/2 inch piece of fresh ginger, peeled
- 1/4 peeled lemon
Substitutions: Spinach or collard greens can replace kale; zucchini works well instead of cucumber; apple can substitute for pineapple if you prefer less sweetness; cilantro or basil can replace parsley for different flavor profiles.
Root Rejuvenator
- 1 medium beet, washed and trimmed
- 1 apple (any variety), washed and cored
- 1/2 inch piece of fresh ginger, peeled
- 1/4 peeled lemon
Substitutions: Red cabbage can replace beet for a milder flavor; pear works as an alternative to apple; turmeric root can be used alongside or instead of ginger for additional anti-inflammatory properties.
Sunrise Energizer
- 4 medium carrots, washed and trimmed
- 1 small orange, peeled
- 1/2 inch piece of fresh turmeric, peeled
- 1/2 inch piece of fresh ginger, peeled
- 1/4 peeled lemon
- Pinch of black pepper (enhances turmeric absorption)
Substitutions: Sweet potato or butternut squash can replace carrots; tangerine or grapefruit works instead of orange; ground turmeric (1/2 teaspoon) can substitute for fresh.
Instructions
1. Wash All Produce Thoroughly
Start by washing all fruits and vegetables under cold running water. Use a vegetable brush for firm produce like carrots, beets, and apples to remove any soil or residue. For leafy greens like kale and spinach, soak briefly in cold water then rinse thoroughly to remove any hidden dirt or sand.
2. Prep Your Ingredients
Cut all produce to fit the feed chute of your specific juicer. Remove any inedible parts:
- Core apples (if required by your juicer model)
- Trim ends from carrots, beets, and celery
- Peel citrus fruits if your juicer manual recommends it (some juicers can handle thin-skinned citrus with the peel on)
- Remove large pits from fruits like peaches or mangoes
Visual Indicator: Your prepped ingredients should be clean, appropriately sized, and free from any spoiled sections.
3. Organize Your Ingredients
Arrange your prepped ingredients in the order you’ll juice them. For optimal results:
- Start with leafy greens and herbs
- Follow with high-water content produce (cucumber, celery)
- End with firmer, juicier items (apples, carrots, beets)
This sequence helps push the maximum juice from leafy greens through the machine.
4. Prepare Your Juicer
Assemble your juicer according to the manufacturer’s instructions. Ensure all parts are properly locked in place. Position a juice pitcher under the spout and have the pulp container ready.
Success Marker: Your juicer should be completely assembled with no loose parts and positioned on a stable surface with the juice container properly aligned.
5. Begin Juicing Process
Turn on your juicer and start feeding ingredients one by one into the feed chute. Use the food pusher to gently guide produce—never force ingredients through with your fingers.
For leafy greens, roll them tightly into a compact bundle before inserting. This increases juice yield significantly.
6. Maintain Steady Pace
Feed ingredients at a consistent, unhurried pace. Rushing can reduce juice yield and potentially strain your machine. Allow each ingredient to process completely before adding the next.
Visual Indicator: You should see juice flowing steadily from the spout and pulp accumulating in the pulp container.
7. Monitor Juice Production
Watch for changes in juice flow. If it slows dramatically, you may need to reduce your feeding pace or clean the filter basket if it becomes clogged.
Success Marker: The juice should have a vibrant color corresponding to your ingredients, with a smooth consistency.
8. Complete the Juicing Cycle
After all ingredients have been processed, let the juicer run for an additional 20-30 seconds to extract any remaining juice from the pulp chamber.
9. Serve Immediately
Pour the fresh juice into glasses and serve right away for maximum nutritional benefit. If not consuming immediately, transfer to an airtight glass container, filling it to the very top to minimize air exposure.
Success Marker: Your finished juice should have a bright, fresh aroma and vibrant color with minimal separation.
Notes
For optimal nutrition and flavor, use organic produce whenever possible. Choose firm, brightly colored vegetables and fruits without blemishes or soft spots. Fresh ginger and turmeric should be firm and aromatic.
The Rich History of Juicing
Juicing may seem like a modern health trend, but its roots stretch back thousands of years. The practice of extracting juice from fruits and vegetables dates back to as early as 150 B.C., when an ancient tribe in Israel called the Essenes developed a method of mashing pomegranates and figs to extract their nutritious juices. These early juicing pioneers recognized the health benefits of concentrated fruit juices long before modern science could explain why.
Throughout history, various cultures embraced juicing for both medicinal and nutritional purposes. Ancient Greek and Roman physicians prescribed fruit juices for ailments ranging from digestive issues to fever reduction. In traditional Chinese medicine, specific fruit and vegetable juices were recommended to balance the body’s energy and treat various conditions.
The modern juicing movement gained significant momentum in the early 20th century. In the 1920s, Dr. Max Gerson developed a therapeutic diet centered around fresh organic fruits and vegetables, which included juicing as a key component. His approach was used to treat patients with chronic diseases and cancer, establishing juicing as a potential complementary therapy. The 1930s marked another milestone when Dr. Norman Walker invented the first industrial juicing machine, making the process more accessible to everyday consumers. This mechanical innovation allowed people to create fresh juices at home without the laborious process of manual extraction.
By the mid-20th century, juicing began transitioning from a niche health practice to a more mainstream activity. Pioneers like Jay Kordich, known as the “Juiceman,” helped popularize juicing through books, television appearances, and live demonstrations in the 1960s and 1970s. The 1990s saw the rise of “juice cleansing” as celebrities and health-conscious individuals embraced the practice for detoxification purposes.
Today, juicing has evolved into a global phenomenon with juice bars appearing in cities worldwide and a vast array of home juicing machines available to consumers. What began as a simple method of preserving nutrients has transformed into a cornerstone of modern wellness culture, with juicing recipes being shared across social media platforms and specialized blogs dedicated to the art and science of creating the perfect juice blend.
Full Ingredient List
Creating vibrant, nutritious juices requires fresh, high-quality ingredients to maximize both flavor and health benefits. Below is a comprehensive list of ingredients for our signature juicing recipes, along with possible substitutions to accommodate preferences, seasonal availability, and dietary restrictions.
Green Vitality Juice
- 1/2 bunch kale (approximately 4-5 large leaves), thoroughly washed
- 2 large celery stalks, ends trimmed
- 1 large cucumber, washed
- 1/2 cup fresh pineapple chunks
- 1/4 cup fresh parsley, stems included
- 1/2 inch piece of fresh ginger, peeled
- 1/4 peeled lemon
Substitutions: Spinach or collard greens can replace kale; zucchini works well instead of cucumber; apple can substitute for pineapple if you prefer less sweetness; cilantro or basil can replace parsley for different flavor profiles.
Root Rejuvenator
- 1 medium beet, washed and trimmed
- 1 apple (any variety), washed and cored
- 1/2 inch piece of fresh ginger, peeled
- 1/4 peeled lemon
Substitutions: Red cabbage can replace beet for a milder flavor; pear works as an alternative to apple; turmeric root can be used alongside or instead of ginger for additional anti-inflammatory properties.
Sunrise Energizer
- 4 medium carrots, washed and trimmed
- 1 small orange, peeled
- 1/2 inch piece of fresh turmeric, peeled
- 1/2 inch piece of fresh ginger, peeled
- 1/4 peeled lemon
- Pinch of black pepper (enhances turmeric absorption)
Substitutions: Sweet potato or butternut squash can replace carrots; tangerine or grapefruit works instead of orange; ground turmeric (1/2 teaspoon) can substitute for fresh.
Quality Specifications: For optimal nutrition and flavor, use organic produce whenever possible. Choose firm, brightly colored vegetables and fruits without blemishes or soft spots. Fresh ginger and turmeric should be firm and aromatic.
Time Breakdown
Understanding the time commitment involved in juicing helps you plan accordingly and incorporate this healthy practice into your routine.
Total Time: 15-25 minutes per juice recipe
Prep Time: 10-15 minutes (washing, trimming, peeling, and cutting produce)
Juicing Time: 5-10 minutes (actual juicing process)
Additional Timing Notes:
- Preparation can be streamlined by washing and prepping all produce at once if making multiple juice varieties
- Pre-cutting ingredients the night before can save morning time, though some nutrient loss may occur
- Fresh juice is best consumed immediately, but can be stored in airtight glass containers for up to 24-48 hours
- Add 5 minutes for cleanup after juicing is complete
For beginners, allow extra time until you become familiar with your equipment and develop an efficient workflow.
Required Kitchen Equipment
Having the right tools makes juicing efficient, enjoyable, and more likely to become a regular part of your healthy lifestyle. Here’s what you’ll need to create professional-quality juices at home:
Essential Equipment
Juicer: The cornerstone of your juicing setup. Consider these options:
- Cold-press juicer (slow juicer): Produces higher quality juice with more nutrients and longer shelf life. Ideal for leafy greens and hard vegetables. Price range: $200-500.
- Centrifugal juicer: More affordable and faster but slightly less efficient with greens. Price range: $50-200.
Prep Tools:
- Sharp chef’s knife for cutting produce
- Cutting board (preferably with juice groove)
- Vegetable brush for cleaning produce
- Peeler for removing citrus and ginger skin
- Measuring cups and spoons for consistent recipes
Storage and Serving:
- Large pitcher or bowl for collecting juice
- Glass bottles or mason jars for storage
- Funnel for transferring juice to containers
- Fine mesh strainer for removing additional pulp if desired
Alternative Options
If investing in a dedicated juicer isn’t feasible right now, consider these alternatives:
- High-powered blender + nut milk bag: Blend ingredients with a small amount of water, then strain through a nut milk bag. This works particularly well for softer fruits and vegetables.
- Manual citrus press: For citrus-only juices, an inexpensive manual press works effectively.
- Food processor + cheesecloth: Similar to the blender method but requires more straining.
For those just starting out, borrowing equipment from friends or purchasing a secondhand juicer can be cost-effective ways to explore juicing before making a larger investment. Many quality juicers are built to last and perform well even when purchased used.
Step-by-Step Preparation
Creating delicious, nutrient-packed juices at home is a straightforward process when you follow these detailed steps. Each step is designed to maximize both flavor and nutritional value, ensuring you get the most from your juicing experience.
1. Wash All Produce Thoroughly
Start by washing all fruits and vegetables under cold running water. Use a vegetable brush for firm produce like carrots, beets, and apples to remove any soil or residue. For leafy greens like kale and spinach, soak briefly in cold water then rinse thoroughly to remove any hidden dirt or sand.
2. Prep Your Ingredients
Cut all produce to fit the feed chute of your specific juicer. Remove any inedible parts:
- Core apples (if required by your juicer model)
- Trim ends from carrots, beets, and celery
- Peel citrus fruits if your juicer manual recommends it (some juicers can handle thin-skinned citrus with the peel on)
- Remove large pits from fruits like peaches or mangoes
Visual Indicator: Your prepped ingredients should be clean, appropriately sized, and free from any spoiled sections.
3. Organize Your Ingredients
Arrange your prepped ingredients in the order you’ll juice them. For optimal results:
- Start with leafy greens and herbs
- Follow with high-water content produce (cucumber, celery)
- End with firmer, juicier items (apples, carrots, beets)
This sequence helps push the maximum juice from leafy greens through the machine.
4. Prepare Your Juicer
Assemble your juicer according to the manufacturer’s instructions. Ensure all parts are properly locked in place. Position a juice pitcher under the spout and have the pulp container ready.
Success Marker: Your juicer should be completely assembled with no loose parts and positioned on a stable surface with the juice container properly aligned.
5. Begin Juicing Process
Turn on your juicer and start feeding ingredients one by one into the feed chute. Use the food pusher to gently guide produce—never force ingredients through with your fingers.
For leafy greens, roll them tightly into a compact bundle before inserting. This increases juice yield significantly.
6. Maintain Steady Pace
Feed ingredients at a consistent, unhurried pace. Rushing can reduce juice yield and potentially strain your machine. Allow each ingredient to process completely before adding the next.
Visual Indicator: You should see juice flowing steadily from the spout and pulp accumulating in the pulp container.
7. Monitor Juice Production
Watch for changes in juice flow. If it slows dramatically, you may need to reduce your feeding pace or clean the filter basket if it becomes clogged.
Success Marker: The juice should have a vibrant color corresponding to your ingredients, with a smooth consistency.
8. Complete the Juicing Cycle
After all ingredients have been processed, let the juicer run for an additional 20-30 seconds to extract any remaining juice from the pulp chamber.
9. Serve Immediately
Pour the fresh juice into glasses and serve right away for maximum nutritional benefit. If not consuming immediately, transfer to an airtight glass container, filling it to the very top to minimize air exposure.
Success Marker: Your finished juice should have a bright, fresh aroma and vibrant color with minimal separation.
Nutritional Information
Understanding the nutritional profile of your fresh juices helps you make informed choices about which recipes best support your health goals. Below is a comprehensive breakdown of the nutritional content for each of our signature juicing recipes per 8-ounce (240ml) serving.
| Juice Recipe | Calories | Protein | Carbs | Fiber | Sugar | Vitamin C | Potassium |
|---|---|---|---|---|---|---|---|
| Green Vitality | 130 | 2g | 30g | 1g | 24g | 35% DV | 12% DV |
| Root Rejuvenator | 153 | 1g | 36g | 1.5g | 28g | 15% DV | 14% DV |
| Sunrise Energizer | 112 | 1.7g | 25.8g | 0.5g | 20.8g | 138% DV | 11% DV |
| Tropical Refresh | 114 | <1g | 28g | 0.5g | 24g | 189% DV | 5% DV |
| Immunity Boost | 65 | 1g | 15g | 1g | 9g | 10% DV | 6% DV |
Each of our juicing recipes provides significant nutritional benefits beyond basic vitamins and minerals. The Green Vitality juice delivers powerful antioxidants from leafy greens, while the Root Rejuvenator offers natural compounds that support liver function. The Sunrise Energizer contains anti-inflammatory turmeric and ginger, making it an excellent choice for recovery and immune support.
Allergen Information
While fresh juices are generally considered allergen-friendly, certain ingredients may cause reactions in sensitive individuals. Our juicing recipes are naturally free from common allergens such as dairy, eggs, wheat, soy, fish, shellfish, peanuts, and tree nuts when prepared as directed.
However, individuals with oral allergy syndrome may experience reactions to certain fresh fruits and vegetables. For example, those with birch pollen allergies might react to apples, while those with ragweed allergies may be sensitive to melons and cucumbers.
For those with specific fruit allergies, we recommend customizing recipes by substituting problematic ingredients. For example, if you’re allergic to apples, try using pears instead. Those with citrus sensitivities can replace lemon or lime with a small amount of apple cider vinegar for acidity.
Always check all packaged ingredients (such as coconut water) for potential cross-contamination warnings if you have severe allergies.
Safety Precautions
Following proper safety protocols when juicing is essential to prevent foodborne illness and ensure a safe, enjoyable experience.
Produce Handling:
- Wash hands thoroughly with soap and warm water for at least 20 seconds before and after handling produce
- Inspect all fruits and vegetables and discard any that show signs of mold or rot
- Cut away damaged or bruised areas on fresh produce
- Wash all produce thoroughly under running water before cutting, even if you plan to peel it
- Scrub firm produce like melons, cucumbers, and carrots with a clean produce brush
Equipment Safety:
- Clean all equipment thoroughly before and after juicing
- Ensure your juicer is properly assembled before use
- Never push produce through the juicer with your fingers; always use the food pusher provided
- Keep electrical components away from water and other liquids
- Unplug your juicer when not in use and before cleaning
Consumption Guidelines:
- Consume fresh juice immediately for maximum nutritional benefit
- If storing, refrigerate in airtight glass containers for no more than 24-48 hours
- Keep juices at 41°F or below in the refrigerator to prevent bacterial growth
- Individuals with compromised immune systems, pregnant women, young children, and older adults should consider consuming only pasteurized juices
Pro Tips & Tricks
Mastering the art of juicing goes beyond following basic recipes. These expert insights will elevate your juicing game and help you create consistently delicious, nutrient-rich juices every time.
Balance Your Flavors
The key to creating exceptional juices lies in balancing five essential flavor components: sweet, tart, earthy, high-yield, and herbaceous or spicy elements. For sweet components, apples, pears, and pineapples work wonderfully. Lemons and limes provide tartness, while roots like beets and carrots add earthiness. High-yield ingredients such as cucumbers and celery form the base, and herbs or spices like ginger and mint add complexity.
Juice in the Right Order
The sequence in which you juice ingredients significantly impacts yield and flavor. Start with leafy greens by rolling them tightly into compact bundles before feeding them into the juicer. Follow with high-water content produce like cucumber or celery, and finish with juicier fruits like apples or pineapples. This technique helps push maximum juice from leafy greens through the machine.
Preserve Freshness
To maintain optimal freshness and nutritional value, add citrus to your juices. The vitamin C in lemons and limes acts as a natural preservative, slowing oxidation that degrades nutrients and causes discoloration. Just half a lemon or lime can help preserve a liter of juice. For best results, add citrus immediately after juicing.
Consider Color
The visual appeal of your juice affects perceived taste. Avoid creating gray or brown juices by pairing ingredients thoughtfully. In green juices, use apples or pears rather than berries for sweetness. If color becomes an issue, add a small piece of beet—it’s the ultimate color trump card that will override almost anything while adding nutritional benefits.
Serving & Pairing Guide
The way you serve your fresh juices and what you pair them with can transform your juicing experience from merely nutritious to truly exceptional.
Complementary Food Pairings
Different juice profiles complement specific types of foods. Green vegetable-based juices pair beautifully with light, leafy salads—the brightness of the juice balances the earthiness of greens. For spicy dishes like curry or spicy chicken sandwiches, apple or carrot-based juices provide a sweet counterpoint that soothes the palate.
Citrus-forward juices like orange or grapefruit work wonderfully with rich, creamy breakfast foods such as egg dishes or avocado toast. The acidity cuts through richness and refreshes the palate. Berry-based juices complement nutty foods like quinoa bowls or almond-flour pancakes, creating a harmonious balance of flavors.
For a complete meal, pair your Green Vitality juice with a light salad topped with salty olives, or enjoy the Root Rejuvenator alongside a hearty grain bowl with roasted vegetables.
Presentation Excellence
Elevate your juice presentation with these professional touches:
- Serve in clear glassware to showcase the vibrant colors
- Add ice cubes made from the same juice to prevent dilution
- Garnish with a fresh herb sprig, citrus wheel, or cucumber slice
- Pour slowly to maintain the juice’s natural foam at the top
- Use identical glasses for the same type of juice when serving guests
- Consider rimming glasses with a complementary spice for special occasions
- Always serve juice in chilled glasses to maintain optimal temperature
For an Instagram-worthy presentation, layer different colored juices in the same glass by pouring slowly over the back of a spoon, creating a beautiful gradient effect.
Recipe Variations
Adapting your juicing recipes to accommodate dietary needs, seasonal availability, and personal preferences ensures you’ll never tire of your juicing routine.
Dietary Adaptations
Low-Sugar Options: For those monitoring sugar intake, replace sweet fruits with lower-sugar alternatives. Instead of apple, use cucumber or zucchini as your base. Add stevia leaf or a small amount of green apple for sweetness. Increase the proportion of vegetables to at least 80% of your juice content.
Anti-Inflammatory Focus: Enhance the anti-inflammatory properties of your juices by incorporating turmeric root (with a pinch of black pepper to increase absorption), ginger, and tart cherries. The Sunrise Energizer can be modified with additional turmeric and the addition of celery to further reduce inflammation.
High-Iron Formulations: Boost iron content by increasing dark leafy greens like spinach and kale, and always include vitamin C sources like lemon to enhance iron absorption. Add parsley and beet greens for additional iron content.
Seasonal Adaptations
Spring Revival: Emphasize detoxifying ingredients like dandelion greens, young kale, and strawberries. Add fresh herbs like mint and basil that begin to flourish in spring. Try this combination: cucumber, dandelion greens, strawberry, and mint.
Summer Refreshers: Focus on hydrating, cooling ingredients abundant in summer. Watermelon, cucumber, and mint create a refreshing base. Add seasonal berries and stone fruits for variety. A perfect summer blend includes watermelon, cucumber, lime, and a sprig of basil.
Autumn Harvest: Incorporate warming spices like cinnamon, nutmeg, and ginger with fall produce. Apple, pear, and carrot form an excellent base for autumn juices. Try this seasonal blend: apple, carrot, ginger, cinnamon stick (removed after juicing), and a touch of lemon.
Winter Wellness: Boost immunity with citrus-heavy juices featuring orange, grapefruit, and lemon. Add powerful immune supporters like ginger, turmeric, and garlic (use sparingly). A protective winter juice includes orange, grapefruit, carrot, ginger, and a small piece of turmeric.

Storage & Reheating Guide
Properly storing your fresh juices is crucial for maintaining their nutritional value and flavor. For optimal freshness, store your juices in airtight glass containers rather than plastic, as glass is non-reactive and won’t affect the taste or nutrient composition. Fill containers to the very top to minimize air exposure, which accelerates oxidation and nutrient degradation.
When refrigerating juice, maintain a temperature between 35-40°F (1.6-4.4°C) and place containers at the back of the refrigerator where temperature is most consistent. Fresh juices are best consumed immediately after preparation, but when properly stored, they can last:
- 24-48 hours: Optimal timeframe for maximum nutritional benefits
- Up to 72 hours: Absolute maximum storage time in the refrigerator
For longer storage, freezing is an excellent option. When freezing juice:
- Leave approximately ½ inch of space at the top of containers to allow for expansion
- Use small portion-sized containers to thaw only what you need
- Frozen juice can maintain quality for 2-3 months
When ready to consume frozen juice, thaw it slowly in the refrigerator rather than at room temperature. Once thawed, drink immediately for best flavor and nutritional value. Never refreeze previously frozen juice as this significantly diminishes both taste and nutritional content.
Troubleshooting Guide
Even experienced juicers encounter challenges. Here’s how to address common juicing issues:
Foamy Juice
- Problem: Excessive foam on top of your juice
- Solution: Use a fine-mesh strainer to remove foam before drinking, or let the juice settle for 1-2 minutes and skim off the foam with a spoon
Low Juice Yield
- Problem: Not getting enough juice from your produce
- Solution: Ensure you’re using fresh, high-water content produce. Juice ingredients in the correct order: leafy greens first, followed by soft fruits, then harder vegetables. Apply steady, even pressure with the pusher rather than forcing ingredients quickly
Clogged Juicer
- Problem: Juicer becomes blocked during operation
- Solution: Cut ingredients into 1-inch pieces before juicing. Alternate between soft fruits and fibrous vegetables to help push everything through. Clean the filter basket/screen if juice flow slows significantly
Bitter Taste
- Problem: Juice tastes too bitter or “green”
- Solution: Add naturally sweet ingredients like apple, carrot, or pineapple to balance flavors. Include a small piece of lemon (with peel removed) to brighten the taste. For beginners, start with a higher ratio of fruits to vegetables (70:30) and gradually increase vegetable content as your palate adjusts
Separation
- Problem: Juice separates quickly after juicing
- Solution: Add lemon juice as a natural preservative and stir before drinking. Consume immediately or store properly as outlined above
Common Mistakes
Avoiding these frequent juicing errors will significantly improve your juicing experience and results:
Ingredient Imbalance: Using too many fruits and not enough vegetables leads to high sugar content. Maintain a proper balance with vegetables comprising at least 70% of your juice.
Poor Storage Practices: Leaving juice exposed to air and light accelerates nutrient loss. Always store in airtight glass containers filled to the top and refrigerate immediately.
Delayed Consumption: Waiting too long to drink your fresh juice diminishes its nutritional value. Consume within 15 minutes of preparation for maximum benefits.
Inadequate Produce Preparation: Not washing fruits and vegetables thoroughly can introduce bacteria and pesticides into your juice. Always wash produce under running water and scrub firm items with a vegetable brush.
Monotonous Ingredients: Using the same ingredients repeatedly limits nutritional variety and can lead to potential issues like oxalate buildup. Rotate your greens and vary your recipes regularly.
Improper Juicing Order: Failing to juice ingredients in the correct sequence reduces yield and efficiency. Start with leafy greens, follow with soft fruits, and finish with harder vegetables.
Fun Facts & Trivia
The practice of juicing dates back to as early as 150 B.C., when ancient tribes in Israel extracted juice from pomegranates and figs for their nutritional benefits. Throughout history, various cultures have used fruit and vegetable juices for medicinal purposes, recognizing their concentrated nutritional value long before modern science could explain why.
When juicing leafy greens like kale or spinach, rolling them into a compact ball before inserting them into the juicer significantly increases juice yield. This simple technique prevents individual leaves from getting stuck between the juicer’s feed chute and the plunger.
While most people think juicing removes all fiber, fresh juice actually retains soluble fiber, which acts as a prebiotic to support digestive health and good bacterial growth. It’s only the insoluble fiber that’s mostly removed during the juicing process.
The color of your juice matters! To avoid creating unappealing gray or brown juices, pair ingredients thoughtfully. For green juices, use apples or pears rather than berries for sweetness. If color becomes an issue, add a small piece of beet—it’s the ultimate color enhancer that will override almost anything while adding nutritional benefits.
Approximately 90% of Americans don’t consume the recommended daily amount of fruits and vegetables. Juicing can help bridge this nutritional gap by providing a concentrated source of plant-based vitamins and minerals in an easily consumable form.
Final Summary and Call to Action
Juicing offers a delicious and efficient way to increase your daily intake of fruits and vegetables, providing a concentrated source of essential vitamins, minerals, and antioxidants. Whether you’re looking to boost your immune system, improve digestion, or simply add more plant-based nutrition to your diet, the juicing recipes and techniques shared in this guide provide a solid foundation for your juicing journey.
Remember that the key to successful juicing lies in balance—using more vegetables than fruits, consuming juice fresh whenever possible, and incorporating juicing as part of a well-rounded diet rather than a replacement for whole foods. By following the expert tips, troubleshooting advice, and creative recipe variations outlined in this guide, you’ll be well-equipped to create vibrant, nutritious juices that both taste amazing and support your health goals.
Now it’s time to put this knowledge into practice! Start with one of our signature recipes, then gradually experiment with your own combinations based on seasonal availability and personal preferences. Document your favorite recipes, note how different juices make you feel, and don’t be afraid to get creative with ingredients and flavor profiles.
Ready to transform your health one glass at a time? Dust off that juicer, stock up on fresh produce, and embark on your juicing adventure today. Your body will thank you for the rainbow of nutrients you’re about to provide. Happy juicing!
For more recipes, visit my Facebook page.
Frequently Asked Questions
Q: Can I mix fruits and vegetables in the same juice?
A: Yes, you can mix fruits and vegetables, but it’s best to limit the fruit content to control sugar intake. Use more vegetables like celery, carrots, or spinach as your base, and add just one fruit for sweetness. This approach prevents blood sugar spikes while still creating a palatable juice.
Q: How long can I store fresh juice?
A: Fresh juice is best consumed immediately after preparation to maximize nutritional benefits. If storage is necessary, keep juice in airtight glass containers filled to the top (to minimize air exposure) and refrigerate at 35-40°F. Most juices maintain optimal quality for 24-48 hours, with 72 hours being the absolute maximum storage time in the refrigerator.
Q: Is juicing better than eating whole fruits and vegetables?
A: Juicing is not necessarily better than eating whole fruits and vegetables. While juicing allows for quicker nutrient absorption and makes it easier to consume a larger quantity of produce, it removes insoluble fiber. Whole fruits and vegetables provide important dietary fiber that supports digestive health and helps you feel full. Ideally, juicing should complement a diet that includes whole produce rather than replace it entirely.
Q: What should I do with the leftover pulp?
A: The leftover pulp from juicing contains valuable fiber and nutrients that can be repurposed in many ways. Add it to muffin or bread recipes, mix it into soups or broths for added nutrition, use it in veggie burgers, blend it into smoothies, or compost it. Getting creative with pulp reduces food waste and maximizes the nutritional value of your produce.
Q: Why does my juice separate after sitting?
A: Separation occurs naturally as heavier particles settle to the bottom while lighter components rise to the top. This is normal and doesn’t indicate spoilage. To prevent excessive separation, add lemon juice (which acts as a natural preservative) and always stir or shake your juice before drinking. Consuming juice immediately after preparation minimizes separation issues.
Q: Can I juice frozen fruits and vegetables?
A: Most juicers aren’t designed to process frozen produce, which can damage the machine and yield poor results. If you want to use frozen produce, thaw it completely before juicing. For best results, use fresh, crisp produce. If you need to freeze fresh produce, use it within 2-3 months for optimal juice flavor.
Comments are closed.