
Table of Contents
Table of Contents
Difficulty Level: ⭐ Very Easy
Introduction
There’s something truly magical about waking up to a blanket of fresh snow covering your yard. While sledding and snowball fights might be the first activities that come to mind, there’s another delightful tradition that transforms that pristine white powder into something extraordinary: snow cream. This simple yet enchanting winter treat has been bringing smiles to both children and adults for generations, turning ordinary snow days into memorable culinary adventures.
Snow cream is perhaps the most accessible frozen dessert you’ll ever make, requiring just a handful of pantry staples and that special main ingredient that Mother Nature provides. Unlike traditional ice cream that demands special equipment and precise techniques, snow cream asks only for a bowl of fresh snow and a few minutes of your time. The result is a light, ethereal dessert with a unique texture that captures the essence of winter wonder in each spoonful.
What makes snow cream so special isn’t just its simplicity, but the fleeting, time-sensitive nature of the experience. You can’t store it for later or buy it at a store—it must be enjoyed in the moment, creating a sense of urgency and appreciation that makes each serving feel like a rare gift. The dessert’s ephemeral quality mirrors the transient beauty of the snow itself, reminding us to savor winter’s special offerings while they last.
PrintDelicious Snow Cream: 2 Ingredients for Amazing Homemade Treats
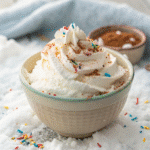
Enjoy a magical winter treat with this easy snow cream recipe! Made with just two ingredients, it’s creamy, sweet, and perfect for kids and adults alike. Make the most of fresh, clean snow for a fun and delicious homemade dessert.
- Prep Time: PT5M
- Cook Time: PT0M
- Total Time: PT5M
- Yield: 6 servings
- Category: Dessert
- Method: No Cook
- Cuisine: American
Ingredients
- 8–12 cups of fresh, clean snow (amount varies based on snow density)
- 1 can (14 oz) sweetened condensed milk OR
- 1 cup whole milk or half-and-half plus 1/2 cup granulated sugar
- 1 teaspoon pure vanilla extract1 pinch of salt (to enhance flavors)
Instructions
- Prepare your liquid base. In a medium bowl, whisk together 1 cup of milk (whole milk works best), 1/3 cup granulated sugar, 1 teaspoon pure vanilla extract, and a tiny pinch of salt until the sugar completely dissolves. Alternatively, you can use a can of sweetened condensed milk (14 oz) with vanilla extract and skip the sugar entirely.
- Gather your snow collection equipment. Take a large bowl (at least 4 quarts capacity) and a clean ladle or large spoon outside. Look for an area with pristine, untouched snow away from trees, buildings, and areas with foot or vehicle traffic.
- Collect the snow. Fill your bowl with approximately 8-10 cups of fresh, clean snow. The snow should be bright white and fluffy. Heap it up in the bowl, as it will compress when mixed with the liquid ingredients.
- Bring the snow indoors immediately. Work quickly to prevent excessive melting. The colder your snow remains, the better texture your final snow cream will have.
- Begin the mixing process. Pour about half of your prepared liquid mixture over the snow. Using a wooden spoon or silicone spatula, gently fold the liquid into the snow with broad, sweeping motions rather than vigorous stirring.
- Assess the consistency. After incorporating half the liquid, evaluate the texture. It should be similar to soft-serve ice cream—scoopable but not runny. If it seems too dry or firm, add more of the liquid mixture. If it’s too wet, add more snow.
- Continue adding liquid gradually. Add the remaining liquid mixture in small amounts, folding gently after each addition until you achieve the perfect consistency. You may not need all the liquid, depending on the density and moisture content of your snow.
- Perform the spoon test. Your snow cream is ready when a spoon pulled through the mixture leaves a clean path that holds its shape for a few seconds before slowly filling in. The mixture should hold soft peaks when lifted with a spoon.
- Taste and adjust. Sample a small spoonful and adjust if needed. For more sweetness, sprinkle in a little extra sugar. For more richness, add a splash of additional vanilla.
- Transfer to serving bowls immediately. Snow cream begins melting quickly, so serve right away in chilled bowls for the best experience. The texture should be light and fluffy, melting gently on the tongue with each bite.
Notes
For best results, use freshly fallen snow. You can also use evaporated milk and sugar as a substitute for sweetened condensed milk. Enjoy immediately, as snow cream melts quickly!
The Rich History of Snow Cream
Snow cream’s origins stretch back much further than you might imagine, with records of snow-based desserts dating all the way to 2700 BCE. These early versions were likely simple combinations of snow and fruit, creating nature’s first frozen treats. By around 500 BCE, Persian cuisine featured sophisticated desserts made with snow and honey, establishing an early template for the sweet, frozen confections we enjoy today.
The tradition of snow-based desserts spread across ancient civilizations, appearing in the records of Ancient Rome, where Emperor Nero reportedly sent slaves to collect mountain snow, which was then flavored with fruit juices—perhaps the earliest ancestor of our modern snow cone. Similar traditions developed independently across various cultures, with Native Americans sweetening snow using maple syrup long before European contact.
The connection between these ancient treats and modern ice cream runs deep. Some food historians believe that Marco Polo may have brought the concept of milk-based frozen desserts back to Venice after his travels in China, where a mixture of rice, milk, and snow was enjoyed as early as 200 BCE. This cross-cultural exchange eventually led to the development of Italian gelato in the 1400s, when Europeans began creating frozen desserts with heavy cream and egg whites.
In American culture, particularly in the South, snow cream became a cherished winter tradition passed down through generations. The recipe’s simplicity—typically just milk, sugar, and vanilla mixed with fresh snow—made it accessible even during times when luxury ingredients were scarce. By the mid-20th century, snow cream had become so embedded in Southern culture that Mayfield Ice Cream, a Tennessee-based company, created a commercial “Snow Cream Ice Cream” flavor in the early 1990s, attempting to capture the light, distinctive texture and flavor of this homemade treat for year-round enjoyment.
Full Ingredient List
Creating the perfect snow cream requires just a handful of simple ingredients that most households already have on hand. The beauty of this winter treat lies in its simplicity and adaptability to what’s available in your pantry.
Base Ingredients:
- 8-12 cups of fresh, clean snow (amount varies based on snow density)
- 1 can (14 oz) sweetened condensed milk OR
- 1 cup whole milk or half-and-half plus 1/2 cup granulated sugar
- 1 teaspoon pure vanilla extract
- 1 pinch of salt (to enhance flavors)
Substitution Options:
- For the milk base: You can use evaporated milk (12 oz can) with 1 cup sugar instead of sweetened condensed milk. For dairy-free versions, substitute with non-dairy milk plus sugar to taste.
- For sweeteners: Brown sugar can replace white sugar for a richer, caramel-like flavor. Honey or agave nectar work well too (use about 1/3 cup).
- For flavorings: While vanilla is traditional, experiment with 1 teaspoon of other extracts like almond, coconut, rum, or orange for variety.
Quality Specifications:
The most important ingredient is the snow itself. For best results, collect fresh, newly fallen snow from clean areas away from trees, buildings, and areas with vehicle traffic. The top layer of snow is typically the cleanest and fluffiest. Light, fluffy snow creates a more delicate texture, while dense, wet snow produces a creamier consistency. Never use discolored snow or snow that has been on the ground for multiple days.
For optimal flavor, use high-quality vanilla extract rather than imitation vanilla, and full-fat dairy products for the richest, creamiest results.
Time Breakdown
Snow cream is one of the quickest desserts you can prepare, requiring minimal time investment for maximum winter joy.
Total Time: 5-10 minutes
Prep Time: 5 minutes
“Cook” Time: 0 minutes (no cooking required!)
Additional Timing Notes:
- Collection time: Allow an extra 2-3 minutes to gather fresh snow
- Serving time: Immediate consumption recommended
- Melting factor: Snow cream begins to melt within 3-5 minutes at room temperature
- Storage time: If storing leftovers, freezing time is approximately 1-2 hours for proper setting
The beauty of snow cream is its immediacy—from the moment snow starts falling to enjoying your first spoonful can be less than 10 minutes. This makes it the perfect spontaneous treat for snow days when you want something special without extensive preparation. For best results, prepare your liquid mixture before collecting the snow to minimize melting time.
Required Kitchen Equipment
Making snow cream requires minimal equipment, making it accessible even for those with basic kitchen setups. Here’s everything you’ll need to create this magical winter treat:
Essential Tools:
- Large mixing bowl – The bigger the better, ideally with a capacity of at least 4 quarts to accommodate all the snow and allow for proper mixing without overflow
- Medium mixing bowl – For preparing the liquid mixture before adding to snow
- Measuring cups and spoons – For accurate measurement of ingredients
- Whisk – To thoroughly combine the liquid ingredients before adding to snow
- Wooden spoon or silicone spatula – For gently folding the liquid mixture into the snow without compressing it too much
- Ice cream scoop – For serving the finished snow cream
- Freezer-safe container with lid – For storing any leftovers
Collection Equipment:
- Clean bowl or container – For gathering fresh snow (can be the same large mixing bowl you’ll use for mixing)
- Clean scoop or large spoon – For collecting snow without contaminating it
Alternatives and Workarounds:
If you don’t have all the specialized equipment, don’t worry! Snow cream is forgiving and adaptable. Here are some alternatives:
- No large mixing bowl? Use a clean pot, plastic storage container, or even a clean kitchen sink (plugged) for mixing.
- No whisk? A fork works well for combining the liquid ingredients.
- No ice cream scoop? Any large spoon will do for serving.
- No freezer container? Any clean container with a tight-fitting lid will work for short-term storage.
The beauty of snow cream is its rustic simplicity—you don’t need fancy equipment to create this magical winter treat. The most important factor is working quickly once you’ve collected the snow to prevent excessive melting during preparation.
Step-by-Step Preparation
Creating snow cream is a simple process that transforms ordinary snow into a delightful dessert. Follow these steps carefully for the perfect consistency and flavor every time.
- Prepare your liquid base. In a medium bowl, whisk together 1 cup of milk (whole milk works best), 1/3 cup granulated sugar, 1 teaspoon pure vanilla extract, and a tiny pinch of salt until the sugar completely dissolves. Alternatively, you can use a can of sweetened condensed milk (14 oz) with vanilla extract and skip the sugar entirely.
- Gather your snow collection equipment. Take a large bowl (at least 4 quarts capacity) and a clean ladle or large spoon outside. Look for an area with pristine, untouched snow away from trees, buildings, and areas with foot or vehicle traffic.
- Collect the snow. Fill your bowl with approximately 8-10 cups of fresh, clean snow. The snow should be bright white and fluffy. Heap it up in the bowl, as it will compress when mixed with the liquid ingredients.
- Bring the snow indoors immediately. Work quickly to prevent excessive melting. The colder your snow remains, the better texture your final snow cream will have.
- Begin the mixing process. Pour about half of your prepared liquid mixture over the snow. Using a wooden spoon or silicone spatula, gently fold the liquid into the snow with broad, sweeping motions rather than vigorous stirring.
- Assess the consistency. After incorporating half the liquid, evaluate the texture. It should be similar to soft-serve ice cream—scoopable but not runny. If it seems too dry or firm, add more of the liquid mixture. If it’s too wet, add more snow.
- Continue adding liquid gradually. Add the remaining liquid mixture in small amounts, folding gently after each addition until you achieve the perfect consistency. You may not need all the liquid, depending on the density and moisture content of your snow.
- Perform the spoon test. Your snow cream is ready when a spoon pulled through the mixture leaves a clean path that holds its shape for a few seconds before slowly filling in. The mixture should hold soft peaks when lifted with a spoon.
- Taste and adjust. Sample a small spoonful and adjust if needed. For more sweetness, sprinkle in a little extra sugar. For more richness, add a splash of additional vanilla.
- Transfer to serving bowls immediately. Snow cream begins melting quickly, so serve right away in chilled bowls for the best experience. The texture should be light and fluffy, melting gently on the tongue with each bite.
Remember that speed is essential throughout this process. From collection to serving, aim to complete all steps within 5-10 minutes for the best texture and temperature. The reward is a delightfully creamy, sweet treat that captures the magic of a snow day in every spoonful.
Nutritional Information
Snow cream is a relatively light dessert compared to traditional ice cream, making it a delightful treat that won’t derail your dietary goals. The nutritional content will vary slightly depending on your specific ingredients, but the table below provides the approximate values for a standard serving of snow cream made with the recipe in this post.
| Nutrient | Amount per Serving (1 cup) |
|---|---|
| Calories | 90 |
| Total Fat | 2-3g |
| Saturated Fat | 1-2g |
| Trans Fat | 0g |
| Cholesterol | 10mg |
| Sodium | 15-20mg |
| Total Carbohydrates | 17g |
| Dietary Fiber | 0g |
| Sugars | 14g |
| Protein | 1g |
| Calcium | 20mg (2% DV) |
| Iron | 0mg (0% DV) |
| Vitamin A | 0μg (0% DV) |
| Vitamin C | 0mg (0% DV) |
Snow cream has a relatively low calorie density at approximately 113 calories per 100g, with a macronutrient breakdown of roughly 75% carbohydrates, 22% fat, and 3% protein. This makes it a lighter alternative to traditional ice cream, which typically contains more fat and calories. The primary source of calories comes from the sugar and milk components, while the snow itself adds volume without significant nutritional impact.
Allergen Information
Snow cream, in its traditional form, may contain several common allergens depending on the specific ingredients used. The standard recipe includes dairy (milk or cream), which is one of the eight major food allergens identified by the FDA. Those with milk allergies or lactose intolerance should consider using non-dairy alternatives such as coconut milk, almond milk, or soy milk.
The vanilla extract used in snow cream may contain small amounts of alcohol, which some individuals may need to avoid. Additionally, if you choose to add toppings or mix-ins such as nuts, chocolate, or fruit syrups, be aware that these may introduce additional allergens such as tree nuts, peanuts, soy, or wheat.
For those with severe allergies, it’s important to note that snow itself can potentially contain environmental allergens or pollutants, which leads us to important safety considerations when collecting snow for consumption.
Safety Precautions
When making snow cream, safety should be your top priority, particularly regarding the snow you collect. Follow these essential guidelines to ensure your snow cream experience is both delightful and safe:
Snow Collection Guidelines:
- Wait until after the first snowfall of the day before collecting. The initial snowfall acts as a natural air purifier, capturing airborne pollutants.
- Collect snow from clean, untouched areas away from roads, buildings, trees, and areas with foot or vehicle traffic.
- Gather only the top layer of freshly fallen snow, avoiding any that has been on the ground for extended periods.
- Never use discolored or yellow snow, as this indicates contamination.
- Avoid collecting snow in heavily populated urban areas where pollution levels may be higher.
Consumption Recommendations:
- Snow cream is best enjoyed as an occasional treat rather than a regular dessert.
- Those with compromised immune systems, including elderly individuals, pregnant women, and people with chronic health conditions, should exercise additional caution.
- Consume immediately after preparation to minimize the risk of bacterial growth.
- Children and adults with respiratory sensitivities should be cautious, as cold foods can sometimes trigger symptoms.
By following these precautions, you can safely enjoy this magical winter treat while minimizing potential health risks.
Pro Tips & Tricks
Creating the perfect snow cream is both an art and a science. These expert insights will elevate your snow cream from a simple winter treat to a memorable culinary experience.
Perfect Snow Selection:
For the best texture, collect snow that’s light and fluffy rather than wet and heavy. Fluffy snow creates a lighter, more delicate snow cream, while dense snow yields a creamier consistency. The ideal snow is freshly fallen, collected a few hours into a snowfall after the initial precipitation has “cleaned” the air.
Temperature Management:
Pre-chill your mixing bowl and utensils by placing them outside for 10-15 minutes before making snow cream. This prevents premature melting and helps maintain the perfect consistency. Similarly, chill your liquid ingredients in the refrigerator beforehand to extend the working time with your snow.
Mixing Technique:
When combining your liquid mixture with snow, use a folding motion rather than vigorous stirring. This preserves the air pockets in the snow, resulting in a fluffier final product. Add your liquid mixture gradually, incorporating small amounts at a time until you reach the desired consistency.
Texture Assessment:
The perfect snow cream should hold its shape when scooped but still be soft enough to eat immediately. If your mixture becomes too runny during preparation, simply add more snow. If it’s too firm or dry, add a small splash of milk or cream to adjust.
Flavor Balancing:
For the most balanced flavor, add a tiny pinch of salt to your mixture. This enhances sweetness without making the snow cream taste salty. When using extracts like vanilla or almond, remember that a little goes a long way—start with less than you think you need, as the cold temperature intensifies flavor perception.
Serving & Pairing Guide
Snow cream is a versatile dessert that can be enjoyed on its own or paired with complementary treats to create a memorable winter dessert experience.
Presentation Ideas:
Serve snow cream in pre-chilled bowls or mugs to prevent rapid melting. For a festive touch, use clear glass bowls to showcase the snow cream’s pristine white color. Create an elegant presentation by using an ice cream scoop to form perfect spheres, or go rustic with a free-form serving style that highlights the dessert’s homemade charm.
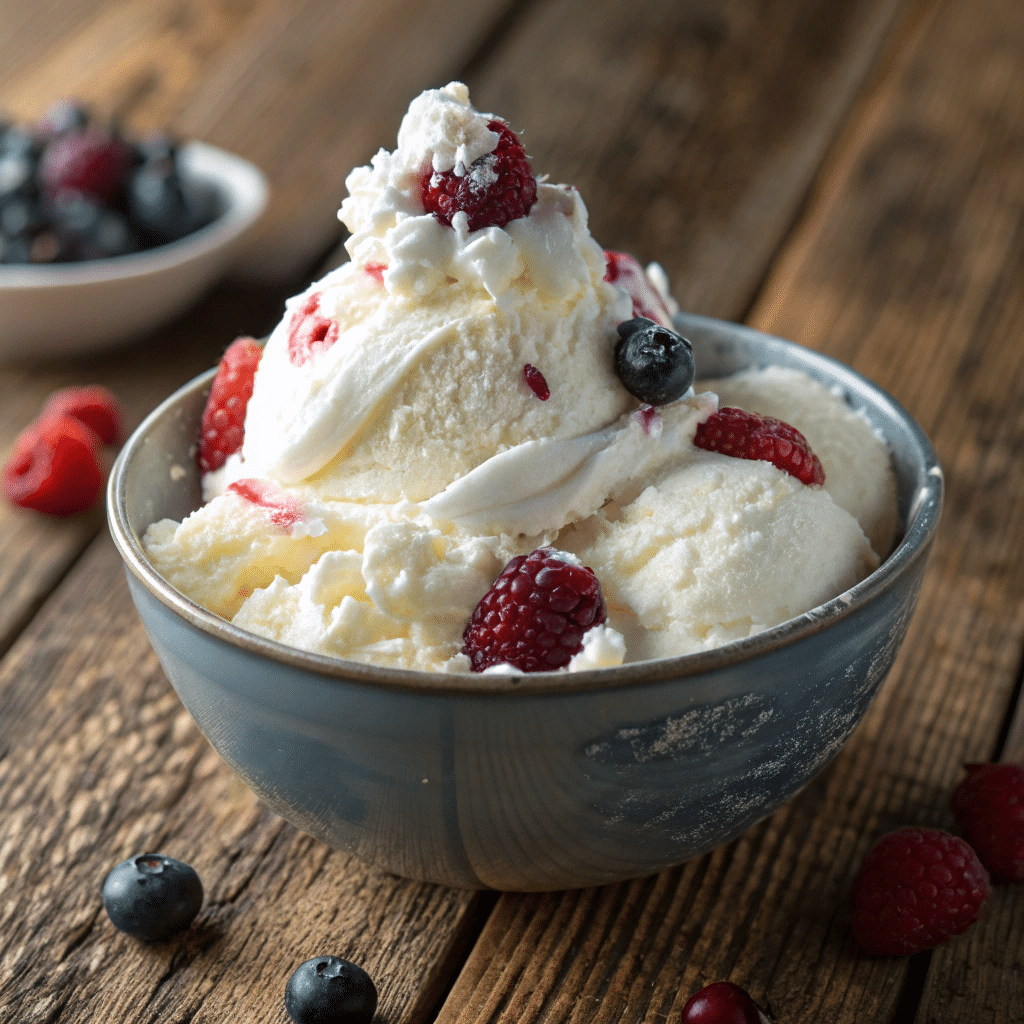
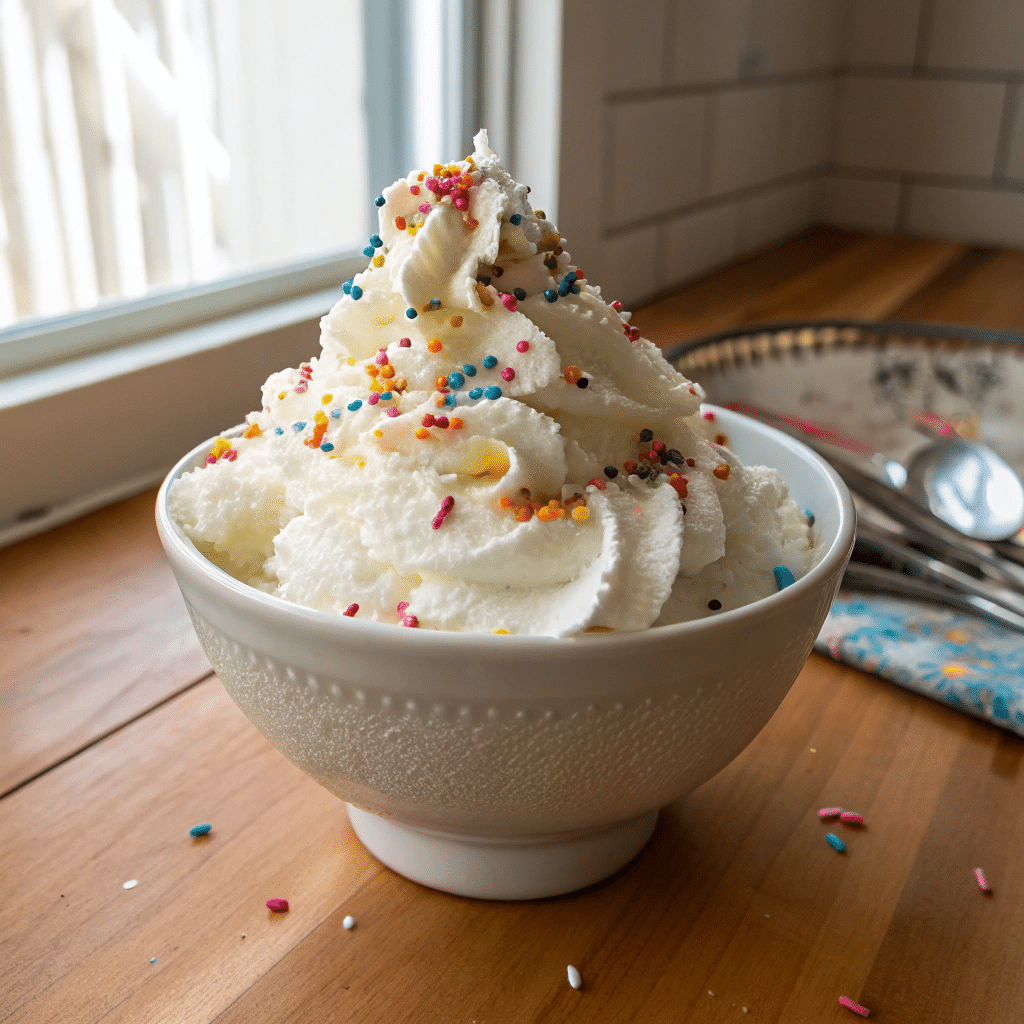
Garnishing Strategies:
Enhance visual appeal with a light dusting of cinnamon, cocoa powder, or powdered sugar. Fresh berries provide a beautiful color contrast against the white snow cream, while mint leaves add a sophisticated touch. For children, colorful sprinkles or mini chocolate chips create an irresistible presentation.
Complementary Hot Beverages:
The cold, creamy texture of snow cream pairs beautifully with hot beverages. Serve alongside hot chocolate for a classic winter combination that balances temperatures and flavors. For adults, consider pairing with spiced cider, mulled wine, or coffee with a splash of liqueur.
Cookie Companions:
Crisp cookies provide textural contrast to the soft snow cream. Ginger snaps, shortbread, or chocolate chip cookies make excellent dipping options. For an elevated dessert, sandwich snow cream between two cookies for an impromptu ice cream sandwich.
Warm Dessert Pairings:
Create a delightful temperature contrast by serving snow cream alongside warm desserts. A small scoop atop warm apple crisp, brownie, or bread pudding creates a delicious melting effect as the snow cream begins to soften. The combination of warm and cold elements creates a multisensory dessert experience that’s perfect for winter gatherings.
Recipe Variations
Snow cream’s simple base makes it incredibly adaptable to various dietary needs and flavor preferences. Here are creative ways to customize this winter treat for everyone to enjoy.
Dairy-Free Adaptations:
Create a delicious dairy-free snow cream by substituting coconut milk or almond milk for traditional dairy. Coconut cream produces an especially rich texture with tropical undertones. For a lighter option, use oat milk with a tablespoon of coconut oil to maintain creaminess without the heavy coconut flavor.
Sugar-Free Options:
For those monitoring sugar intake, replace traditional sweeteners with monk fruit sweetener, erythritol, or stevia. These alternatives provide sweetness without the glycemic impact. When using stevia, remember it’s much sweeter than sugar—start with just 1/8 teaspoon and adjust to taste.
Flavor Variations:
- Chocolate Snow Cream: Add 2-3 tablespoons of cocoa powder to your liquid mixture before combining with snow.
- Coffee Snow Cream: Replace half the milk with cooled strong coffee and add a dash of cinnamon.
- Maple Snow Cream: Substitute maple syrup for sugar and add a drop of maple extract for an authentic flavor.
- Fruity Snow Cream: Fold in 1/4 cup of pureed strawberries, blueberries, or peaches after mixing.
- Mint Chocolate Chip: Add 1/4 teaspoon peppermint extract and fold in mini chocolate chips.
Seasonal Inspirations:
During holiday seasons, incorporate festive flavors like pumpkin spice (add 1 teaspoon pumpkin spice mix) for Thanksgiving, or peppermint (1/4 teaspoon extract) for Christmas. For Valentine’s Day, create pink snow cream with a few drops of natural food coloring and a splash of rosewater. During spring, add lavender extract and honey for a floral variation.
Regional Twists:
Different regions have their own snow cream traditions. In the American South, many recipes use sweetened condensed milk for extra richness. In New England, maple syrup often replaces granulated sugar. For a Pennsylvania Dutch variation, add a tablespoon of molasses and a pinch of cinnamon, while a Mexican-inspired version might include a dash of cinnamon and cayenne for a sweet-spicy combination.
Storage & Reheating Guide
Snow cream is a fleeting treat that’s best enjoyed immediately after preparation. However, if you find yourself with leftovers, there are ways to preserve your winter creation, though with some changes to texture and quality.
Short-Term Storage:
For the best results, transfer any leftover snow cream to a freezer-safe container with a tight-fitting lid. Press the snow cream down firmly to remove air pockets, which can cause ice crystals to form. When stored properly in the freezer, snow cream can last for 1-2 days before quality begins to deteriorate.
Texture Changes:
Be aware that frozen snow cream will become significantly harder than its freshly made counterpart. The delicate, fluffy texture will transform into a more solid frozen dessert, similar to a popsicle rather than soft-serve ice cream. This happens because the air pockets in the snow collapse during freezing.
Serving After Storage:
To enjoy stored snow cream, remove it from the freezer and let it sit at room temperature for 5-10 minutes to soften slightly. For a more scoopable consistency, transfer the container to the refrigerator for 20-30 minutes before serving. Alternatively, repurpose harder snow cream by breaking it into chunks and blending it into a slushy-like consistency.
Creative Repurposing:
If your snow cream has hardened too much for scooping, consider repurposing it into popsicles by transferring the mixture to popsicle molds or paper cups with sticks. This transforms the texture issue into an intentional frozen treat.
Troubleshooting Guide
Even with a recipe as simple as snow cream, occasional challenges can arise. Here are solutions to common issues you might encounter:
Too Runny:
If your snow cream resembles soup rather than ice cream, the most likely cause is that the snow has melted too much or you’ve added too much liquid. To fix this:
- Add more fresh snow in small amounts, folding gently until desired consistency is reached
- Place the mixture in the freezer for 10-15 minutes, stirring once halfway through
- Use colder milk or cream in your initial mixture next time
Too Icy/Gritty:
A gritty texture usually indicates that the sugar hasn’t fully dissolved or that the snow cream has partially melted and refrozen:
- For undissolved sugar, next time mix the sugar with the liquid ingredients thoroughly before adding to snow
- If already prepared, let it melt slightly and remix to better incorporate ingredients
- Add a splash of cream and remix to improve texture
Flavor Issues:
If your snow cream tastes bland or has an off flavor:
- For blandness, add a bit more vanilla extract or a pinch of salt to enhance sweetness
- If snow has an unusual taste, it may have absorbed environmental odors—always collect snow from clean areas away from roads and buildings
- Try adding a stronger flavoring like almond extract or cocoa powder to mask any unwanted tastes
Melting Too Quickly:
To slow melting and extend enjoyment time:
- Pre-chill serving bowls in the freezer
- Serve smaller portions and keep the remainder in the freezer
- Create a snow “bath” by placing your serving bowl inside a larger bowl filled with fresh snow
Common Mistakes
Avoiding these frequent errors will help ensure your snow cream experience is magical rather than disappointing:
Using Dirty or Old Snow:
The most critical mistake is using snow that isn’t fresh and clean. Snow that has been on the ground for days, has visible dirt, or is discolored should never be used. Always collect pristine, newly fallen snow from elevated surfaces or use a clean bowl to catch falling snow directly.
Adding Too Much Liquid at Once:
Pouring all your liquid mixture into the snow immediately often results in a soupy mess. Instead, add the liquid gradually while folding gently, allowing you to control the final consistency.
Vigorous Stirring:
Stirring too aggressively compacts the snow and destroys the air pockets that give snow cream its light texture. Use a folding motion with a wooden spoon or silicone spatula instead of stirring in circles.
Waiting Too Long:
Delaying the mixing process after collecting snow leads to melting. Have all ingredients measured and ready before bringing snow indoors, and work quickly once you begin combining ingredients.
Using Room Temperature Ingredients:
Warm or room temperature milk and flavorings accelerate melting. Always use cold ingredients straight from the refrigerator to maintain the snow’s frozen state longer.

Fun Facts & Trivia
Snow cream has a fascinating history that spans thousands of years and multiple civilizations. Archaeological evidence suggests that as early as 2700 BCE, people were combining snow with sweeteners to create primitive frozen desserts, making snow cream one of the world’s oldest frozen treats.
In ancient Rome, Emperor Nero was known to send slaves to collect mountain snow, which was then flavored with fruit juices and honey for a refreshing dessert. This early version of snow cream was considered a luxury reserved for the elite.
The Chinese were pioneering snow-based desserts around 200 BCE, creating a mixture of rice and milk that was frozen with snow. Some food historians believe Marco Polo may have brought these ideas back to Venice, potentially influencing the development of Italian gelato.
In the Appalachian region of the United States, snow cream has become deeply embedded in cultural traditions. Many families have passed down their snow cream recipes for generations, with some recipes dating back to early American settlers.
The tradition of avoiding the first snowfall for making snow cream has practical origins. The initial snowfall acts as a natural air purifier, capturing airborne pollutants. By waiting for the second snowfall, you’re likely to collect cleaner snow for consumption.
In some parts of the Southern United States, commercial ice cream companies have created “Snow Cream” flavored ice cream to capture the nostalgic taste of this homemade treat, allowing people to enjoy the flavor year-round regardless of weather conditions.
Final Summary and Call to Action
Snow cream represents more than just a simple dessert—it’s a celebration of winter’s magic, a connection to culinary history spanning thousands of years, and a tradition that brings joy to people of all ages. With just a handful of pantry staples and fresh snow, you can create a memorable treat that transforms an ordinary snow day into something extraordinary.
What makes snow cream truly special is its ephemeral nature. Unlike store-bought desserts available year-round, snow cream can only be enjoyed during those precious snow days, making each batch a fleeting treasure to be savored in the moment. This temporality is perhaps what makes it so cherished in regions where snowfall isn’t guaranteed each winter.
As we’ve explored throughout this post, snow cream is incredibly versatile. Whether you prefer the classic vanilla version, chocolate variations, or creative flavor combinations, there’s a snow cream recipe to suit every taste. The simplicity of the base recipe makes it perfect for customization, allowing you to put your own unique spin on this timeless treat.
The next time snowflakes begin to fall outside your window, I encourage you to embrace the opportunity. Bundle up, grab a clean bowl, and venture outside to collect some pristine snow. Return to your kitchen and transform it into this magical dessert that has delighted generations. Share the experience with children, friends, or neighbors, passing along the tradition just as countless families have done throughout history.
Don’t forget to share your snow cream creations on social media with #SnowCreamMagic—I’d love to see your variations and hear about the memories you create around this simple yet enchanting winter tradition. Here’s to making the most of every snowfall with a bowl of homemade snow cream!
For more recipes, visit my Facebook page.
Frequently Asked Questions
Q: Is it safe to eat snow?
A: Snow is generally safe to eat if you collect it properly. Choose fresh, newly fallen snow from clean areas away from roads, buildings, and areas with foot or vehicle traffic. Many experts recommend waiting until after the first snowfall of the day, as initial snowfall acts as a natural air purifier, capturing airborne pollutants. Always avoid discolored or yellow snow, and collect only the top layer of freshly fallen snow.
Q: Can I make snow cream with non-dairy milk?
A: Absolutely! Snow cream works wonderfully with non-dairy alternatives. Coconut milk creates a rich, tropical-flavored snow cream, while almond milk, oat milk, or soy milk also work well. For extra creaminess when using plant-based milks, consider adding a tablespoon of coconut oil or a dairy-free creamer.
Q: How long does snow cream last?
A: Snow cream is best enjoyed immediately after preparation. If you must store leftovers, transfer them to a freezer-safe container with a tight-fitting lid and consume within 1-2 days. Be aware that the texture will change significantly, becoming harder and less fluffy than freshly made snow cream.
Q: Can I make snow cream without vanilla extract?
A: Yes! While vanilla extract provides the classic snow cream flavor, you can substitute other extracts like almond, coconut, or maple. You can also use a splash of maple syrup, honey, or even a tablespoon of cocoa powder to create different flavor profiles without vanilla extract.
Q: What’s the difference between snow cream and regular ice cream?
A: Snow cream differs from regular ice cream in both preparation and texture. Traditional ice cream requires churning to incorporate air and prevent ice crystals, while snow cream uses naturally airy snow as its base. Snow cream has a lighter, fluffier texture and melts more quickly than commercial ice cream. It’s also much faster to prepare and doesn’t require special equipment.
Q: What if I live in an area that doesn’t get snow?
A: If you live somewhere without natural snowfall, you can create a similar treat using shaved ice from a snow cone machine or by finely crushing ice in a blender. While the texture won’t be identical to real snow cream, you can still enjoy a similar experience by following the same recipe with your shaved ice substitute.